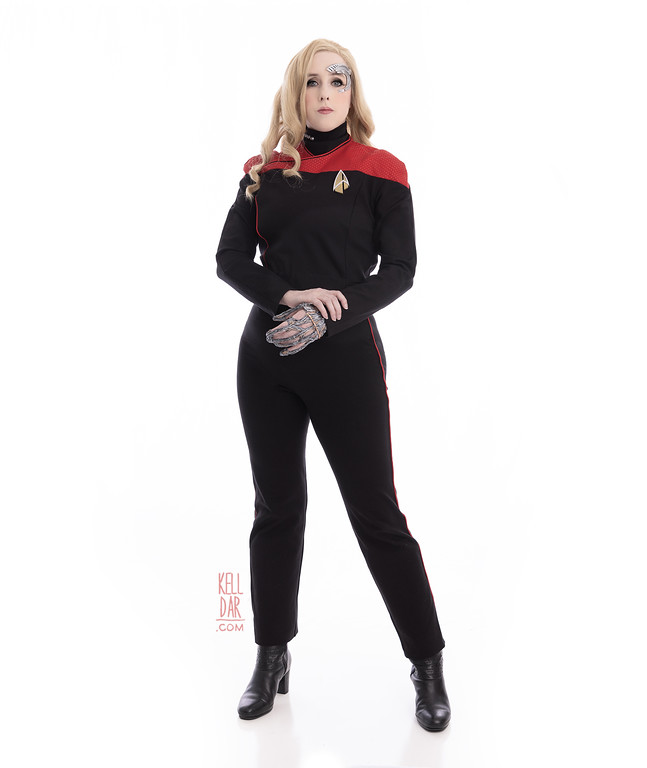
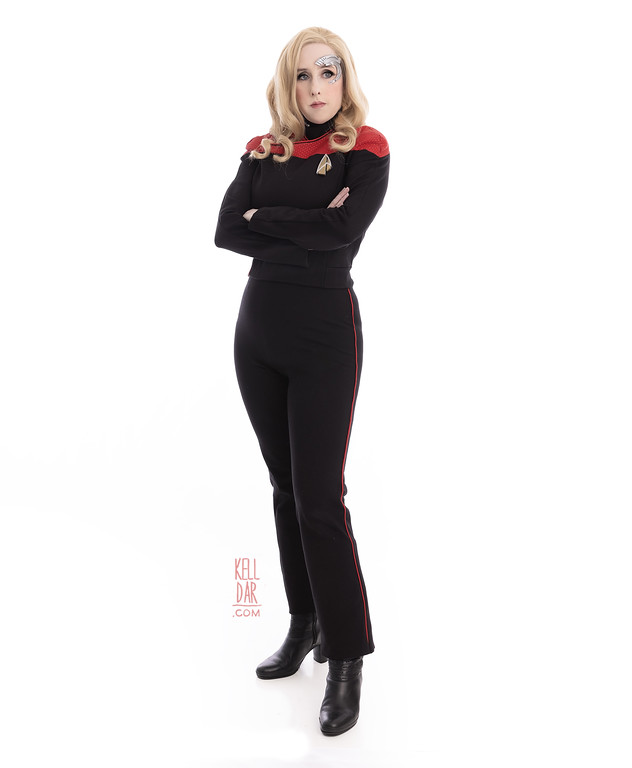
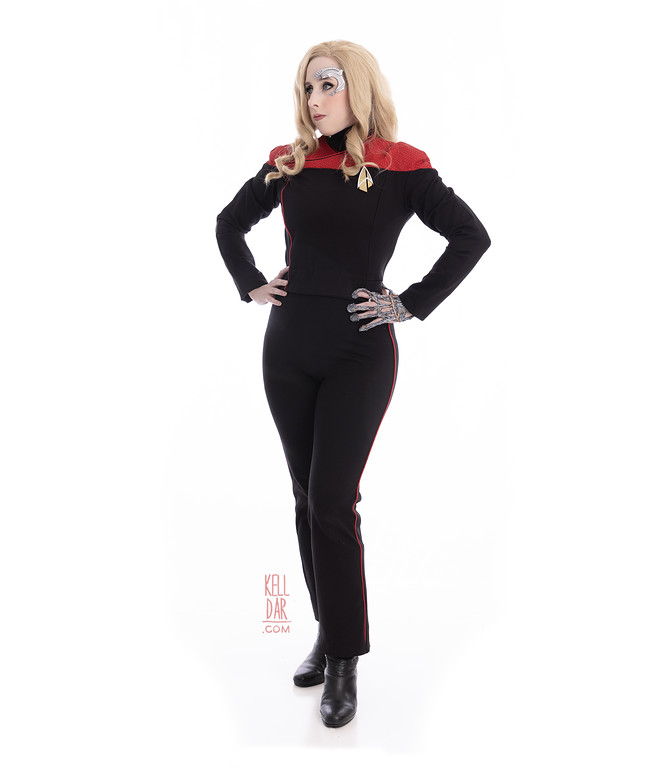
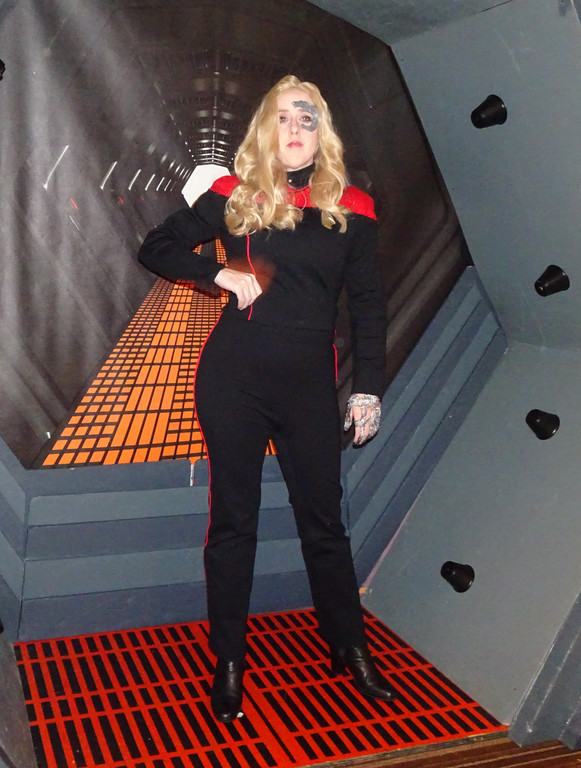
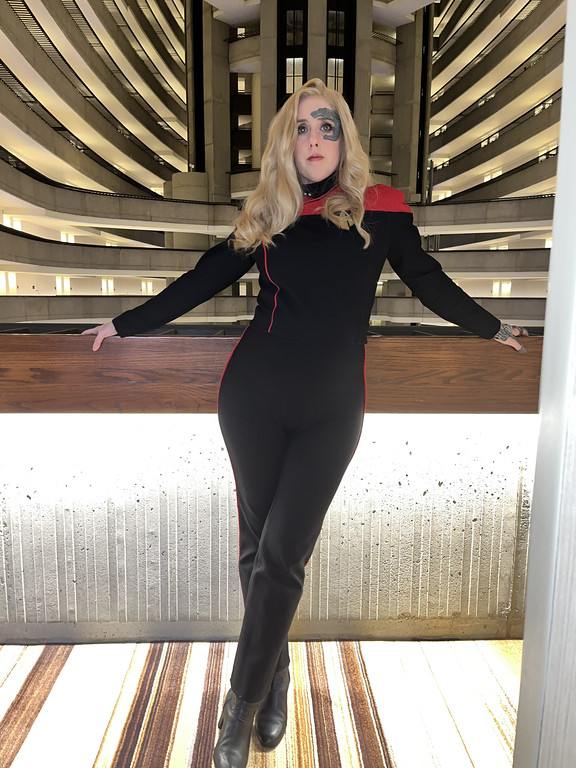
Captain Seven of Nine
Source: Star Trek Picard Season 3
Made for: Dragoncon 2023
Journal Entries: Read more at my seven of nine tag
Related Costumes: Star Trek TOS Uniform, T’Lyn, Dr. Crusher
![]()

![]()
Patterns Used: BadWolfCostume’s TNG uniform pattern (yoke and sleeves), Vogue V8301 (lower portion of top), and Kwiksew 3052 (pants)

Background: So I had a lot of Star Trek in my head for the past year. I had lots of things I wanted to do, but one thing that’s been floating around my want-list for a couple of years was Seven of Nine’s season 1 Picard look. My mom had suggested it, so I was trying to get around to it. I also wanted a Strange New Worlds uniform, a Lower Decks uniform, a Deanna Troi costume, etc, etc etc.
Then Season 3 of Picard came out and that cemented my choice for Dragoncon this year – I wanted to do Seven’s captain uniform.
The Pants:
I hate making pants, so surprisingly one of the first things I did for this costume was to make the pants. I made all of the black part of this costume out of the refined ponte knit from Joann – I LOVE that fabric, it’s so fun to work with. So I had some leftover I used for parts of the top, but had to buy some more to finish it and the pants up – so one Saturday morning I got out my bodysuit pattern linked above, and got started. I did cut these VERY high – they basically go all the way up to my chest – because I didn’t want any gaps between the cropped top and the top of the pants. I also cut the pants wider from the hips down – basically I cut them as a straight line so they would look more like pants and less like leggings. I added the red piping to the side seams and elastic waist and they were done in a couple of hours. Yay!
The Top:
For the top I frankensteined 2 patterns together as noted above – I used BadWolfCostume’s fantastic TNG uniform pattern for the yoke and sleeves, and the panels of that Vogue jacket pattern for the lower section.

Originally I had planned to have it be a center front closure with a front flap that closes on the wearer’s right – just like I did with my Lady Blackhawk jacket, which is why I chose this pattern. But as I messed with the pieces, trying it on and taking it off, I realized I could make this a lot simpler by just sew it closed at the side front seam and pulling it off and on. Since this fabric is so stretch, I could easily get it off and on with it fully pinned closed, so I jettisoned the idea of a front flap closure and made it all one piece.
Before I could start assembling everything though, I had to do the repeating delta pattern on the red yoke pieces. For those pieces, I was using some red stretch knit leftover from my Black Widow dress – it’s probably a little too bright red, but I wanted to use this, I liked the look.
My mom had been making a discovery uniform back in 2020, but never finished it thanks to covid canceling our plans that year. But my husband and I had already put together a repeating delta pattern for her to use for that. Just pulled that back up, cut it on red heat transfer vinyl and I thought that was gonna be that.
Except it wasn’t. I don’t know what was happening but we could NOT get these to print the right way. Print it mirrored? They’d be backwards. Print it not mirrored? They’d be backwards. I think out of 4 or 5 sheets we got ONE TEST SQUARE that was correct. And a lot of times I wouldn’t notice until I was halfway through weeding – we’d do one and see it was backwards and be like “Ok well you did that one mirrored and it’s backwards, so send it to the cutter not mirrored” — and then get it off the machine, start weeding, and it’s backwards too!!!
The only way we fixed this was flipping the design and then we started getting consistent cuts. But it was incredibly irritating and wasteful.

And then they were a pain to weed. The silhouette didn’t cut well around the points, so I’d have to hold each delta in place while removing the the stuff around it, which was hard because they were so small and so close together.
Anyway, I finally got enough good cuts weeded to iron them on. Got that done and could finally start putting this together!
Assembly went pretty smoothly – except I forgot how the yoke and sleeves went together on the TNG uniform pattern and kinda did the back attachment wrong – I had got the back looking, moved onto the front and that’s when I remembered how to do it. I didn’t want to attempt a fix on the back pieces again since I’d already trimmed the excess and clipped the curve. So the front sleeve attachments look great at the yoke join – the back looks ok, and that’s all I’m after.
So the jacket has red piping along the collar edge and down the front “opening” – but it also has a line of black in between the piping at the collar at the red yoke. So to do that, I faced the collar in black fabric. I hand-sewed the piping behind that, so you get a peek of the black facing in between the piping and yoke. Not the cleanest option but hey, it worked.
Once I got to the front “opening”, I tacked the piping down, then sewed that seam closed permanently.
Now with the jacket mostly assembled, I made the waistband, got it attached, and finished by hand on the inside. Installed some elastic and that was done.
Or so I thought. When I went to do the markings for the snap closures marked, I realized my front “opening” edge with the piping was too long and making the upper red part of the flap sit slightly too high, so the horizontal line didn’t match up exactly. So I had to take the entire front section apart, move it slightly down and and put everything back together. It didn’t go together as neatly as it was the first time around, but it looks ok on the outside and that’s all that matters. Got the snaps sewn on and called it a day.

The Accessories:
For the collar, I just made a dickie. Got some ribbed black knit fabric online, copied the shape of a turtleneck I had and just sewed it together – 2 seams. Folded the top over and stitched it down to the inside for a neat finish.
My original face implant pieces seen in the Dragoncon pics are from FarrisFair on etsy and they are lovely! I used pros-aide and a little bit of wig tape to apply them. I did have issues keeping them on my face for long periods of time, since they didn’t conform to my weird face very well, so for the 2024 photoshoot, Chase 3d printed new versions for me. He heat-molded these to fit my face.
So that part was easy, but then there was the borg hand. I found defunct links to people who USED to make and sell them, but nobody currently selling anything like it. I really didn’t feel like making this, but I guess I had to.
I had some old cheap costume gloves – just a basic pair of white satin gloves I bought at Spirit Halloween one year, to wear with my Tightrope Walker at Mickey’s Not So Scary Halloween party (because I didn’t want to wear my leather gloves in the parks). I took the left glove and put it on, and drew out guidelines with a sharpie. Then I followed those guidelines with my hot glue gun, building up the glue and trying to make it look kind of “wire-y” I guess. One that was done I trimmed off some of the weird chunks and loose glue strings, then painted the whole thing in a matte dark grey/almost black.
Once the paint was dry, I trimmed away the excess fabric of the glove. Then put it all back on and did a a lighter coat of grey over the top, just getting the parts that were more raised. Finally, I went back in and did some detail areas with some copper paint.
It’s not perfect – I’m no hot glue artist – but it was cheap and easy and that’s my favourite kind of project!
My combadge was a 3d print from thingiverse, and the first wig seen at Dragoncon was from Amazon. I got it and curled it and it was fine. But after we did the white backdrop shoot I just didn’t love it. It was too big and bulky and the curls weren’t holding right. So I steamed out the whole thing to straighten it and then went in with my thinning shears and probably removed like, half of the hair in the wig LOL. Recurled it, and then we reshot it (with the new 3d printed pieces too) and it was MUCH improved.
![]()


![]()


Please note that none of these costumes are for sale! This is my personal portfolio.