Haunted Mansion “Walkaway” Dress Challenge
Source: Disney’s Haunted Mansion
Made for: Halloween 2022
Journal Entries: Read more at my Haunted Mansion Dress tag
Related Costumes: Retro Star Wars Dress, The Skeleton Dress
![]()


![]()
Patterns Used: Butterick B6212

So, unfortunately I’m writing this about a year and a half after making it. I thought I had made a portfolio page with my notes, but apparently I never did. So, I am going to have to go off my memory and my blog notes here, and I apologize for any inconsistencies or mistakes!
The Fabric:
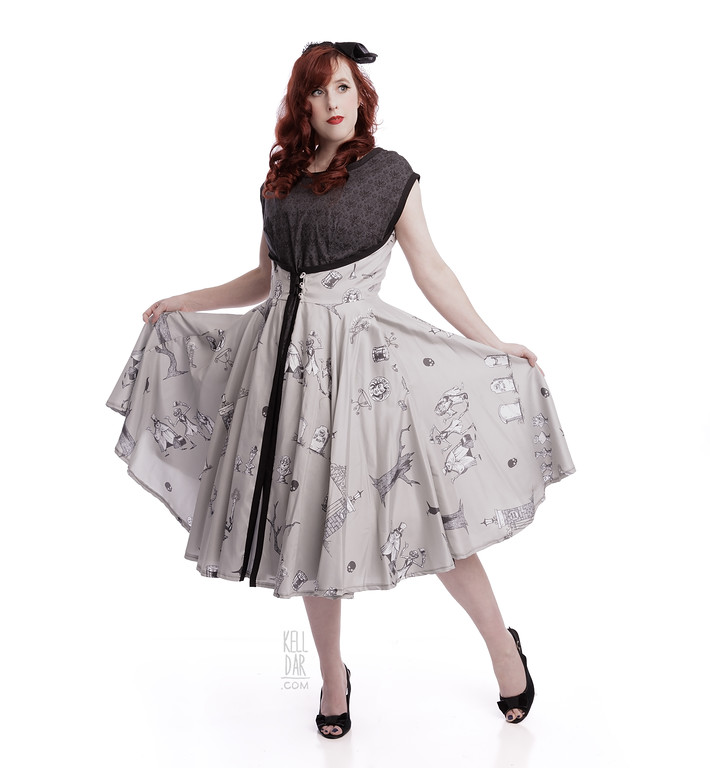
I came across these Haunted Mansion bedsheets on shopdisney one day, and I thought, oh that would make such a cute dress. And a couple of hours later I stumbled on the Walkaway Dress challenge (which I will talk about in the next segment). I decided it was serendipity, I went back and bought the sheet set and planned everything.
I did want to use a contrasting fabric for the front panel though, and what I pictured was a very very dark, basically black-on-black version of the Haunted Mansion wallpaper. So it would look black or at least very dark to the eye but when you get up close, the wallpaper pattern would be visible. Of course I couldn’t find anything like that, closest I could find was the wallpaper in black on a light grey background. So I ordered a yard of that, and when it arrived I tossed in some RIT “Back to Black” dye, which I was really impressed with – it really is a true black instead of a dark purple. It worked perfectly and made the fabric look exactly the way I saw it in my head.
The only crappy thing was that the wallpaper fabric was, for some reason, sideways. Like the repeating pattern was only right-side-up if you were looking at it with the selvedge at the top and bottom, instead of it being right-side-up on the grainline. What a weird way to do it. I ended up having to add a lot of steps to construction in order to not have a front panel with the design sideways.

The Challenge:
So there is this pattern, Butterick B6212, which is a reproduction of a vintage pattern from the 50s. It’s called the “Walkaway Dress” because it’s supposed to be so easy and simple you can start it after breakfast, and “walk away” with a finished dress by lunch. I know a lot of folks who have used this pattern, and I came across a challenge on tiktok where lots of folks were making it and timing themselves. That looked like fun so I wanted to give it a try.
The Construction: I did indeed start on it right after breakfast one Saturday morning.
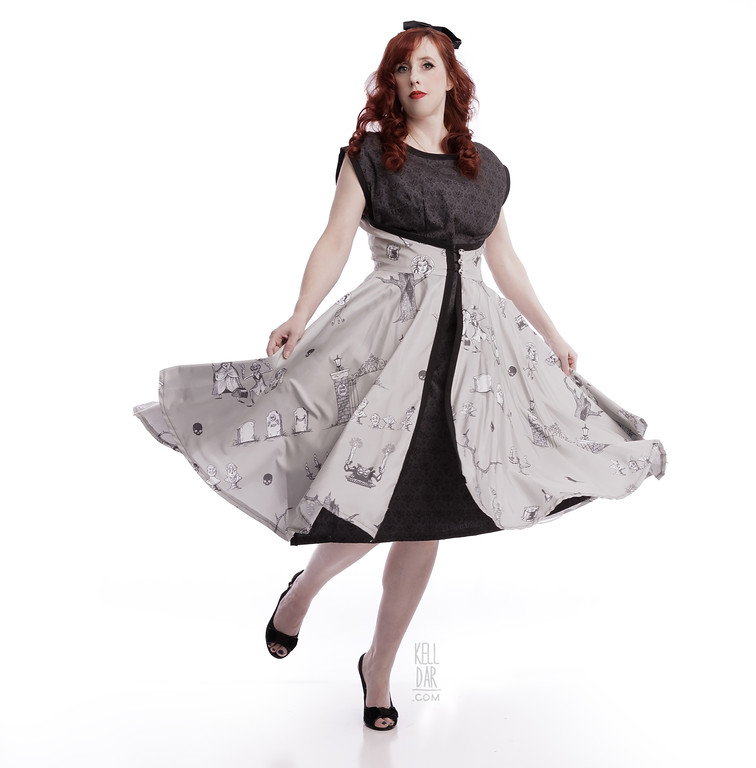
As I mentioned above, the wallpaper design was sideways. So I couldn’t just lay out the front panel and cut it all as one piece. Instead, I had to add a waist seam, and basically a side seam for the parts that wrap around the back, to keep the design right-side-up. That was frustrating and took extra time. But once I got the pieces cut, I put the darts in and got it assembled.
Then it was onto the back top panel and skirt pieces. Got all those pieces cut, but did change up the way I cut the skirt – if I were to cut it the way the pattern wanted, the designs would be upside down on the back. So I split the skirt pattern pieces so it had 3 seams instead of 1 (I think it was? Like I said I’m writing this a year and a half later!) I definitely wanted to add side seams to the skirt so I had pockets and being able to place the pattern pieces separately for all 4 panels meant I could control the way the design laid. I add my pocket pieces, got the skirt assembled, and then sewed it onto the back panel.
At this point I was already starting to notice some fit issues, namely it was too big through the shoulders/upper torso, which is common problem for me in commercial patterns. So I took up the shoulder seam which helped somewhat. I also played with the length of the back and the darts a bit just to try to help it fit me a little better.

The pattern calls for the whole front of the dress to be finished in black bias tape, which I did, and I sewed it all on on the machine, but in the interest of the challenge there was no finishing it by hand. The pattern also called for the skirt to hang for 24 hours to make sure it wasn’t going to stretch – but again, even with the tagline as laid out by Butterick – you can’t do that in a day LOL. So I went ahead and machine-hemmed it and just hoped it wouldn’t stretch.
For closures, I had 2. First up, the closure for the front panel – my friend Janine Spendlove had just made a dress using this pattern and had added an elastic strap here, so I did that too (instead of just a button as the pattern suggested I think? Lord I should have written this a year ago, I’m sorry if that’s not right). I added a snap onto the elastic. For the front closure, I added little loops of black mousetail cord to go around some little skull buttons Chase 3d printed for me.
It took 4 hours and 20 minutes to complete. I was definitely not a winner for time, but I did now have a cute dress!
The Aftermath:
My plan was to wear this out for dinner Halloween night, but that didn’t happen. In fact, the only time I ever even had this on my body was in the video I made of the construction. It got stuck in “Costume Closet B” and forgotten about.
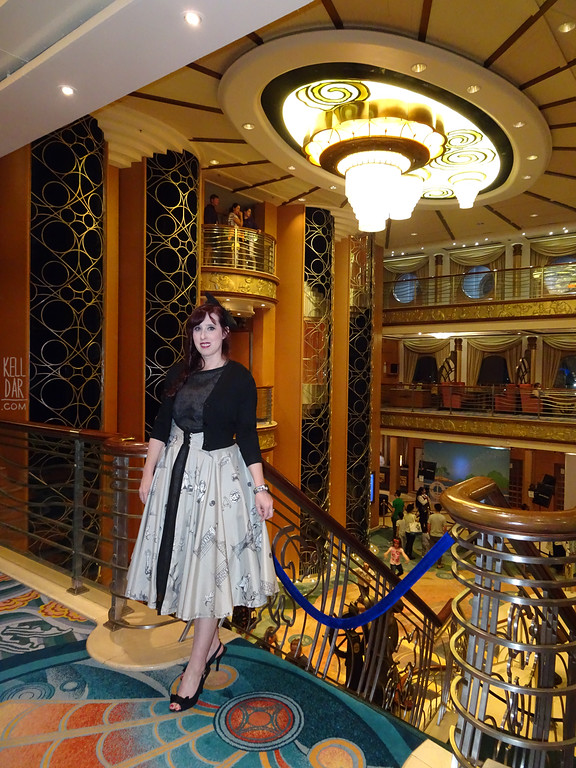
In Jan 2024, I was trying to think of things I could sell to declutter and put some money towards our new HVAC. I remembered this dress and thought about selling it – BUT then I realized, we are leaving on our Disney Cruise in a month in a half. I’m already taking a bunch of cute Disney dresses, why not take this one too?

I had just bought a small petticoat for the Star Wars cruise dress, so I decided to try that petticoat on with this dress and the way that changed the silhouette made me like the look of this dress SO much more!
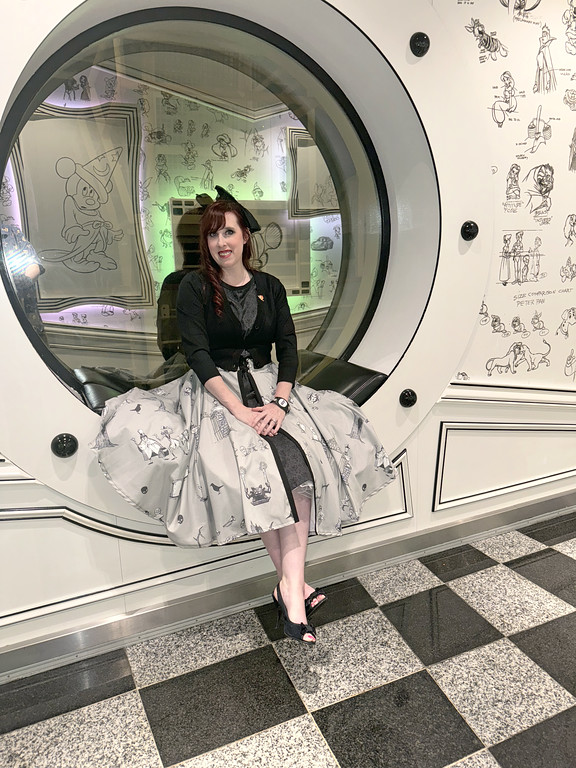
So it came on the cruise with me, and I’m so glad I did. I really liked it! I paired it with a black cardigan since it was a little chilly that night, and a vintage black bow with a netted veil that belonged to my great aunt.
That being said, actually wearing it for several hours including sitting down for a show, walking around a ship in the wind, sitting down to dinner, etc was a very different experience than just standing in front of a mirror for 5 minutes wearing it. I quickly realized that my elastic straps/snap thing I added to secure the front panel in place was too short. It would cause the bottom of the front panel to bunch up on the sides anytime I sat or leaned over, and I’d have to get my husband to fix it. I finally realized it was doing it because that strap was too tight. I just need to put in a longer piece of elastic.
So – before I wear it again, I’ll be lengthening that elastic strap/snap section and doing a lot of fit tests at home to make sure everything works this time. I may also unpick the machine hem and redo it by hand, and I’d also like to find a way to finish the inside edges of the skirt — this fabric sheds like CRAZY and causes little specs of white fuzz to stick all over the black cotton front panel. I think I’ll start with pinking shears and see how that goes. I wish I’d just sacrificed the time challenge and done a french seam!!
![]()


![]()


Please note that none of these costumes are for sale! This is my personal portfolio.