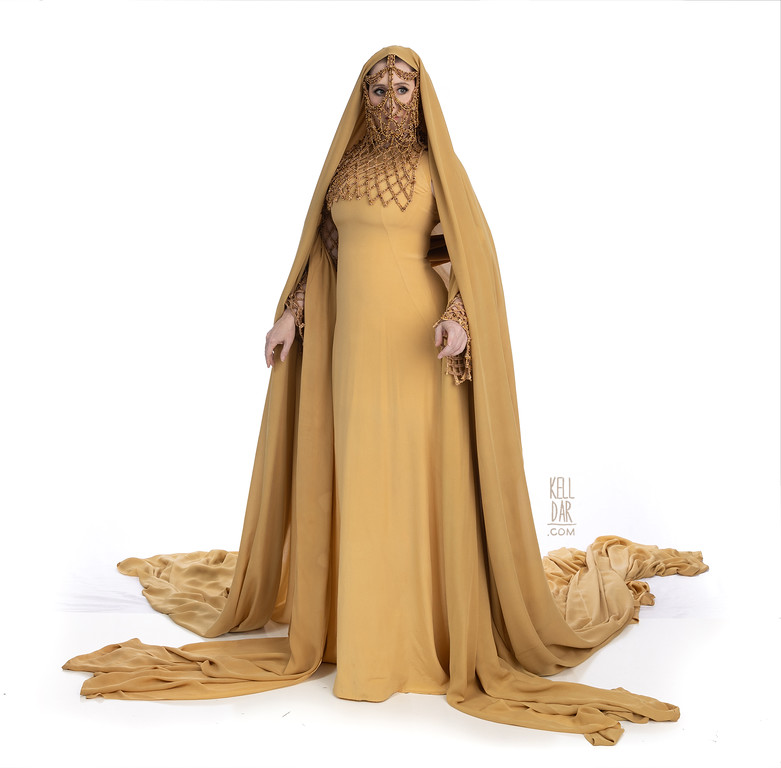
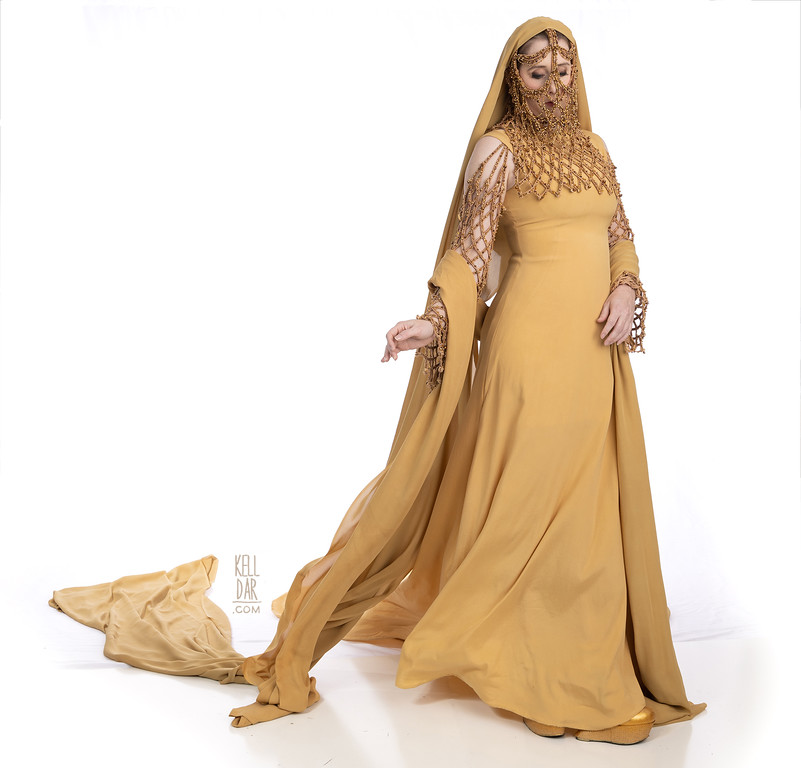
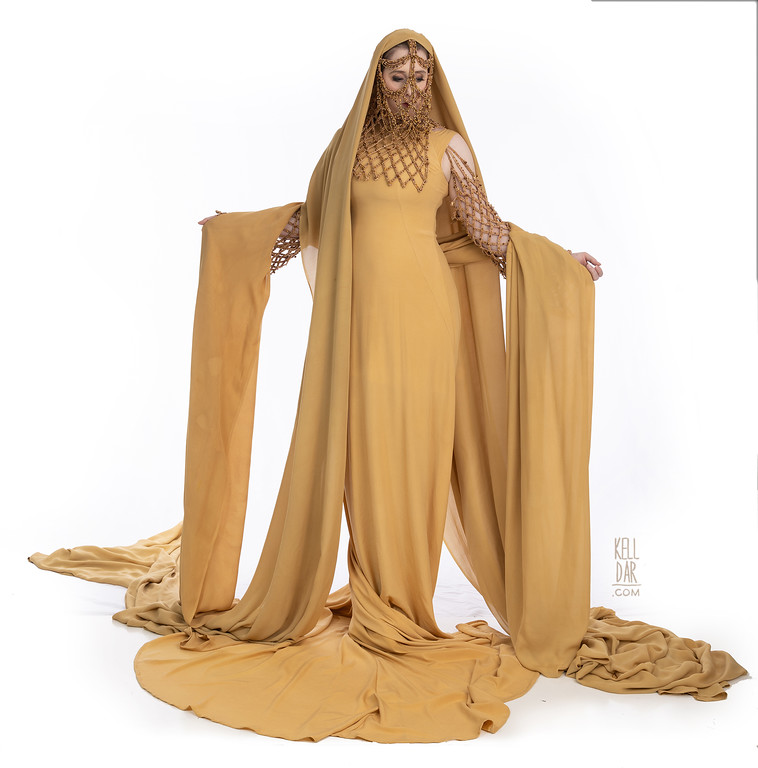
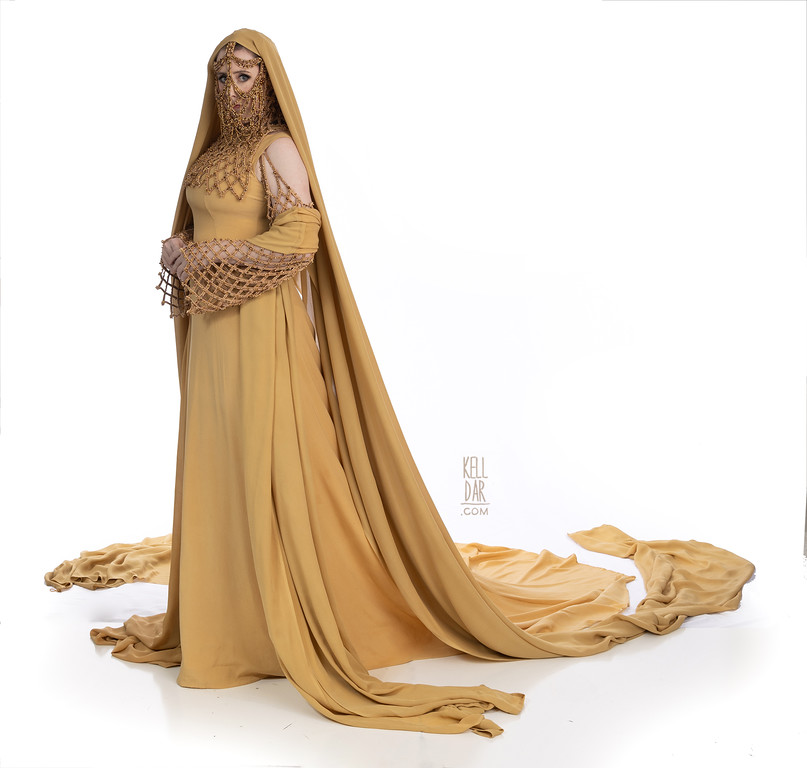
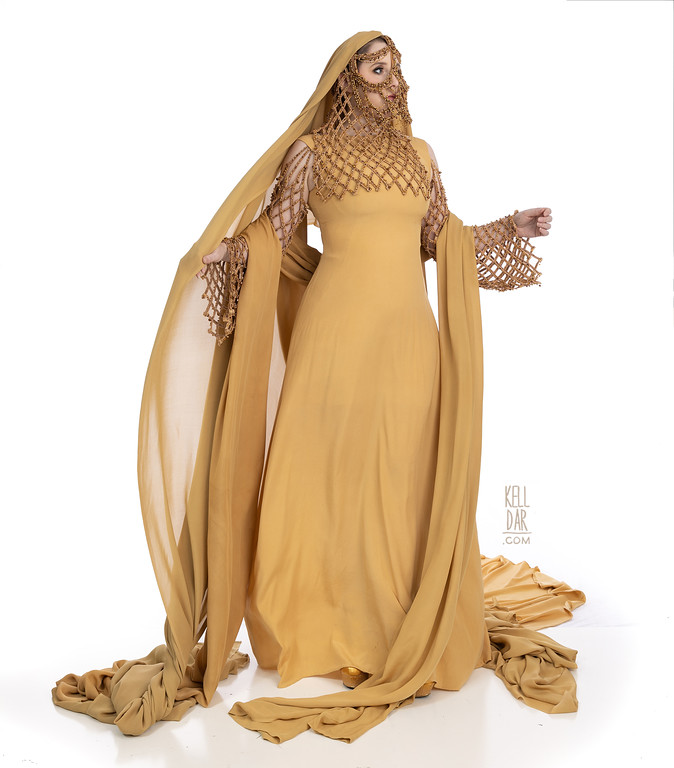
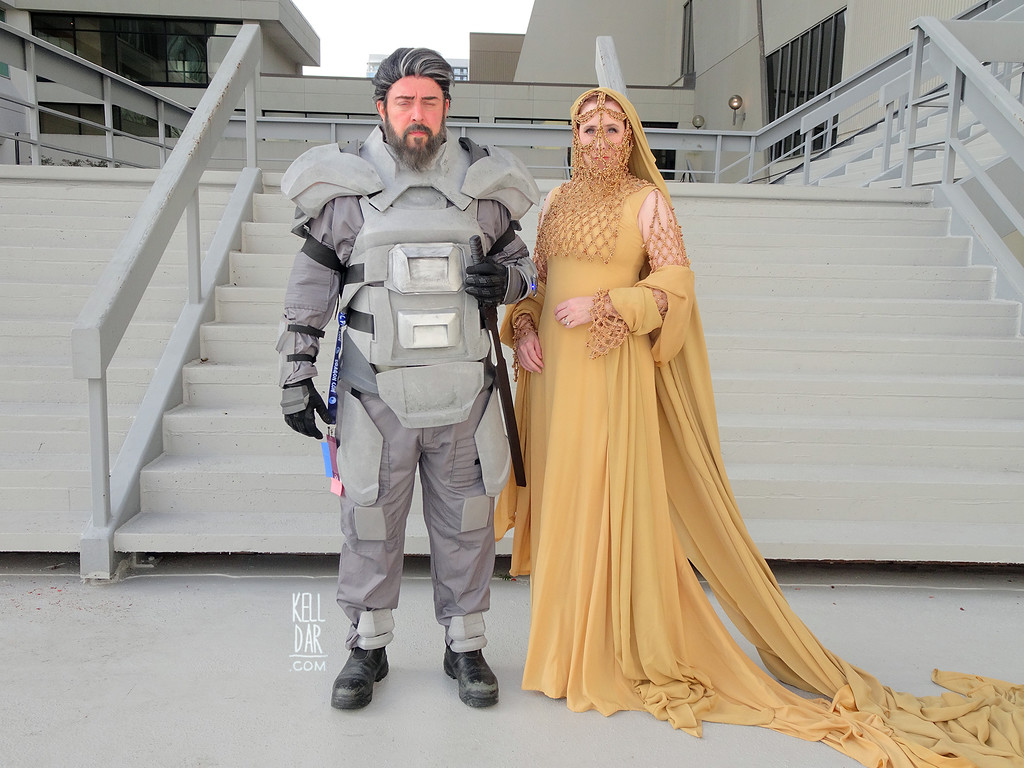
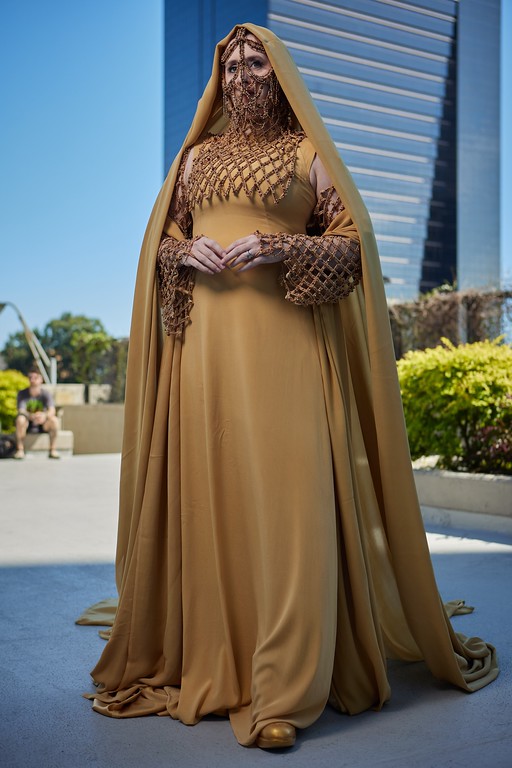
Lady Jessica
Source: Dune
Made for: Dragoncon 2022
Journal Entries: Read more at my Lady Jessica tag
![]()


![]()
Patterns Used:
Simplicity 4566 (lower part of dress)

Fabric/Dye: I decided to use a silk charmeuse for the dress, and silk chiffon for the sleeves/veils. Initially I calculated X amount for each and got it ordered. But once the fabric arrived and I started laying out my mock-up pieces and holding up the chiffon to me I realized I’d way under-planned. I had to order more of both. I can’t remember exactly how much I ended up with of each – something like 10yds for charmeuse for the dress and 14 for the chiffon for the veils/shawl?
For the dye I set up a dye station outside and just did everything in one go — I had tested out a combo on some smaller swatches earlier and thought I pretty much had it figured out, but after the first go in the dye I felt like it was too yellow and went back in several times colour-correcting. The main colour I used was RIT’s marigold, with some tan/camel and even orange mixed in.
Despite the fact I dyed everything at the same time, the large cut of chiffon for the veil somehow ended up a slightly different colour. So frustrating – but my friend who was helping me bustle everything at Dragoncon said it was actually helpful so she could tell what was veil and what was shawl when she was getting it all buttoned up out of the way. So I guess a happy accident.
Dress:

For the dress, I used the Simplicity pattern above as a starting point for the dress from about the hips down. For everything above that, I drafted my own pattern – I started out using a shirt I had that fit the way I wanted the upper part of the dress, just as a starting point to trace onto my newsprint paper. Then I worked with that getting that weird hip-to-bust dart worked in and figuring out the opening at the shoulder. Once I had that kinda where I wanted, I did do a full mock-up of the dress before I ever cut into my expensive silk – I got some cheap cotton and made a complete mock-up with a zipper and everything. <>This looked good so I moved onto my expensive fabric.
I did decide to self-line the upper part of the dress – it is lined to about mid-thigh, just because the fabric was so sheer. I got all of my panels cut including the lining and started getting it assembled. Oen choke-point I had was the darts – I have never been good at making nice looking darts but I did my best.
So I got the dress pieces and lining pieces assembled and started to go to put them together – then realized as I was looking at references I had missed a seam. There’s a seam running from the armpit to the opening on top of the shoulder. So I had to back up, remove part of the front and back panels and mock-up a new panel to go there. Thankfully this went pretty smoothly, and in the end I think it looked better than the way I was going to handle the openings in the first place.

Then another frustration – the upper part of the dress just wasn’t fitting well around my bust. I was having some major gaping at the armholes, the darts just didn’t look right. It was a crisis and I had to step away from it for a day.
I did end up having to put another set of darts at the armhole. Hated doing that but it was needed, and was hidden by the netted cowl once finished. I also realized my shoulder straps were too long and the whole dress was sitting too low – once I got that fixed, all of the darts fell into place, looked fine and the whole thing looked sooo much better.
After that it just sat in my office for a few weeks untouched while I focused on Padme. Finally got back to it, got the zipper put in, and hemmed the skirt by hand.
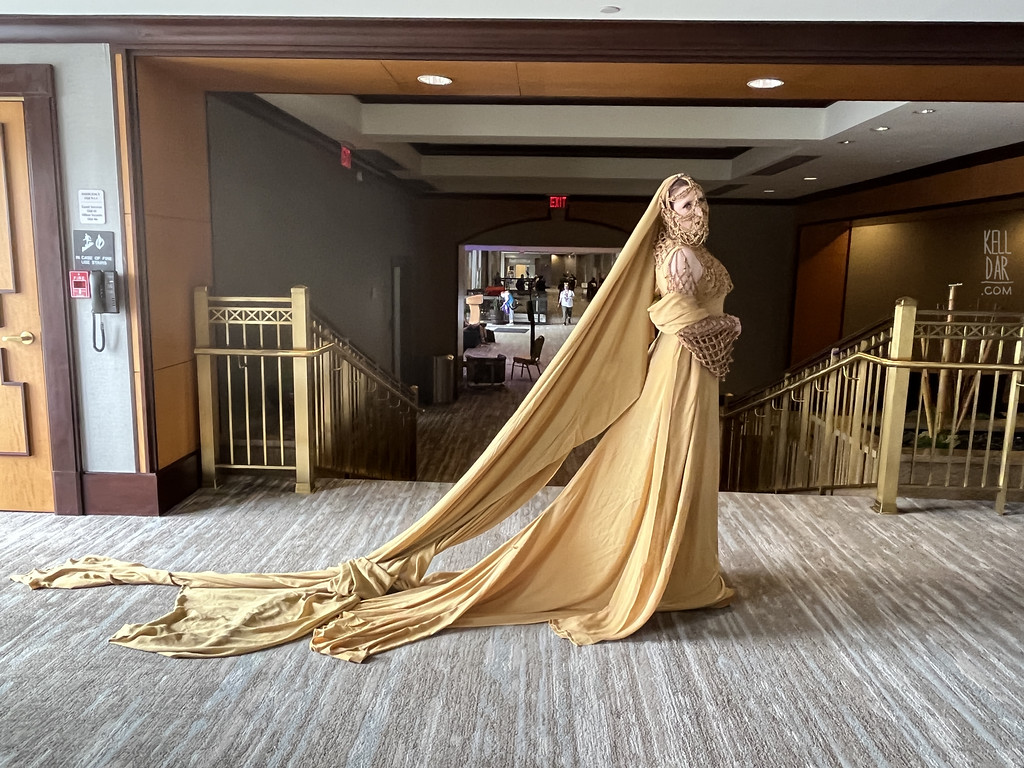
Since the skirt was so long (as were the veils) I decided I needed to add some bustle points to this so I wasn’t carrying yards of fabric in my arms everytime I wore this. The skirt train bustles up onto a button positioned right below the zipper in the back, which essentially makes the whole thing floor length. This worked great. The veils also bustle onto the dress, which I’ll talk about in the next section. I also added hand loops at the center back and side seam to I can pick it up even more for escalators.
Veils/Shawl:

As I mentioned in my fabric section above, I had to order more silk chiffon than I thought — and in the end I had to cut some of the length off the largest piece I intended for the veil and add it to the shawl. Hated having to have a seam there – and hated removing 2 yards from my veil – but I didn’t want to order MORE fabric.
I also for some reason was expecting to need to hem the entire length of both pieces, but when I ironed them after getting them out of the dye, I realized… silly me, the long edges are the selvedge, I only have to do the ends! So that was pretty quick and easy.
For the shawl piece, I ended up attaching 2 small loops (made of cording) at the center back and these attach to the back of the netted sleeves to keep the shawl from slipping or falling out of place. This ended up being very necessary, because without them, the shawl tends to get tangled up in veil, mis-aligned or dropped all together. Really glad I did that.
The longer veil pieces attaches to the headpiece at the top in a series of 3 snaps. These worked really great too. The veils also bustle at the back – there are 2 buttons at the top of the dress on either side of the zipper and the veils can half their length by being attached to this. I also included cording loops at the end so I can pick them up there as well.
Yall I really tried to make this convention/walking friendly as much as possible while still retaining as much fabric drama as I could. I think I did pretty well. The only major downside is that I can’t do most of the bustles by myself – especially the veil to the dress ones.

Netted Sleeves/Cowl:
So after weeks of searching through chain options online, I gave up on making these pieces out of chain. I couldn’t find anything that I was satisfied with, and I didn’t really feel like trying to work with chain anyway.
So instead, I found a very small 1/4″ braided trim that had a similar look at a glance. I started out buying 40 yards of it thinking surely that was enough. It arrived and I dyed it all in my leftover dye from dyeing the dress/veils.
And then I stalled because I didn’t feel like making these pieces, lol.
Finally I started working out the shape of the cowl piece. After getting the front piece kinda put together and the back started, I realized… 40 yards was not going to be enough. So I quickly got another 40 ordered — and in all I think I went through about 75 yards? That sounds so extreme <(but part of that was this first cowl which I ended up scraping).
So yeah I wasn’t happy with how the first cowl was looking, so I paused on that and switched to the sleeves. I used a basic sleeve pattern just as a guide for width and length, and then got all of the pieces of trim laid out in a grid on a cut of paper tear-away stabilizer. I got them all sewn together, then sat and spent about 2 hours per sleeve with a pair of tweezers removing all that damn stabilizer. God I hate tearaway stabilizer (but it’s what I had on hand so I wanted to use it up).

After I was happy with the resulting sleeves, that’s when I decided I’d start over on the cowl. Like I said I scraped that first version, and instead of trying to drape the shape on my dressform like I’d tried to do the first time, I instead made a fabric mock-up of the shape – fully covered head/neck with the pieces hanging in the front and back – then used that to cut my stabilizer. Sewed the stabilizer together so I had a very stiff paper stabilizer cowl looking thing, it looked very Flying Nun. Then I sat and sewed all of the cording to it in a grid. This was much more time-consuming than the sleeves because of the weird shape, and it took just as long to remove all the stabilizer, but I was very happy with the end result. It fit really well.
Next up, time to try to make it look like pretty shiny chain. I gathered up all my beads leftover from Queen Amidala in 2018, plus a few new packs, and just started beading everything. I used a mix of metallic gold, yellow translucent, bronze, dark brown crystal, and a few purple beads thrown in there just for the look. I just sat and sewed on beads for days.
After I finished beading the sleeves, I made extensions that would cover the shoulders and go up under the dress. I wasn’t sure how I wanted to attach them – attaching them to the cowl stretched it out weird, they were too heavy for the dress – so I ended up sewing some ribbon onto the end and snaps around my bra straps. Overall worked ok except when the ribbon is occasionally visible it’s way lighter than my skin, and it has tendency to rotate, so it may be something I rethink in the future.

After finishing the sleeves I moved onto beading the cowl – starting in the front because I started to realize my bead supply was dwindling and I still had the headpiece to do. So I focused the good beads on the front, and used some of less-nice colours on the back portion which would be hidden by the veil anyway. I would’ve left the beading off this section entirely since it’s not seen – but I didn’t want the thing to be front heavy, I felt like it needed the weight of beads back there.
In 2023 I went back and fixed a few small things – my sleeves kept wanting to rotate forward on my shoulder which didn’t look right (see all of my white backdrop photos…), thankfully this was an easy fix, they just needed the attachment at the top shortened. After that they’ve stayed in place perfectly. I also went back and added the “hand” segments of the sleeves with my leftover trim and beads.
Once I finished all the beading it here, it was time to make the headpiece…
Headpiece:
For the portion of the headpiece that covers the upper part of the head/forehead and over the face, I decided to make this a separate piece. Mostly just for ease of wear plus being able to access my face easily to put a mask on/take it off.
I started out with headband, which I covered in scraps of my dyed silk. I made a brace that goes around the back of the head out of kobracast – it’s just sewn directly onto the headband and I painted it brown to blend in with my hair.

Then I made a couple of “brace” pieces for the front that I wanted to conform to my face – you can see it in the progress pics below, but I made portion that comes down over my forehead and down the bridge of my nose and then splitting into a Y shape on either side of my nose – and 2 pieces, one for each temple. Originally I made these of just kobracast, but this wasn’t strong enough so I backed them in worbla, and heat-formed them to my face. Then I painted those pieces gold.
Once I had this frame made I started adding my trim – I glued the trim onto all of the brace pieces and the headband, sealing all of the edges with glue. Once that was done I started building out the lower half which is all just trim (no worbla/kobracast) and comes down past my chin to blend into the cowl piece. Once I got everything sewn together and edges finished, I could start beading again. I did the same mix of beads from my cowl and then also added smaller lengths of beads for detail areas.
So now with all pieces done, to put it on I put on the cowl with it all down around my neck, put the headpiece, and then pull the cowl over the top of it. Snap the veils in place which locks the cowl in place around the headpiece. Overall it’s a little chunky and not completely accurate (I mean all of these pieces that were supposed to be chain), but I liked how they looked and was quite happy with them. They are very sturdy and I was able to just carry everything in a bag to atlanta.

Shoes:
Ok so the shoe saga.
So yes I found the screen accurate shoe-maker and it was way way way too pricey for my blood. I decided I’d just find something that looked cool.
Headed to the secondhand store and discovered a pair of those heel-less platform boots. AKA those same heel-less sort of shoes I refused to wear with Lady Gaga 12 years ago because I thought I’d break an ankle. They were leopard print, had all these cool little studs all over the heels, and were only $5… so I decided to chance it.
I painted them gold, added some piping at the shoe/heel area. Pretty happy with the outcome but trying them on at home I knew this was going to be trouble because I don’t really wear heels at all anymore, so my muscles just don’t know what to do with that anymore. In wearing them around the sewing room I realized my ankles were especially screaming everytime I wore them, so I decided I’d wrap my ankles for stability – but then I’d need something to hide my ankles, so I basically made some gold socks out of some leftover gold fabric.
And I thought about it some more and decided I could not walk in these from the Marriott to the Hilton while also dealing with all this fabric and low visibility due to the headpiece. So I decided I needed walking shoes and the stupid platforms could be my standing shoes.

I had a pair of old suede wedge boots I’d cut off at the ankles a few years ago for Johanna and then decided not to use – so I painted those in the same paint as the platform boots, same cording, finished the upper edge with some bias tape and covered up some holes from some lacing I removed with nailheads. So those were my walking shoes.
For the Saturday shoot I had the platforms on for photos, then switched to the shorter wedge boots for the rest of the photos. When I rewore her on Sunday, I did the platform boots the entire time. I was quite proud of myself, but my feet weren’t. LOL
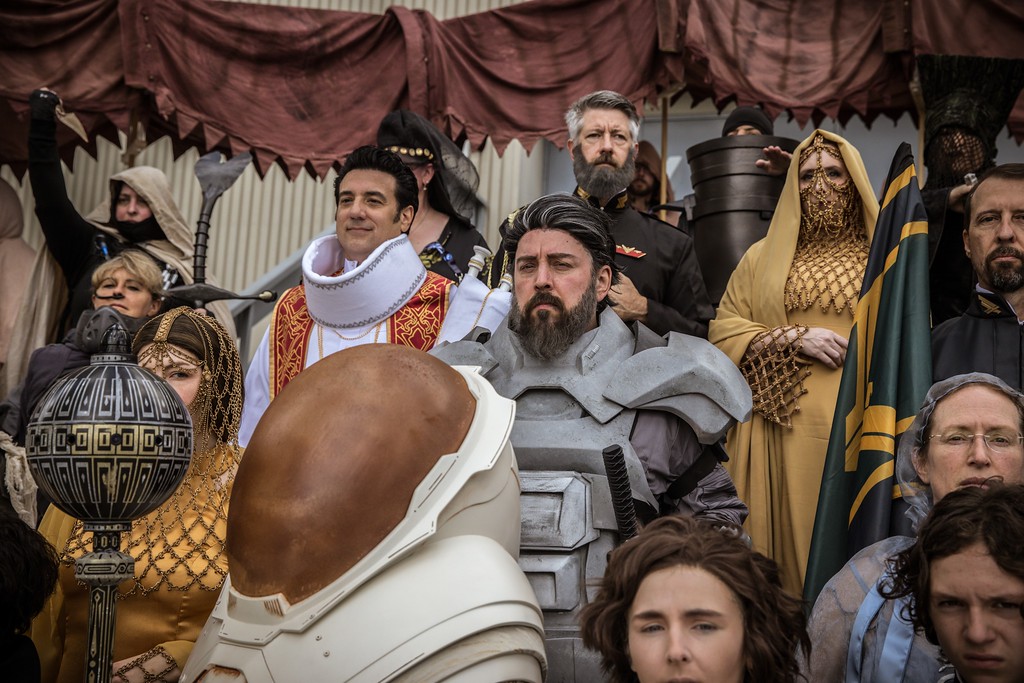
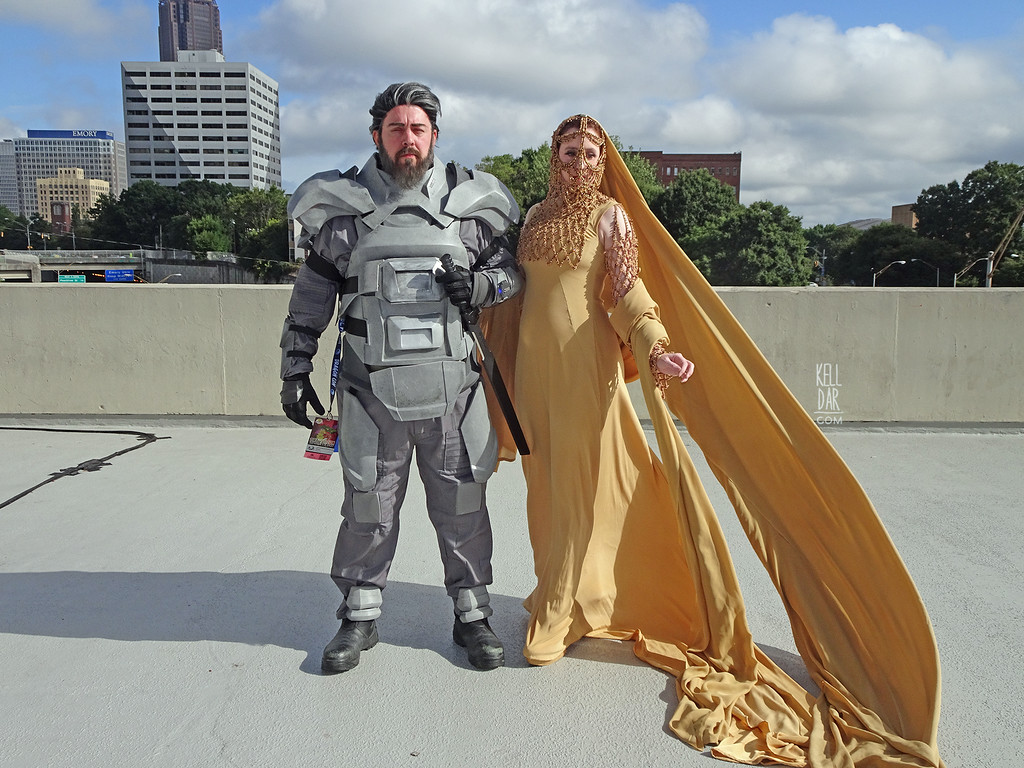
Duke Leto Notes:
I’m not going to go into Chase’s Leto costume much because he of course did all of the armor on his own and I wasn’t really involved. It was all a 3d file from a maker online that he printed, assembled, painted and weathered.
For my part, I modified a suit for him. We bought 2 identical grey jumpsuits on amazon, and I took one in to fit, and cut up the other one to create the elbow/knee pockets for the armor as well as the pleated arm and leg panels.
I also picked out the wig which we had our hairdresser friend cut. After seeing it on him for a while I want to tweak a few things – see if I can puck some of the hair at the hairline to give it a more natural look, and also add a little curl.
Final Thoughts:
I love how these came out! The only things I’ve changed on Jessica since her debut is that I took up the top of the netted sleeves a little bit, and that helped prevent them from rolling and sitting too far forward (as you can see in all of the white backdrop shots). You can see the corrected length in the Dragoncon 2023 pic here. I also made the hand sections for the netted sleeves and got those attached; I skipped it the first time around. Chase and I have been trying to rewear these at Dragoncon again since – for 2024 we took both Leto and Jessica, I had restyled his wig, we dragged all that armor all the way to Atlanta, I steamed out 15 yards of silk in the hotel room… and then we didn’t wear them LOL We will again one day I swear!!
![]()


![]()


Please note that none of these costumes are for sale! This is my personal portfolio.