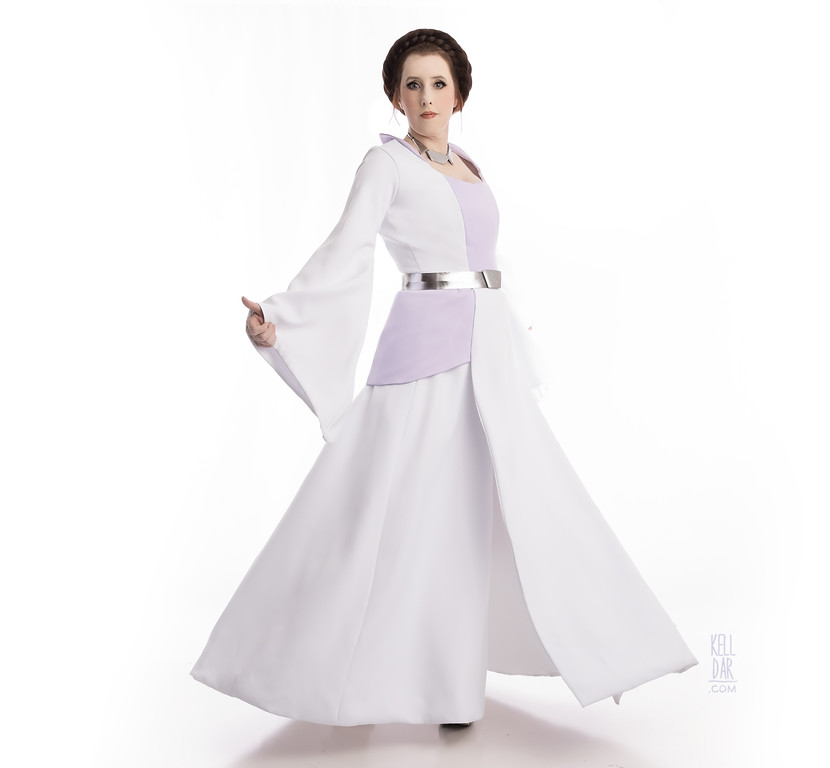
Leia – Honeymoon Suite Dress
Made for: HSV Expo 2024
Journal Entries: Read more at my honeymoon leia tag
Related Costumes: Breha Organa
![]()


![]()
Patterns Used: Simplicity 9891/1045
The Fabric:

So when I first started mentally planning this costume in 2023, initially I had wanted to use a thick stretch fabric. But, the more I thought about it, I began to think for something as “nice” as a honeymoon departure dress, I feel like it needs to be something more luxe, thicker, and built more like a DRESS DRESS and not a simple stretch thing like my jedi Leia dress.
So I had just finished my Breha costume around this time and remembered they also had the fabric in an optic white — the double brushed matte satin from Joann. That fabric had been a pain in the ass to work with, but I loved the texture and weight of it, it felt like something a formal dress would be made of. Also I liked the connection of having a Leia dress and a Breha dress made of the same materials. And bonus since it was from Joann, I could use a coupon, so I bought 6 yards.
Once I had my dress pieces cut, I took the front bodice layer, the hip panels and the collar pieces and dyed them lavender, along with a scrap piece just in case I needed to recut something.
The Dress:
As mentioned above, I decided to use Simplicity 9891/1045 as a base (9891 is the older Lord of the Rings version of the pattern and 1045 is the newer Game of Thrones version of the pattern, but they are pretty much the same thing. My versions of these are mixed up in a bag together.) It’s got a full skirt with multiple panels I can break up to have the front panel separate, a bodice with princess seams, and the big sleeves. All I’d need to do is edit the sleeves a bit and add a collar.
I got some cheap white cotton to use a mockup and eventual lining. Got the mock-up basically assembled and fitted and then moved onto the real fabric.
I started out with the skirt – I was doing the skirt in 2 parts, the single front panel and then the larger side & back section which consisted of 6 panels. For the larger back panel, I took apart my cotton mock-up to use as a pattern to cut the real fabric, and then I intended to use as a lining. (I definitely did not want to self-line anything on this because that matte satin is so thick). As I took apart the mock-up layer, I numbered each panel so I wouldn’t lose track of the correct order. Buuut that didn’t help, I had the correct order but I numbered them AFTER I took them apart so then I wasn’t sure which side was right and which was wrong, it just turned into an avoidable mess.
I still cut out the real fabric and got that back layer assembled. Re-assembled the mock-up/lining cotton layer and… of course they didn’t fit together right. Trying to get the lining and outer layers to match up right is basically all I did for about 3 weeks between the end of November and beginning of December. I took the both layers apart, laid each piece out together to make sure I had them all in the right order and facing the right direction and it still didn’t work.

So finally I said forget it, I’m skipping the lining, I’ll french seam the skirt and finish the edges by hand. So I did that, started doing the hem by hand and just… hated it how it looked. So I undid the french seams, cleaned up each outer layer panel, bought new cotton fabric and cut new lining based on the outer layer pieces. Got that all put back together and it finally worked ok this time. What a drama.
One note is that everywhere I could, I understitched every edge – the front collar of the bodice, the larger skirt panels, etc. This fabric doesn’t press very crisp so that was the best way to get everything to look neat.
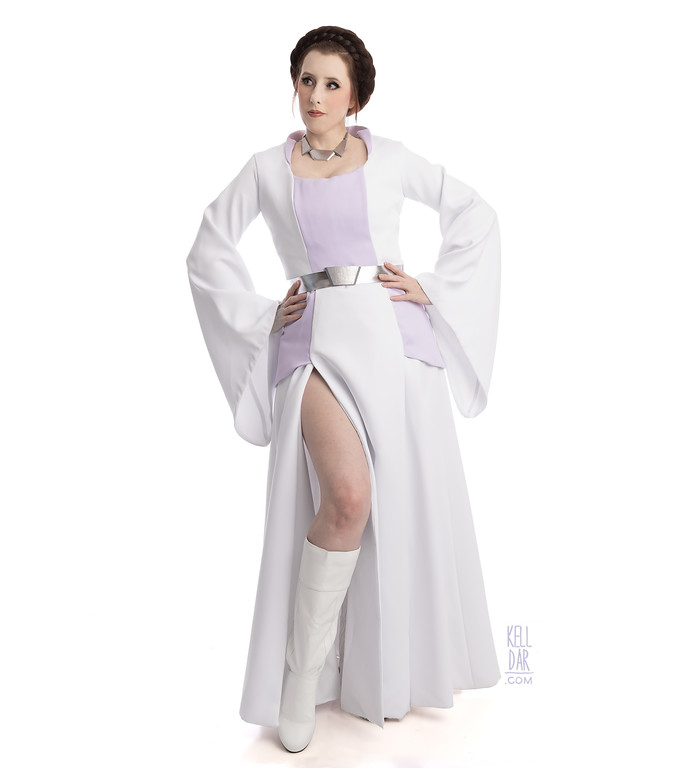
The front skirt panel was simple, just sewed it to the lining layer and flipped it, that all worked fine!
For the sleeves, I used the the pieces from the Simplicity pattern but changed the shape a bit to be more fitted through the upper arm. I did do a french seam here, and finished the edge with bias tape folded to the inside.
Finished getting the bodice layer assembled, made the hip panels (lined with cotton), got the collar pieces sewn together and pinned on. By early December I had all of the pieces assembled and ready be put together – I had a bodice layer, bodice lining layer, collar, sleeves, front skirt panel, hip panels, back skirt panels – all of these pieces were done and ready to go.
And then I took a long, long, long break. First I stopped because we went out of town before Christmas, then everybody including me was sick over Christmas and New Years. After New Years I realized I have a ton of stuff to do for the cruise in February, so I started working on all that (my disneybound Scarlet Witch, my Star Wars dress, bags and shoe decorations for Cath, etc).
I FINALLY got back to work on it in March! Quite a long break.
First up I got the sleeves sewn onto the bodice, and then the collar attached, and then the bodice lining finally installed. All of that went pretty smoothly, with the exception of the collar – it wasn’t perfect but at this point it was just gonna be what it was gonna be.

Next up I got the hip panels sewn to the top edge of the side/back skirt panels, and then the front panel sewn on also. Finally it was time to sew top to the bottom. Got that done and BOY was this dress heavy.
Next up was the zipper was was my last tripping point. I didn’t do a full zipper – the zipper starts just below the collar in the back and ends around the lower hips. It was tricky to get it lined up correctly – it took a couple of basting attempts. Finally looked ok and I sewed the zipper in and thought ok – I’m done right?
But then I tried it on and it was slightly too big. I was like, I’m not taking it up at this zipper, so I removed the skirt from the bodice just on the side panels, and took up all the side seams. Put it back together and that fit better. But, the hip panels were hanging weird in the back.
I did end up taking the zipper out. I had to reconstruct the back seam of the hip panel — basically the problem was it was flaring out too far, and the addition of the zipper exacerbated it. So I took that in a bit, got the zipper back in and finally, at last, the dress was done.
The Accessories::
For the necklace and belt, I drew the basic shapes and my husband 3d modeled the pieces for me. He got the painted silver, and I strung the necklace pieces together on a wire, and just used some basic silver leather belting for the belt, with a snap in the back.
I do need to go back and add something to the back of the belt buckle to keep it from sliding right or left while I’m wearing it. I may also add belt loops to the dress to keep it sitting in the right place right over the waist seam.
The boots are just my regular Leia boots.
Final Thoughts:

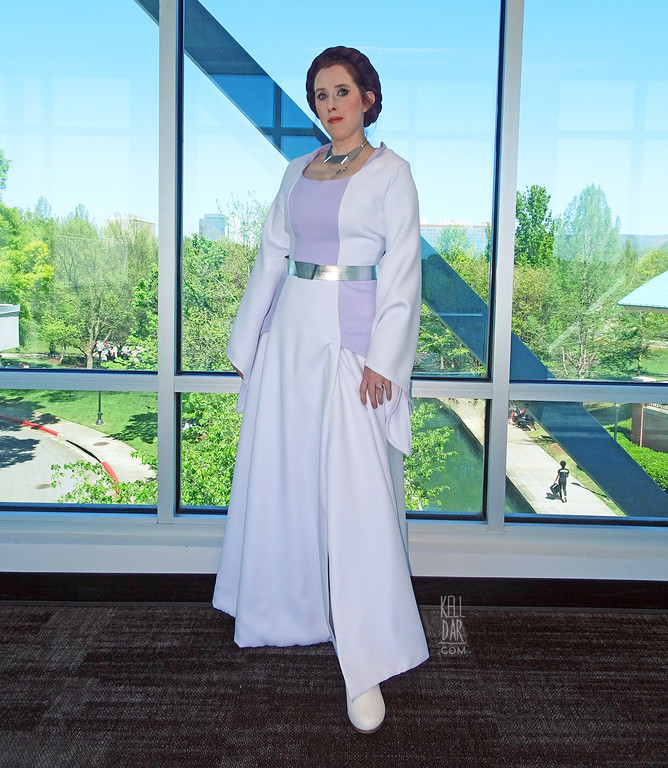
So the fabric I used for this – and Breha – while I love the look of it, it does have one really bad downside – it snags REALLY easily. And sometime between packing this costume up in a garment bag Friday morning and put it on Saturday morning, something had caused really bad snags all over the front panel. No idea what it could’ve been up against to cause that, but I could have cried! It doesn’t look awful in photos but it was super noticeable in person.
So after HSV Expo I struggled with what to do. I really didn’t want to take it apart and either replace the front panel or flip it around, because either option is major surgery and may cause even more damage to the fabric. Finally I came up with a dumb idea – I bought one of those fabric shaver doo-dads and… I shaved the worst of it off. It’s not perfect but it made it look a LOT better!!
But also frustrating is the fact I feel like I look frumpy in it, and after wearing it at 2 cons and now a white backdrop shoot, I think I’ve put my finger on it. It just doesn’t fit great through the torso and I think the problem is in the lining, I think the lining ended up too short and it’s causing wrinkling on the outer layer. That’s something I feel a little bit better about revisiting (vs having to replace the front panel) because it’ll mostly just be cutting the bodice lining away from the waist seam and seeing if that fixes the wrinkling. Then I can fix the lining as needed, no major undoing necessary.
Anyway, just things for the future, for now this costume is kinda filed away as “done” since I’ve worn it to 2 cons and now a white backdrop shoot. I’ll probably only monkey it with it if I get bored or want to wear it out again. We’ll see what the future holds.
![]()


![]()


Please note that none of these costumes are for sale! This is my personal portfolio.