
Morticia Addams
Source: The Addams Family
Made for: Dragoncon 2026
Journal Entries: Read more at my Morticia tag
Related Costumes: Stevie Nicks, Edith Cushing

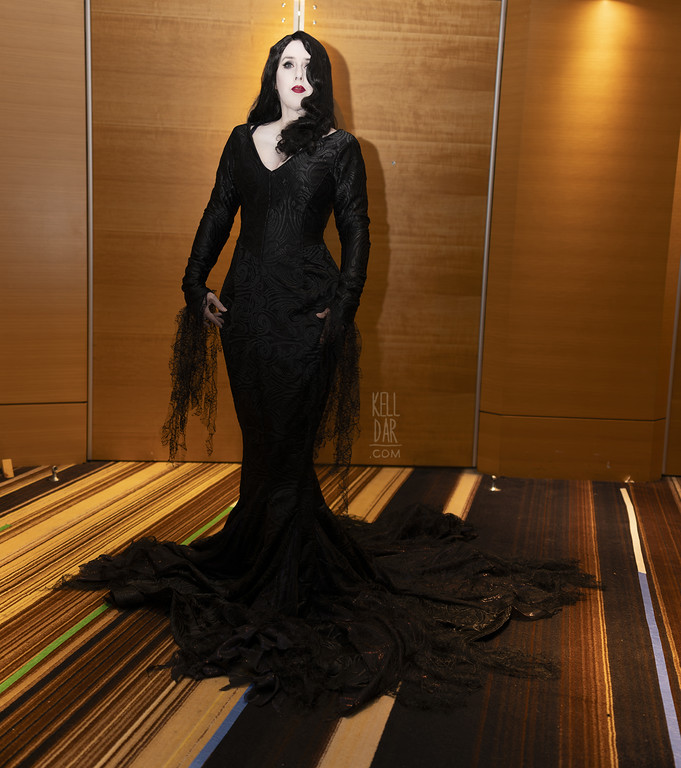
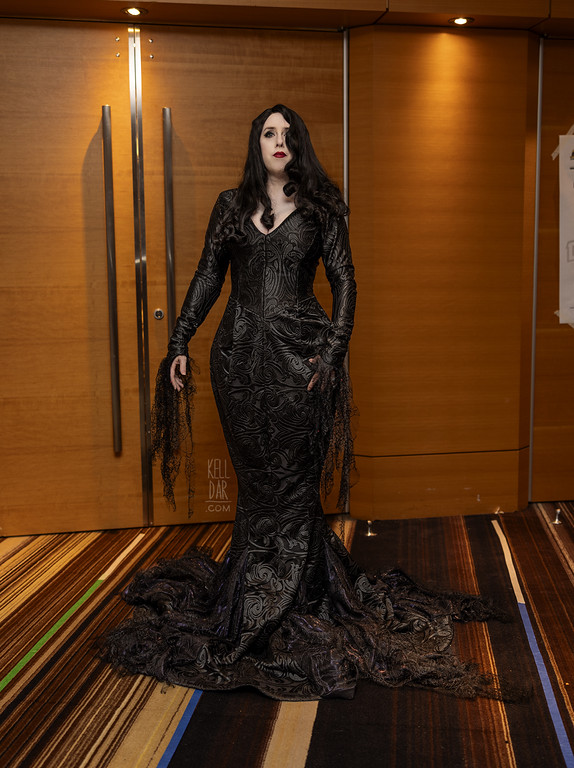
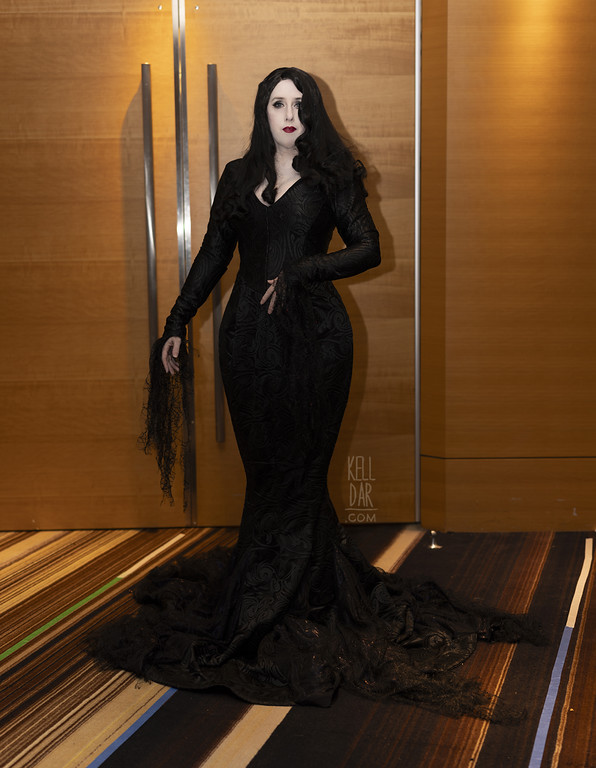
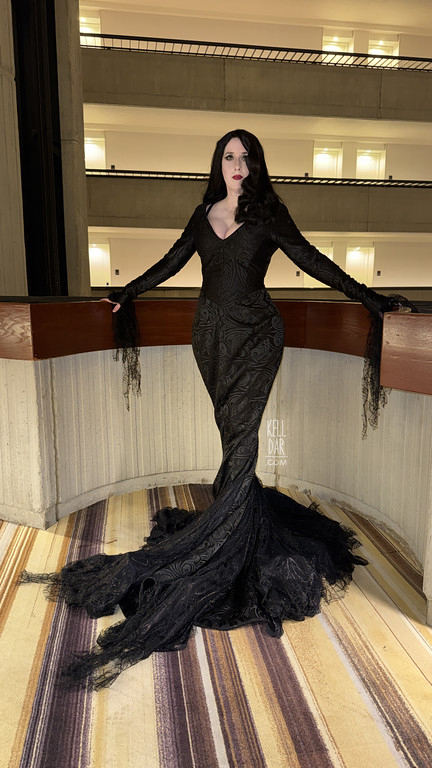

 Patterns Used: Butterick 4827
Fabrics::
When we decided to go to LA for a vacation in early 2026, I knew part of that trip would be fabric shopping! I was really excited to get to check out the fabric district for the first time. I looked through my folders of costumes I wanted to do to decide what I wanted to shop for – I landed on Morticia. I’ve wanted to do a Morticia costume for a long time, but with my own spin on it. I decided this would be a fun project to shop for, since I wasn’t shopping for specific fabric – I could just have fun looking for neat black fabric.
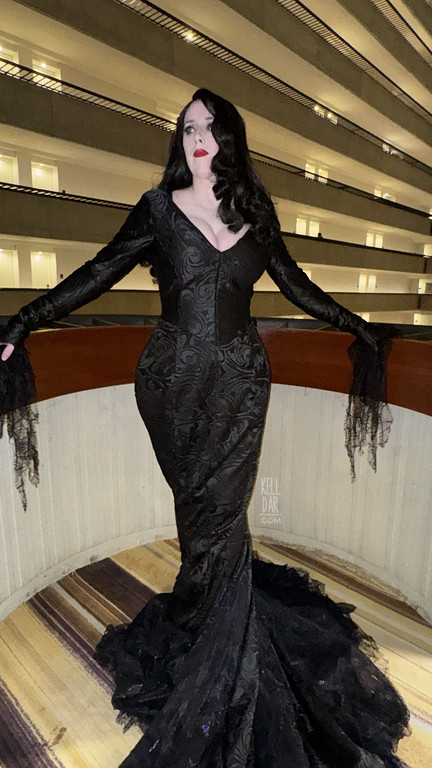
I ended up with this beautiful velvet swirl motif on a mesh. Once I got it home I started looking for a black fabric to layer under it – I wanted it to be something with a little sheen so the matte texture of the velvet would pop. I got several swatches, but eventually just ended up with a jumbo spandex that I got from Gail K while in Atlanta one weekend. Not exactly the “lux” fabric I wanted but it was affordable, comfortable, easy to work with and had the sheen I wanted.
 For the insets in the skirt, I really wanted to find something similar to the distressed chiffon I used for my mandalorian cape back in 2006. While I didn’t find anything with the distressed look I wanted, I did find this metallic black chiffon that was shot through with these violet threads. It was pretty cool, it looks black until the light hits it, and depending on the light, it either looks like a deep reddish violet or a purple. I wanted to layer another fabric over the top of it, otherwise I felt the purple would be too much – I picked up this very delicate black netting with flowers at Gail K in Atlanta to use over the top of it — but in the end I decided the flower motif wasn’t right. I found some spiderweb lace tablecloths on amazon and bought them – they were PERFECT for this, the spiderweb motifs looked much better than the flowers and bonus – it was much cheaper. So I have the flower netting in my stash for something else in the future.
I’ll talk a bit more about how I distressed those fabrics later in the post.
Dress:
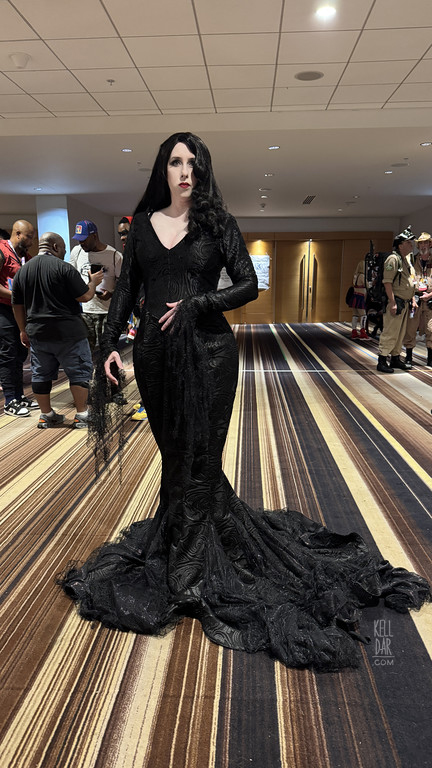
For the dress, I started with the Butterick pattern above, which I already had cut from other projects and I know it fits me nicely. It had the fitted torso and sleeves I wanted, so it was a good start. I traced the pattern pieces onto new paper and did my edits — I changed the neckline shape, I added a waist seam, and made the skirt panels just basic rectangles for now.
 I used those new pattern pieces to do a mockup out of some old sheets – I took in the mockup as needed, and started messing with the shape of the skirt panels to get the fit I wanted. I had not made patterns for the skirt insets – instead I just cut triangles of my mock-up fabric and pinned them in until I liked the shape. Once I had that where I liked, I made some paper patterns out of the fabric pieces. Also transferred my edits of the other parts back to my pattern pieces, and then it was time to start cutting the real thing.
I started with my bodice pieces since they were the smallest and easiest to work with. I cut a layer of the spandex and a layer of the velvet. I did try to pattern match here as best I could, but the motif was so large, and my pattern pieces had so many curves, it was pretty impossible. I just tried to match where I could and have it not be weird or egregiously off everywhere else.
I basted the velvet and spandex layers together, then pinned them together to test the fit. Once I had that adjusted I did the same to my lining layer — originally, I had planned to line the bodice layer in the same spandex, but when it for whatever reason didn’t match up right (despite being cut at the same time?) I just trimmed off the excess and turned it into a facing at the neckline.
 Next I cut the skirt panels, same song and dance here – basted the layers together, then sewed each skirt panel to its matching bodice panel. Then to assemble each full length panel, I did end up having to baste the sections together first before machine sewing, otherwise the velvet layer shifted despite the basting to the base spandex layer. I sewed them together to just below the knee and left them open past that for the insets to be added later.
Before I did the insets (because I knew that was going to make it unwieldy to get into the machine), I also added the sleeves and the zipper in the back, with a hook and eye at the very top.
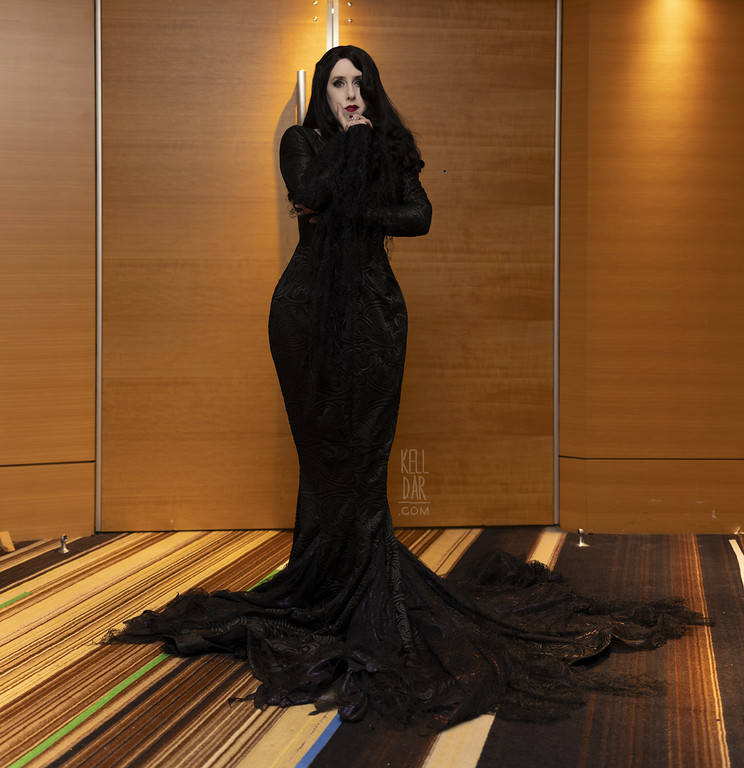
For the insets, I skipped the velvet mesh layer since it wouldn’t be seen, and no sense in wasting that pretty fabric! (I wouldn’t have had enough fabric anyway.) I just did a layer of the jumbo spandex as a base (and had jussst enough fabric to do it). Next I played around with how I wanted to add in the spiderweb lace and the metallic chiffon. I ended cutting a wider, longer version of the inset pattern out of both fabrics, gathering it down to fit and sewing it in place onto the outside edges of the insets.
Then I took each inset downstairs to sit in the kitchen and burn the chiffon layers. I tattered up the edges with scissors and just grabbing it and tearing, cauterizing the edges of it with a candle (hence why I did it in the kitchen where I could sit on the tile floor to do this instead of carpet), and then also burning some holes into it along the edges. It wasn’t EXACTLY like my old mandalorian cape fabric I’d been hoping to replicate, but it was close enough.
 Next I got all of the insets sewn in place, which was a pain to get all of that through the machine LOL. But I got it done, got it on my dressform, and then sat and trimmed and tattered the edges of the spider-web lace until I like how it looked.
With that done, I still needed to hem the thing. I bought some wide horsehair trim to sew onto the edge, to give it some more structure at the edges. I sewed that on to the right side, flipped it, and sewed it into place on the inside.
(I should note that for the insets with the extra fabric along the seam lines – I didn’t sew the extra fabric down for the last 2-3 inches. Once I had the horsehair in place and the hem finished, I stitched those last couple of inches down by hand at each inset seam to finish it.)
Last thing I did was I took some scraps of the spiderweb lace and hand-sewed it onto the ends of the sleeves. I also had plans to sew some very dark red crystal beads scattered over the dress – but when I tested out a few, I didn’t like how it looked. It just wasn’t the vibe. So since I had the beads, I sewed a few into places on the spider-web lace on the sleeves. They’re just little pops of red occasionally and I like that.
Accessories:
 For the shoes, I wanted to be very TALL (like Jenna Marbles), but everything I could find that was a good 4-5 inches was too chunky for the look I wanted. I wanted like victorian lace not club kid. I ended up with a fairly plain pair of black ankle boots that have about a 4 inch heel. I’d like them to be a little taller, so I may replace them eventually — but if I don’t, my plain is to eventually glue my leftover spiderweb lace over them to at least give them a TOUCH of the “victorian lace” look I wanted.
I did buy a mermaid style petticoat I thought I would need for this – in the end, I didn’t need it, my flare out was lower then the petticoat would’ve helped with. Oh well, into the stash for future projects.
I had wanted to make a corset to wear under this (that I could also use with other costumes), but that plain went sideways. I jettisoned the cups pretty early on and just made it into an underbust, and I don’t love it. It does not give me the shape I wanted, but hey, at least it makes me stand up straight LOL. I’d love to invest in a really nice corset from a maker one day, but for now, I think next time I wear this I’ll try one of my other old ones.
 The wig is from Wig is Fashion. It was a standard lace front with beachy sort of waves. I was hoping it would work out of the box but the wavy curls just weren’t what I wanted. I set it in pincurls and then did a brush out – oof, that was not the look either, it was a triangle of hair on my head. So I sat and steamed the curls out down to the very end, so only the ends had the curls, and I thinned it out a lot. I left the front left lock curled all the way up for that “Veronica Lake” look. I ended up being super happy with how it turned out – it was exactly what I pictured in my head and I’m glad I kept pushing instead of settling.
History:
I LOVE how this turned out. It was an easy project (outside of the corset) and the end result is basically exactly what I had in my head. I really wish I’d built in a second time to wear this at Dragon con – I should’ve also done sunday morning or something, but it was hard because of the specific makeup I used for it (I did a layer of white over my normal foundation. It would’ve looked crazy with any other costume, so I would’ve had to totally redo my makeup to wear something else after this.)
I’m hoping to bring her out for something around Halloween though. What that might be, I dunno. I’d love to do a photoshoot somewhere.







Please note that none of these costumes are for sale! This is my personal portfolio.