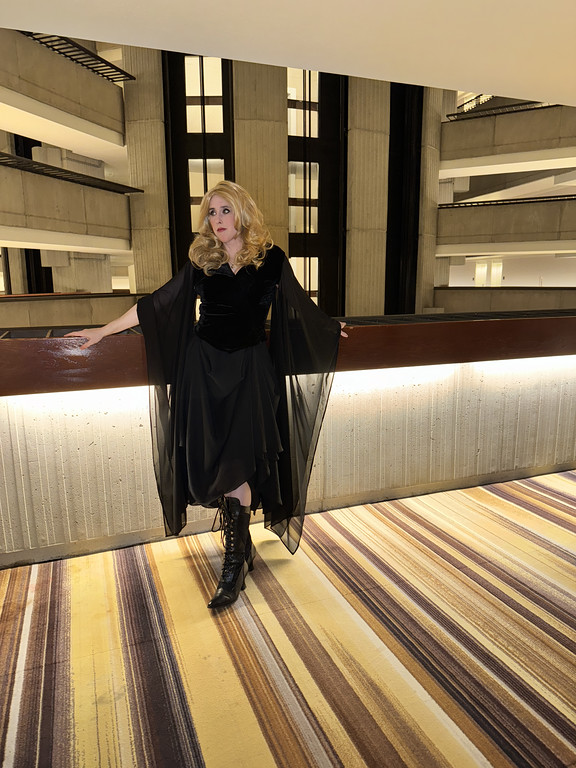
Stevie Nicks – Rumors covers
Made for: Halloween 2023
Journal Entries: Read more at my Stevie tag
Related Costumes: Taylor Swift, Kate Pierson, Lady Gaga
![]()

![]()
Patterns Used: None

So originally, I was thinking, what could I wear out of my own closet for this? And then I was like… wait, no, it’s Halloween weekend. I can put together something more costume-y and nobody will bat an eye, right??
So after Dragoncon I started digging through my stash to see what I had that I could use to put together a “Stevie-ish” look. I wasn’t going for anything specific, just the vibe.
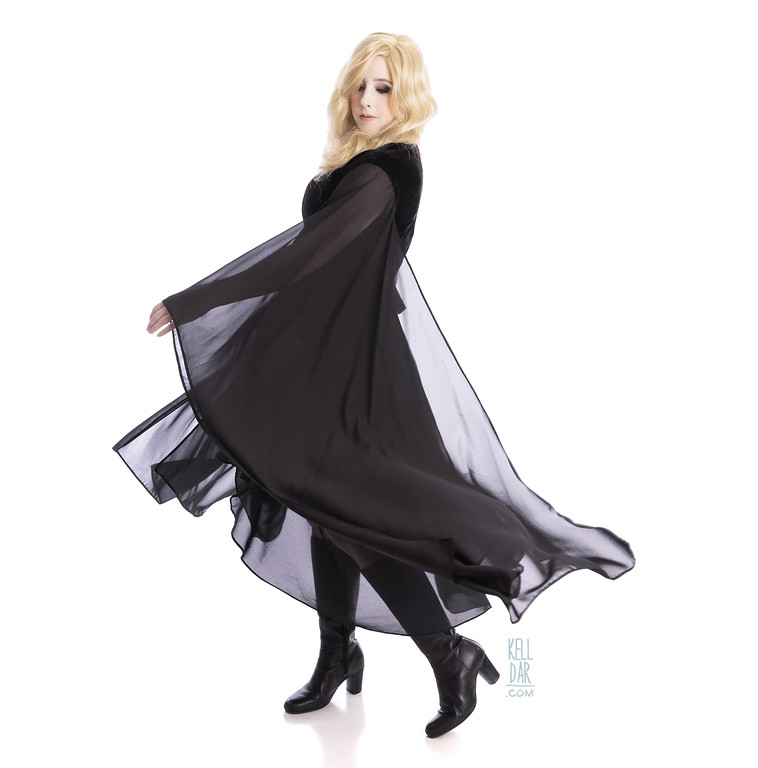
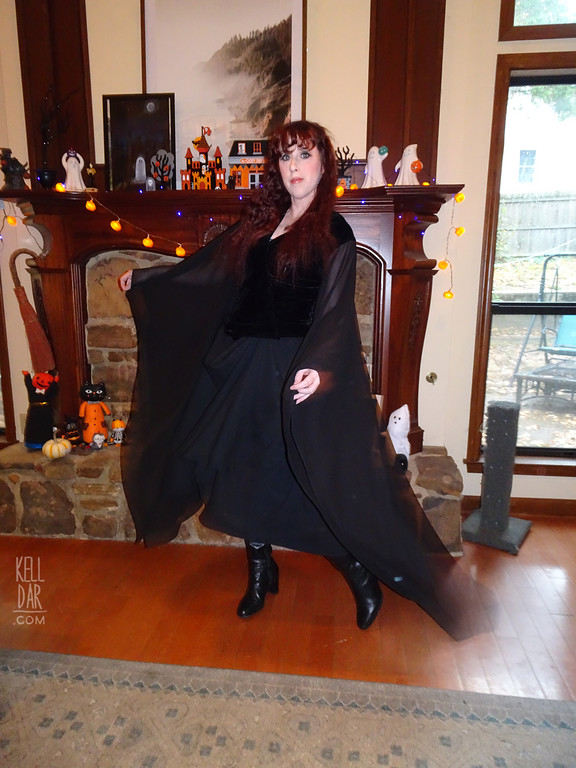
One of the things I dug up was a long black chiffon skirt my grandma gave me like 20 years ago. She used to love to give me anything she thought I could use in my costumes, usually old clothes of hers, trims she cut off stuff, scraps of fabric. This skirt was one of hers. It has sat in my stash ever since… and at long last, my hoarding pays off and I finally got to use it LOL Maybe one day I’ll also find a use for a blue velvet dress she gave me around the same time!
So now I had this skirt and a pile of maybe fabrics… and it was at that point that Barbie announced their Stevie Nicks Barbie and suddenly I had a great reference for the Rumors outfit.
And I immediately dumped the idea of doing something “Stevie-ish” with a bunch of fabric scraps. We were going full fledged costume at this point. Although, it did end up being much more akin to a quick, half-bought-and-modified/half-very-quickly-made 2003/2004-ish Kell costume than anything I’d normally make today, but we’ll dig more into that aspect further along.
So I didn’t really want to cut up my grandma skirt, so instead I just tacked up the front edges to give it a kind of handkerchief hem look without cutting into it. That was all I did to that piece.

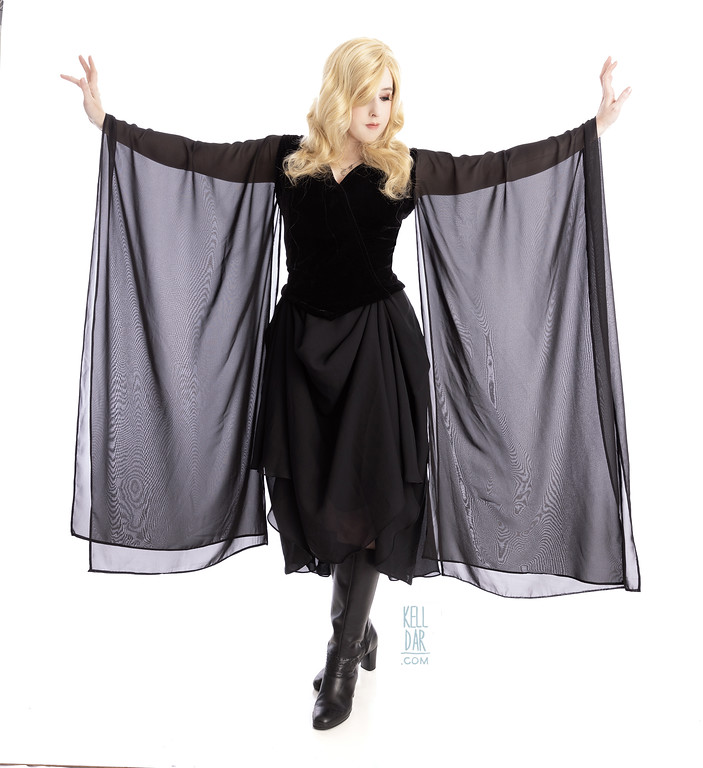
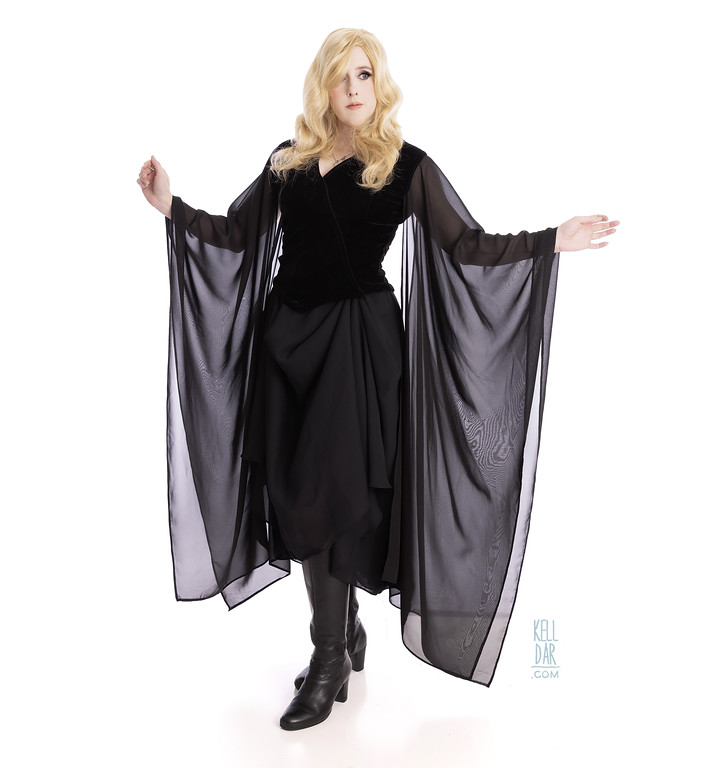
And then for the top. I bought a yard of black velvet and 5 yards of chiffon online. Somehow the chiffon I got online matched the chiffon skirt EXACTLY which was magical (same weight, texture, opacity – I’d expected the chiffon I got online to be thinner and flimsier.)
So first up I decided for the wrap-style top, I’d use my duct tape dummy pieces from Scarlet Witch and modify them. I had some scraps of this cute star cotton I decided I’d use for the mock-up and eventual lining. I thought I could figure it out in one go.
I could not figure it out in one go. I got the star cotton pieces cut and assembled and the 2 front panels weren’t quite right, and I didn’t have enough to recut those panels. So I decided to use some scrap lining leftover from Breha patterning and worked through a couple of tweaks to the front shapes until I had something that seemed to work well.
I recut the cotton lining in some Beatles cotton I had (only thing that was mostly black!), got that assembled, it all looked good, had to take it up a bit but at that point finally felt confident enough to cut the velvet. I disassembled the lining to use as pattern pieces to cut the velvet, then put everything back together.
Now with the outer velvet layer and cotton lining layers ready to go, i started to pin them together. I knew sewing these 2 pieces together was going to be a pain because the velvet was stretch and the cotton lining was obviously not, but I thought the top needed the stability of a non-stretch lining especially to support the sleeves.
But after pinning it partially together, I decided… why not just try to finish the velvet layer without the lining? If it doesn’t work i can take it apart and go back and install the lining. Let’s just see if I can do this in a more simple way than the way I’m going at the moment.

So I sewed the shoulder seams together, just folded the neck and sleeve hems over and sewed them down, just one fold over (I can’t even remember the last time I did that). Trimmed out the excess, then put it on and pinned the front closed. Originally I had planned to truly do this as a wrap-around top with a couple of snaps for closures, but if the whole thing is just one layer of stretch velvet? I can sew it closed permanently and just pull it off and on over my head. So I pinned the front sections together correctly, and hand-sewed them together. Then I put it on again and pinned the hem into the front point, and did finish that by hand instead of on the machine.
Then onto the sleeves – the Barbie doll was very helpful in understanding the shape of those sleeves LOL I just took 2 big rectangles of the chiffon, folded the edges over to hem them, and then hand-sewed them along the top edge of the velvet top’s sleeve openings.
And that was it. The sleeves and top did fine without a lining. Is it great? No. Was it comfortable? Heck yes it was.
Since the original pattern/lining had been meant for no-stretch, the vest did end up a little big on me. So I may go back and take it up in the future, but overall, it was kind of fun to do a quick, easy build with simple hems and no over thinking, like the old days LOL
The boots were just some I had – and I had meant to 3d print the necklace pendent and put that together… but I completely forgot. I didn’t think about it again until I was getting dressed to leave for the concert and did not have time to scrap anything together.
But I did have so much fun wearing this and it’s so comfy to wear – I’m definitely going to be doing some little upgrades (taking it up to fit better, the necklace, add a wig) for a simple late night dragoncon costume next year. Yay for comfy and pretty costumes!
![]()


![]()


Please note that none of these costumes are for sale! This is my personal portfolio.