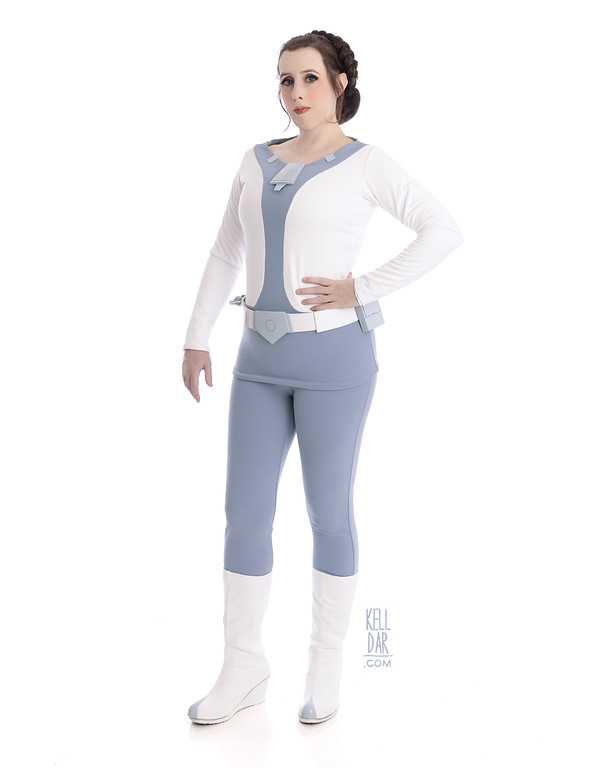
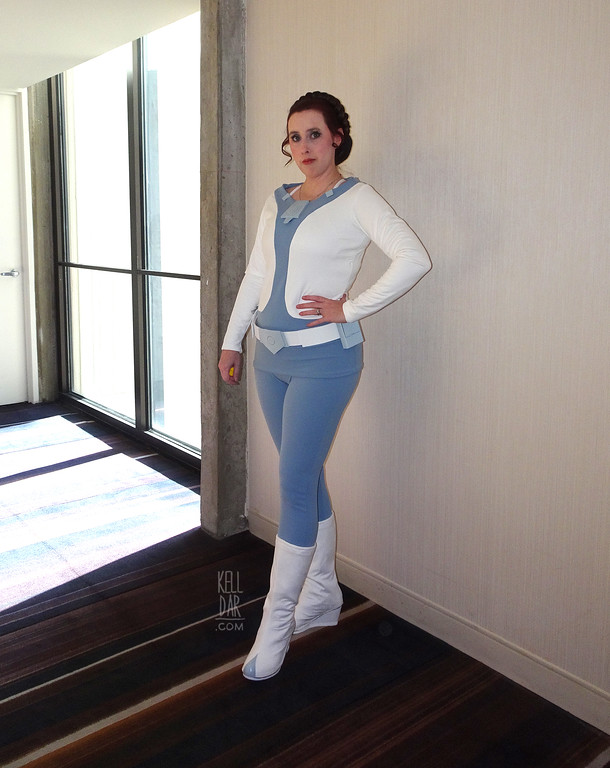
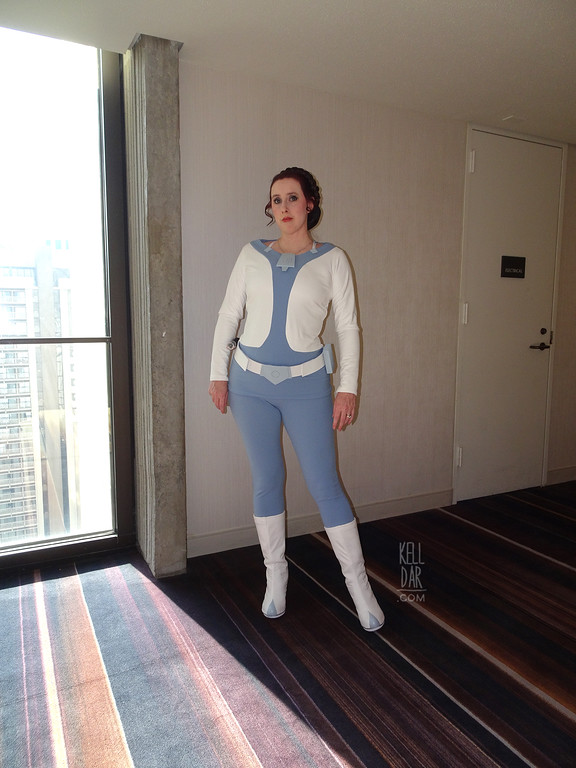
Princess Leia – Lothal
Made for: Dragoncon 2023
Journal Entries: Read more at my lothal leia tag
Related Costumes: Classic Leia, 2018, Marvel Comics Leia, Jedi Leia
![]()
![]()
Patterns Used: Kwiksew 2722

Background:
So in my quest to do every Leia costume, this has been on my list since she showed up in Rebels because I loooved that it was based on the original Leia concept art. Back in 2019 when I went on my quest for Dr Crusher fabric, I’d gotten a couple of yards of clearance spandex I couldn’t return that I thought might work for this, so I decided to do it after dcon that year… and it just never materialized.
Fast forward to 2023 and friends are putting together a Rebels group, and that was the quick kick in the pants I needed to finally do this.
I ended up deciding that the 2019 fabric was quite the right colour, so i went on a trek to find something different. While on vacation in NYC, I picked up some light blue scuba fabric that wasn’t quite the right shade but I loooved the thickness and drape of it. So that is what I planned to use, until a week later I went to Joann and found a basic thick matte spandex in a dusty blue that was EXACTLY what I wanted. So the neoprene I hauled home from NYC is going into the stash, and we’re using the Joann fabric.
(Interestingly, the RL standards call for those parts of the costume to be grey. I interpret it as a dusty blue. Ah well.)
For the white parts I was really stuck on it being a faux suede. I dunno, just something about the textures in Rebels made suede seem like a cool choice. So I got a white faux stretch suede online, and when it arrived, it was REALLY thin. Like too thin to use here. So I backed it in some white scuba and that made it functional.

The Pants: I absolutely hate making pants, and I especially hate making fitted pants with a crotch seam. It always looks bad! (Maybe I just need more practice LOL)
So my solution is to use a bodysuit pattern and just cut it off at the waist. This is the same thing I did with Wanda in 2021. So I pulled out my trusty Kwiksew bodysuit pattern, got the pieces cut… and it was way too big. When I’d used this pattern for my Wanda pants, the fabric was much thicker and less stretchier than what I’m using here. So to adjust, I recut each panel down a size and that helped this stretchier fabric fit better. Added elastic the waistband and done.
The Top:
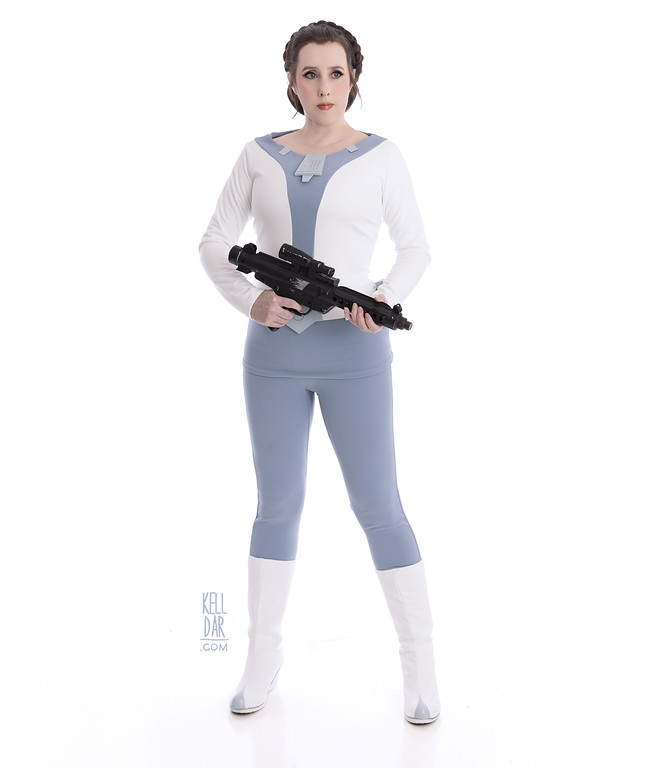
The top was fun to do – I basically made a shirt out of scrap fabric, drew the design on, and then cut it up to make pattern pieces. I did a mock-up with the pattern pieces out of some more scrap fabric and that looked good, so onto the real thing.
For the white panels, like I mentioned in the fabric section above, I was using the stretch suede and backing it in neoprene. So for each white panel, I basted the 2 fabrics together first before assembling the shirt. Then added the sleeves.
For finishings, I made a facing for the neckline and got that sewn in, and hemmed the bottom edge by hand. And with that the top and pants were done.

The Boots: The boots were a saga. I put more work into these boots than the other parts of the costume combined!
So I had picked up these little ankle high wedge heel booties at the second hand store to use for this. I was just going to create the upper shaft section of the boot myself.
So I spent all one weekend painting the heels, making the pattern, making a mock-up, cutting the fabric (again using the suede + scuba basted together) and it was at the point I got one boot cover put together that I realized I had an issue. The scuba just didn’t have the stiffness I was thinking it would have, and the upper shaft section of the boot was going to look droopy and bad. I experimented with adding some stiffer fabric, but after agonizing over it for a few hours, I decided to just buy new boots.
So I ordered some knee high wedge heel boots online, and when they arrived, I started the process all over. Painting the heels, making a pattern, doing a mock-up. In this case, I cut the top like 3 inches off the boots, and I also sewed the zipper opening closed (it was only a short zipper through the ankle section).
Then I got the boot covers made and originally had planned to hand-sew them into place on the boot, but alas, I could not get a needle through these shoe portion of these boots. So I used some permanent double sided fusible tape to attach them along the heel. I sewed them to the boot at the top edge, and then added some grey mousetail cord at the point where the boot covers end and the heel starts, just to make it look neat.

They are a BITCH to get off and on without the zipper. I may have to cut myself out of them at dragoncon if my feet swell even the tiniest bit. Please pray for me, LOL. If I one day have to put a new zipper in, it’s do-able, I made sure I could go back and edit the upper section of these if needed.
And as for the first boots and boot covers? They went on to become my Breha boots!
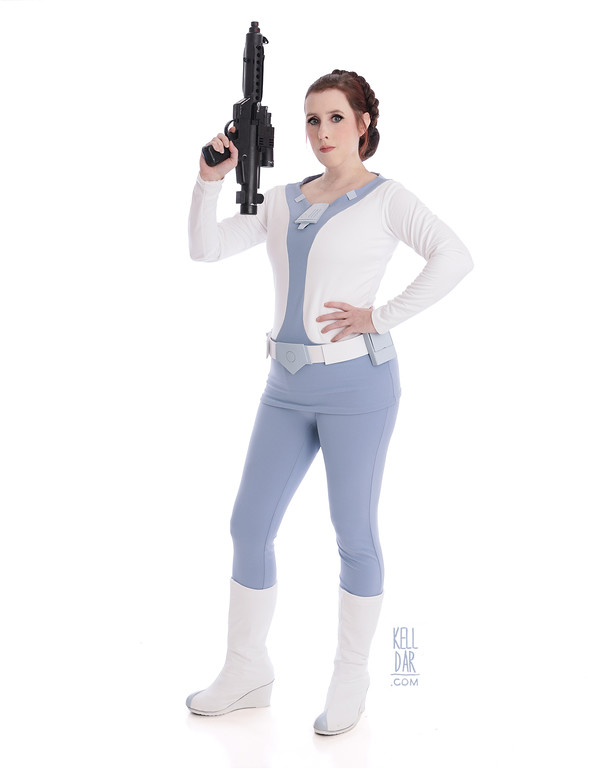
The Accessories: Chase 3-d modeled and printed most of accessories! That includes the parts for the shirt and the belt, as well as the toe caps on the boots. He did find a file on thingiverse to use for the hair comb.
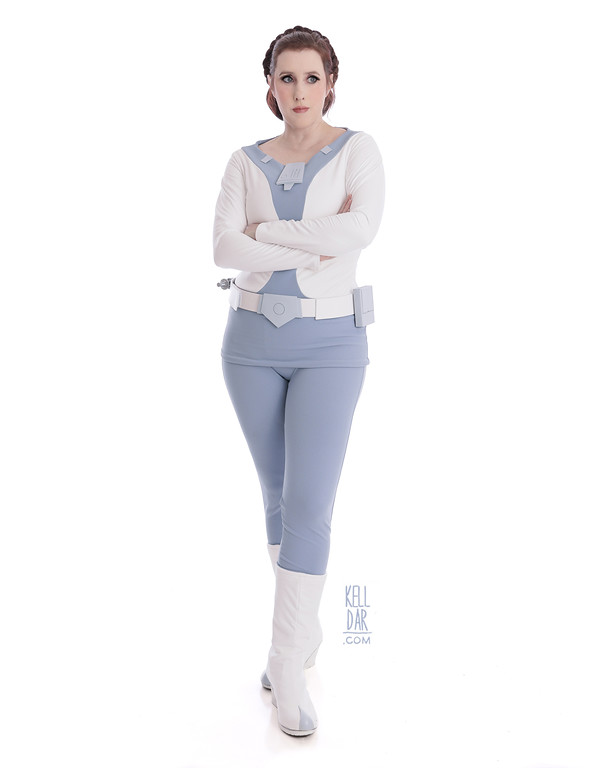
The belt is 2 belts – I used a less tall belt for the shorter part in the front (and the rest of that belt went on to be my Flashback Jedi training Leia belt) and a slightly taller belt for the main section. It velcros at one of the front edges.
The hairpiece was an adventure. I tested out some of my existing Leia hairpieces, and decided I’d have to make a new bun for the lower part, but I could use an existing braid for the halo braid above it. So I made the lower hairbun – it’s basically a small pillow made of black knit fabric and batting, covered in a brunette hair extension, with the hair glued down and a hairnet sewn around it.

Once that bun was done, I tested it out with an existing braid and my haircomb and hated it. The braid just didn’t work well with the bun, I had nowhere to “put” my own hair so I tried braiding it and putting it underneath the existing braid, but that just looked sloppy. Plus my own hair didn’t match great (and won’t match great at dragoncon…) so seeing my own hair visible inside the halo braid just looked bad.
So back to the drawing board. I decided to make the entire thing one existing piece – including the “back of the head” hair you see inside of the halo braid. So I started out by cutting out a circle of kobracast and heat-forming it over the back of a wighead. Once that was cool I sewed some brown fleece around it, then sewed one of the remaining hair extensions from the bun at the upper edge. I gathered the hair at the bottom edge in a ponytail, tucked it under to the “wrong” size and glued it down there. Also glued down the hair on the outside so it would stay in place. With that done, I cut out another circle of brown fleece and glued that to the inside just to cover up the ends of the extension and make it neat.
So now I had a little tiny hair hat. Next was the halo braid – I ended up buying a braid headband on amazon that worked way better for this than any braided extension. I just hand-sewed this around the outer edge of the hair hat, and since the lower part of it is just elastic, it doesn’t create weird bumps and lumps for the hairbun – and because it’s a headband there are no loose ends to have to hide.
I decided to go ahead and sew the hair comb permanently into the hair bun, then sewed that to the bottom of the hair hat – and it was done, this will be much easier to put on at a convention than trying to hide my own hair (can just curl it up under the hair hat) and make 2 different extensions/buns work!
![]()


![]()


Please note that none of these costumes are for sale! This is my personal portfolio.