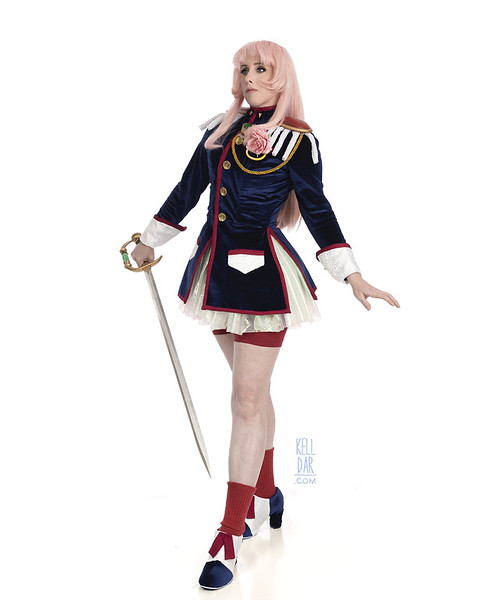
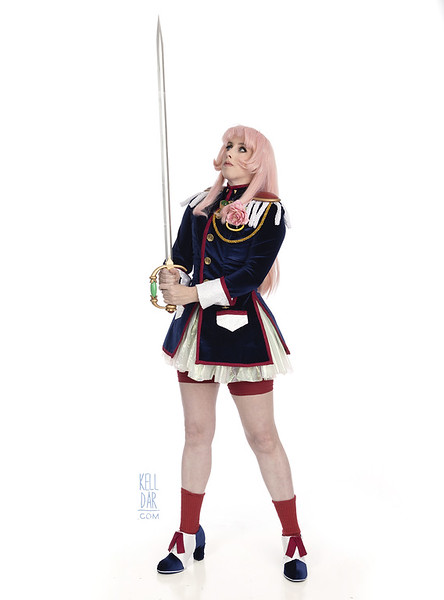
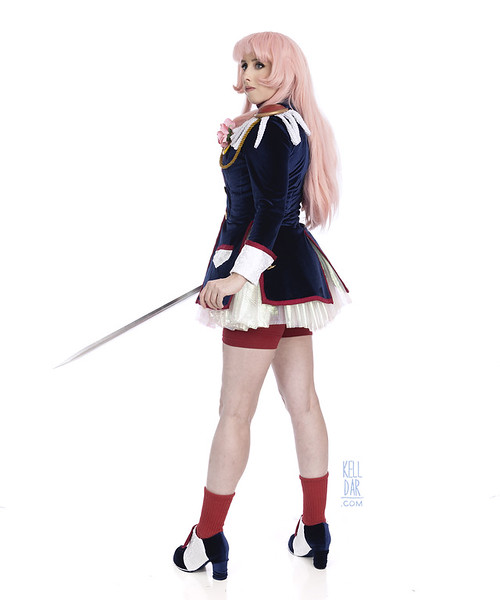
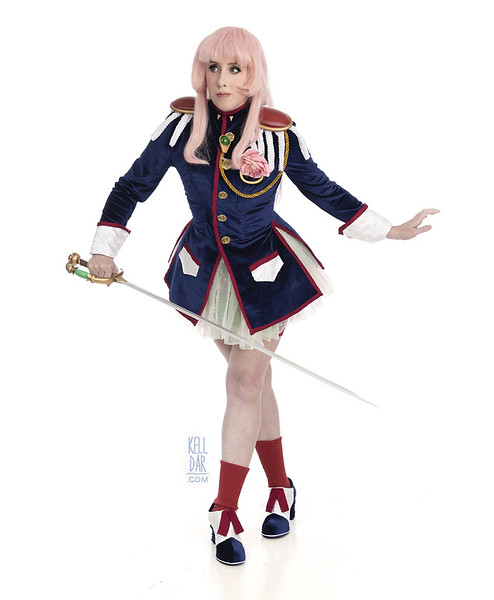
Utena, 3rd Version
Source: Revolutionary Girl Utena
Made for: 20th anniversary of my first Utena costume from November 2001
Journal Entries: Read more at my Utena tag
Related Costumes: Utena 2007, Utena White Uniform, and Utena 2001
![]()

![]()
Patterns Used: None

I was never happy with my 2007 remake of Utena, so I’ve wanted to redo it for ages – the 20th anniversary of the original seemed like the best opportunity.
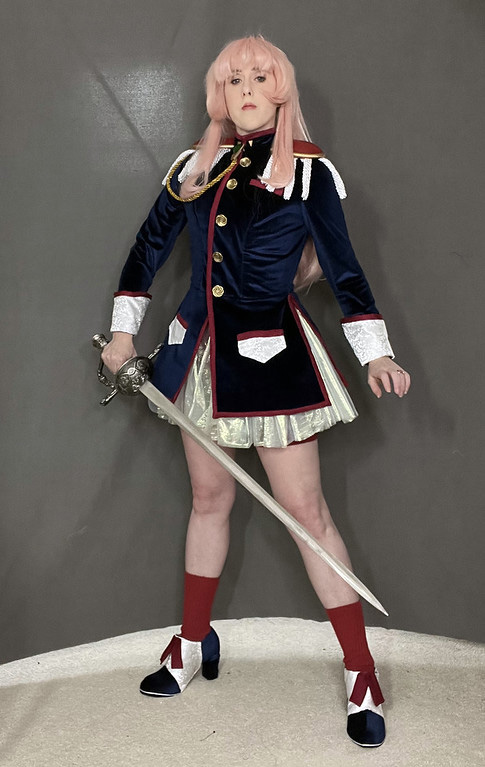
Wig:
The wig is from Arda, I love the colour! I straightened and recurled it. It’s not exactly how I wanted it to turn out but it’s fine.
Jacket:
Deviating from my previous 2 Utenas, I decided to not use an existing pattern to modify for the jacket. Instead, I made a duct tape dummy and cut it apart and used that as the basis to make my own pattern, because I wanted it to fit me really well.
For fabric, I wanted to use velvet this time, instead of suede like the last 2 times. I couldn’t find a deep royal blue velvet that wasn’t stretch – so I just used stretch. I backed it in stabilizer to prevent it from stretching. The upper part of the jacket is flat-lined in cotton, with the lower panels flat-lined in taffeta. Then the entire jacket was lined in blue lining fabric.
I didn’t want to do an actual button/buttonhole closure in the front; I did that on the 2007 version and wasn’t happy with how it pulled. So I instead I did an interior closure – I did 2 panels out of my taffeta lining that zip close in the front, and then the jacket closes over that with snap tape. The buttons aren’t functional, they are just for looks.

I found a really pretty red-on-red brocade I decided to use for the trim and red parts; it was pretty but was a giant pain in the ass. It took me well over a month to attach all of the trim – about halfway through I realized it would’ve been better if I’d had stabilized it but I wasn’t about to start over and do that. I didn’t get the point turns quite as clean as I wanted, but by that point I just wanted it done.
The white fabric for the cuffs and faux pockets I made of leftover Anne Boleyn fabric. The buttons I found on etsy; they were EXACTLY what I had in mind, so I was very excited to find them!
Shoes:
I bought some shoes on amazon, they had the shape/heel I wanted. I removed the laces and sewed the front closed (wide enough I could still slide my foot in). Then i covered them in my stretch velvet and made spats of the leftover white satin from Anne Boleyn, and made bows out of my red trim fabric. Finally I sewed on a thin white ribbon along the bottom edge.
Skirt:
in the previous 2 versions, my underskirt was part of the jacket, sewn onto the inside. For this version I decided to make a separate piece. I picked up this holographic organza while I was in Atlanta for Dragoncon – it just looked totally magical and I had to have it. I cut it into one long length, to the right height, and let the selvedge end be the bottom so I didn’t have to weight it down with a hem. I pleated it onto a bias tape waistband and finished the front edges by hand.

Accessories:
I decided to keep using the same shorts I’ve used for the previous 2 versions! And I’m also re-using the socks from version 1. Same ring, rose and rose holder too.
For the brooch/jewel on the front, I lucked out – I had bought a Sailor Jupiter gem on etsy back in 2020 for my remake of that costume, and when it arrived, it was too small. But it was cute so i kept it. Turns out it was the perfect size/look for this Utena gem! My husband 3d modeled/printed the lower section which has a loop on the back to hold the gold braid in place. The whole thing attaches with a pin back.
For the shoulder epaulets, I wanted to go the 3d printed route for sure. I was never happy with the previous 2 versions, and my goal for these was for them to be hollow on the inside so they would fit DOWN on my shoulders instead of sitting up and making it look like I have no neck. So my husband 3d-modeled and printed these for me and I’m very happy with how they turned out. For the trim, I bought some bullion trim which has a flat top edge for attaching to the interior of the epaulets without creating bulk. Originally I bought matte white, but it just didn’t look right, so I went back and found a version with a sheen that looked much better. I gathered the tassels into groupings of 6, and then sewed them into a little tube to create larger “tassels.” I had originally wanted to twist them like I did my previous versions, but they looked wonky when I did that, so I abandoned that idea.
My sword of Dios is 3d-printed, using a file from DangerousLadies on etsy. My husband printed, assembled and painted it – it’s beautiful! I’m so excited to finally have an actual utena sword 🙂
History: Nothing yet, I haven’t worn it anywhere LOL
![]()


![]()


Please note that none of these costumes are for sale! This is my personal portfolio.