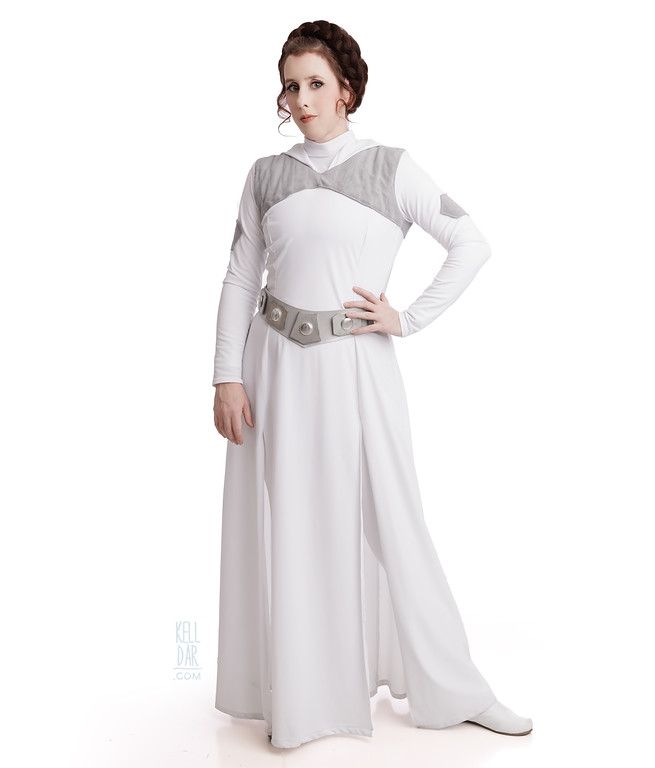
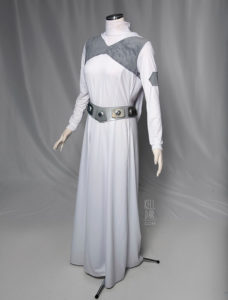
Princess Leia – Jedi Dress
Made for: Dragon Con 2019
Journal Entries: Read more at my Jedi Leia tag
Related Costumes: Marvel Comics Leia, Honeymoon Leia, Cato Neimoidia Leia
![]()
![]()
 Patterns Used:
Vogue V9264, Kwik Sew 2004 (version 2 sleeves)
I actually made 2 versions of this costume at the same time – I’ll be talking about them separately here.
Version 1:
So the first fabric I bought was a cotton jersey that I thought would be a good option for this. When it arrived, it was a little thicker and more “t-shirt material” than I really wanted. I decided to push ahead and make the dress with it, in the back of my mind already planning a version 2. I decided to go ahead and work out the patterns and kinks in version 1, sell it, and make my own version 2.
A Bun Sister on facebook recommended Vogue V9264 for the dress which was a great pattern for it! I cut it out to my size per the pattern envelope, though it ended up too big – after sewing the main panels of the dress together, I put it on inside out and took it up through the body til it fit right. I left the two front seams open from about mid-thigh down to create the skirt slits, and I left the inside edges raw since the fabric doesn’t fray, then hemmed the bottom and the slits.

I went ahead and put the sleeves together – I did the diamond shapes on the sleeves before sewing the seam closed. It’s a layer of grey suede, batting and lining. Got those sewn on, sleeves sewn up and attached. This pattern called for a lot of gathering at the top of the sleeve that I eliminated.
Once the basic body of the dress was finished, I started patterning the yoke – I used some scrap material to get the shapes I wanted for the front and back, and then used those as patterns to cut out the grey suede fabric I’d gotten for the yoke. The yoke is lined in some white fabric I had on hand, and there is an interior layer of low-loft batting.
I cut out all 3 layers of the yoke using my created pattern, sewed each version together at the side seams, and then laid the 3 versions (suede layer, lining layer, batting layer) together and sewed them along the outside edges, leaving the back edges open so I could flip it. Had some difficult flipping it and keeping the batting in place – something I revised on version 2. Once I had the yoke flipped and pressed, I took a ruler and marker and drew quilting guide-lines on the back lining layer. I did my stitch lines 1.5 inches apart. I followed my guidelines on the machine, just starting at one end and working my way around until all lines were done. Then I sewed the shoulder seams closed.

At that point I had a nearly finished yoke that was a separate piece from the dress – it was basically like a backwards jacket. I put the yoke on the dress on the dressform to get the sizing of the back correct, had to trim a bit off at the center back where it was open – then I tucked the raw edges inside, sewed them closed, then sewed the back edges together and pressed it.
Put the yoke back on the form and started getting the yoke attached to the dress. I machine-sewed the arm openings in place around the sleeve seam of dress, and hand-sewed the bottom front of the yoke in place on the front. At this point I needed to switch over to the hood.
I made the hood same as the classic ANH hood – a trapezoid shape longer on one side than the other. I hemmed the edges, and then took the longer ends and tucked it under the top of the yoke at the front. I machine sewed the yoke and hood onto the dress from the top center of the yoke to the shoulder seam. In the back, I took the part of the hood that was still hanging down, ran a gathering stitch on each side, and then sewed it in place along the back collar opening of the dress.
Once the hood was done, I got the back of the yoke machine-sewed in place along the top, though I left the lower back part of the yoke “loose” – so that the dress could still stretch a bit when someone was putting it on. I had one small issue around this time – the back of the yoke along the sleeve edge was gaping away from the body a bit. At this point all I could do was to take a small dart – I hid it under the arm near the side seam, and it did help with the fit, though I wasn’t happy about having to add a dart line over my quilting lines.

I attached the collar to the dress next and decided to finish the back edges of it and put hook-and-eyes in, to make it easier to get on.
And that was it for version 1! I uploaded it to etsy and sold it so I hope it is has found a good home!
Version 2:
So a lot of version 2 was similar to version 1, just with a few tweaks here and there based on what I learned the first time around.
The first thing that I did differently was I got a different fabric. I was already ordering some spandex for Dr Crusher from a site, so I just bundled in 6 yards of white milliskin fabric with it to save on shipping. I liked the milliskin MUCH better for this project!
The next change I made was to cut the pattern smaller. I went down a size – something I’ve ALWAYS done on stretchy costumes but just didn’t think of it while working on version 1. One other size tweak I made was on the front pattern piece — it was meant to be cut on the fold, and on version 1, I felt like the princess seams were too far apart. So for version 2, I edged the pattern piece forward a little bit so about a half inch was hanging off the fold. It helped with the seams a bit.

I still had to take it up a little after sewing the main dress panels together – again I put it on inside and pinned it to size, then sewed along the new pinned lines. It was not quite as drastic as version 1 due to the tweaks I made during cutting. I also opted to use a different sleeve pattern this time around – I didn’t like how much gathering the Vogue sleeve pattern required, so I pulled the sleeve pattern from Kwiksew 2004 – a basic leotard sleeve pattern – and used that instead.
For the sleeves I again repeated the process of creating the diamond shapes and sewing them in place before sewing the sleeves closed. Got those done, and got the main dress and the front skirt slits hemmed. Then it was time to make yoke #2.
So I initally made yoke #2 the same as version 1’s (with one small difference – I sewed the batting to the lining before assembly, so I wouldn’t have the issue of the batting not staying in place while I flipped it). I felt like my inital yoke pattern was working pretty well and didn’t think it needed any changes. At that time, I was still finishing up version 1 while also working on the beginnings of version 2, and once I got to the end of version 1, when I’d had to add that dart to the back, I started rethinking yoke #2.
So here I had a mostly finished yoke and was thinking I may need to completely repattern and remake it. But after messing with it a bit, I realized I just needed to change the yoke-to-dress assembly method more than changing the entire yoke. I meant I was going to have to backtrack a bit – but that was better than making a new yoke.

First, I took the dress partially apart – I removed the sleeves I’d already attached, undid the shoulder seams, and unpicked the side seams about 2-3 inches down. Now I could lay the front and back of the dress out flat without the other side getting in the way. Next I took my yoke and took it apart – I unpicked the shoulder seams, and I cut the 2 back pieces away from the front at the side seams. I was left with 3 pieces – 1 front panel and 2 back panels. I laid the front panel out on the front of the dress, pinning it into place, and repeated for the 2 back panels onto the back of the dress. I put it on my dressform like this to make sure they were matching up, and discovered the issue that caused me to have to create the dart on version 1 – the back pieces were simply too tall. I trimmed them down at the shoulder, and at that point, the front and back pieces were matching nicely at the shoulder and side seams. I decided I also should unpick the sleeve edge of the yoke, because I decided instead of sewing it directly to the top of the dress (thus needing the finished edge), I wanted to have the edge be in the sleeve seam this time. So to reduce the bulk I unpicked the finished edge. Now it was time to get it all attached to the dress.
Again it was a careful dance of sewing parts in place and then having to work on the hood – but with the dress partially disassembled it was a LOT easier to sew the yoke panels in place. I got the front sewn in place along the bottom edge, then went ahead and sewed the side and shoulder seams shut (dress and yoke seams together). It was a much cleaner look than version 1.

At this point I paused to make my hood – I wanted to change the shape a bit from version 1. It was essentially the same trapezoid shape, but I cut the long end longer than version 1. I probably added 8in of extra length. Again I finished the hood edges, sandwiched the long edge between the front of the yoke and the dress, and machine-sewed all 3 down together, from the center top front of the yoke to the shoulder seam. Again, I gathered the excess in the back by hand, and machine sewed it to the collar opening in the back.
Once the hood was in place, I got the back of the yoke closed up and finished, and then got it sewn in place onto the dress. Then I got the sleeves sewn back on – again, catching the edge of the yoke sleeve opening in the seam for a cleaner look.
At that point all that was left was the collar, which this time I sewed completely closed in the back. I have a tiny head so I wasn’t worried about being able to squeeze through it LOL. And version 2 was finished!
Accessories:
For the pants, I decided to dig up my old Snowbunny Padme bodysuit. That way I had a full white suit on underneath the dress to keep it from being see-through and also gave the illusion of wearing pants.
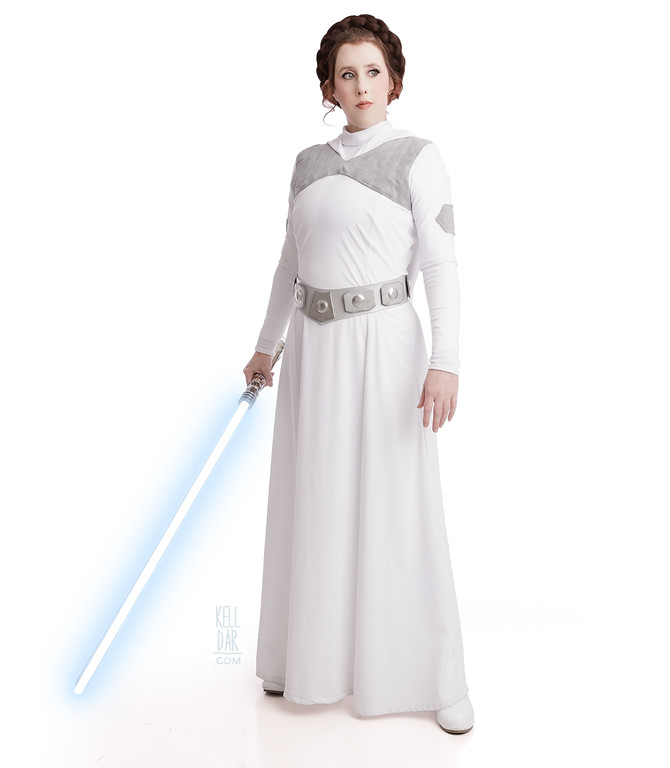
The belt is my 2007 ceremonial Leia belt, just updated. In 2007 we never quite finished it – only did 5 plates and just closed it with some sticky-back velcro. I always wanted to go back and add 2 more plates and replace the velcro with snaps but never did. Until now!! I took the belt over to my parents’ house and dad made 2 new plates for me out of craft metal, based on the dimensions of the finished ones on the belt. I scraped the old velcro off (which also lifted off the silver leather paint underneath it! thankfully Tandy still carries the same silver paint so I was able to patch it!) and we replaced it with snaps.
My boots are from amazon, placeholders until I finally achieve this pipe dream of making my own Leia boots from scratch. But they get the job done and I was pretty pleased with them for only $40!
![]()


![]()


Please note that none of these costumes are for sale! This is my personal portfolio.