
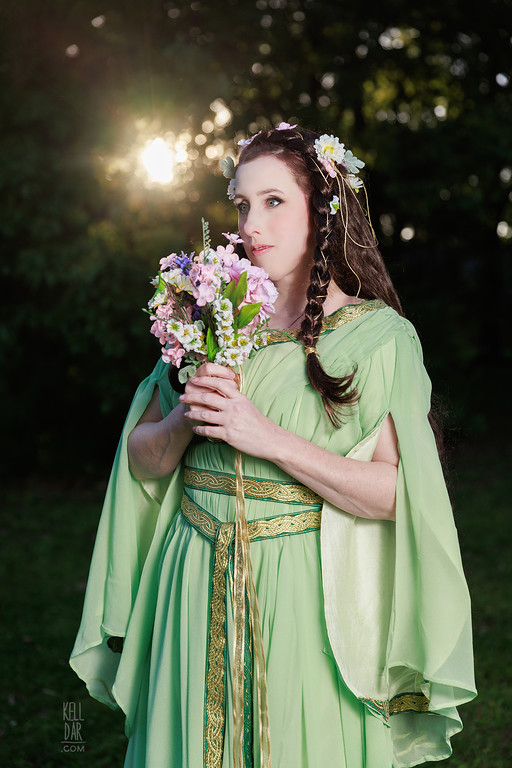
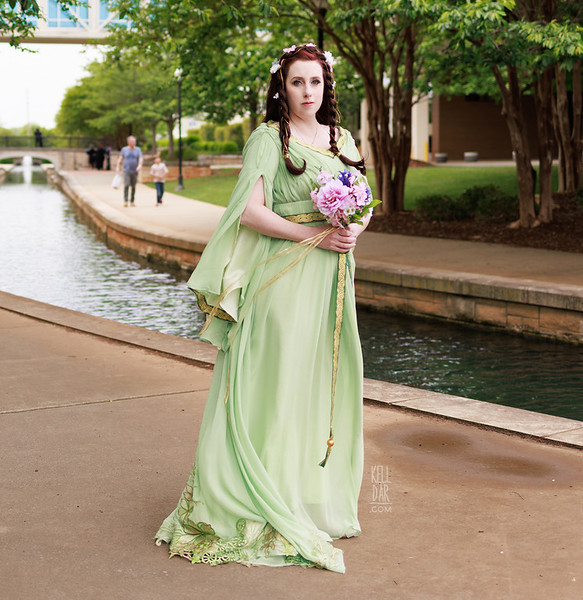
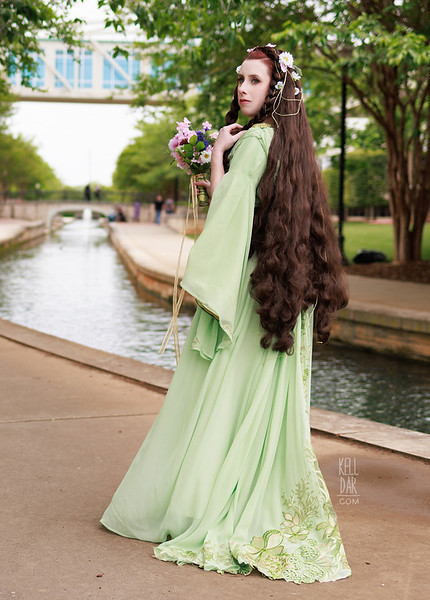
Leia’s Wedding Dress – The Princess and the Scoundrel
Made for: I Don’t Know 2023
Background: I mean it’s a new Leia costume, I gotta do it. Also the book was great.
Journal Entries: Read more at my Wedding Leia tag

-

- 2023 Photoshoot
-

- 2023 Photoshoot

-

- 2023 Photoshoot
-

- 2023 Photoshoot
-

- 2023 Photoshoot
-

- Wedding Leia
-

- Wedding Leia
-

- Wedding Leia
-

- Wedding Leia
-

- HSV Expo 2023
-

- HSV Expo 2023

Patterns Used:
Background:
As soon as I saw the first image of the art for the cover released I wanted to do this! I even bought fabric back in summer 2022 hoping I could sneak it in for Dragoncon that year… what was I thinking? I used to be that girl, I’m not that girl anymore, I can’t do things that fast anymore LOL.
So I had a pretty good game plan of how I wanted to make this from that first image and once I realized there was no way to finish it for dragoncon, I decided to start on it after con was over.
And thank goodness I waited because early September they dropped new art of this costume. Which was, structurally-speaking, a completely different dress than the first one. Which threw my whole game plan into a tailspin as I now had to rethink everything.
I can’t think of another project that has quite as fractured a construction process as this, and I think having 2 very different references played into that. Also the fact I wasn’t in a hurry to finish it – didn’t have a con to wear it to for months – and just personal life stuff, I worked on this from September 2022 to Feb 2023. And it wasn’t like I was working on other stuff in that time. This was the only thing I had going.
But anyway let’s jump into it…
Fabric/Dye:
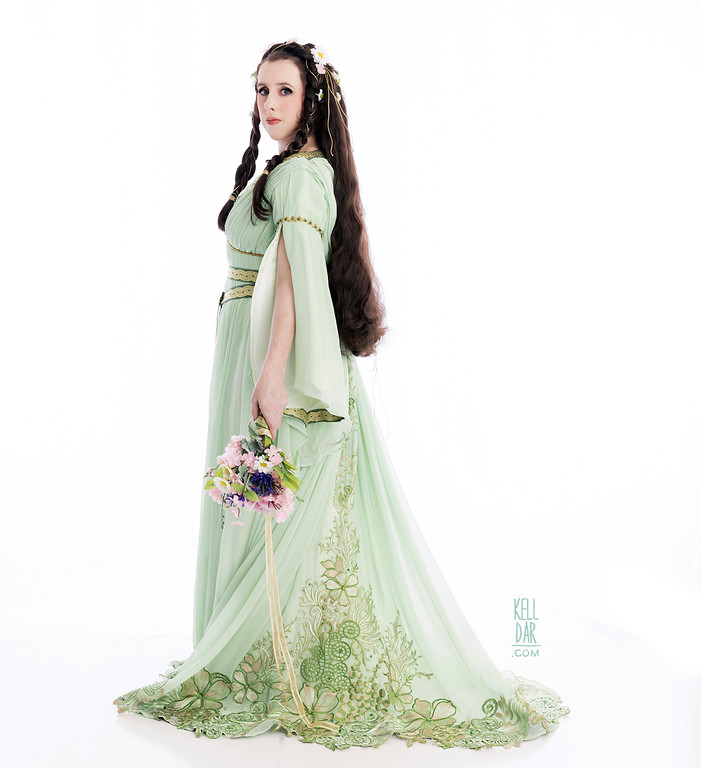
So as I mentioned I bought fabric back in summer 2020. This was the floral lace fabric, and I bought this to use for the back/lower hem design as it was seen on the first, earlier reference. It was a little bit more of a nebulous design on that reference, so I felt just going with something I thought was neat looking was the best choice.
Then the second reference came out with a much more solidified back design and I had to make the decision of jettisoning this original fabric that I LOVED or just going with it. I decided to just go with it.
For everything else, I definitely wanted a silk chiffon for the main dress. So I got that ordered from dharma trading.
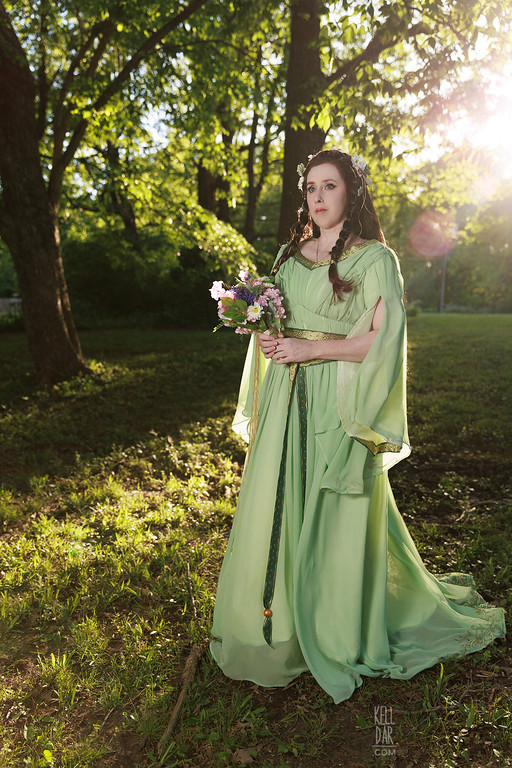
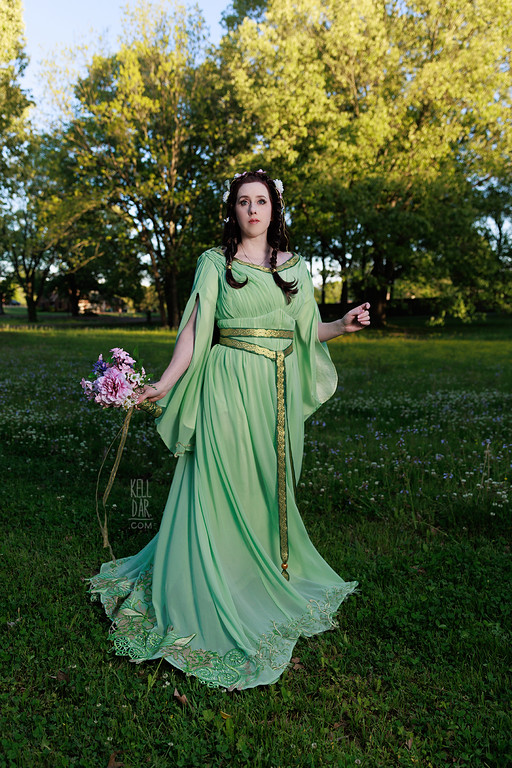
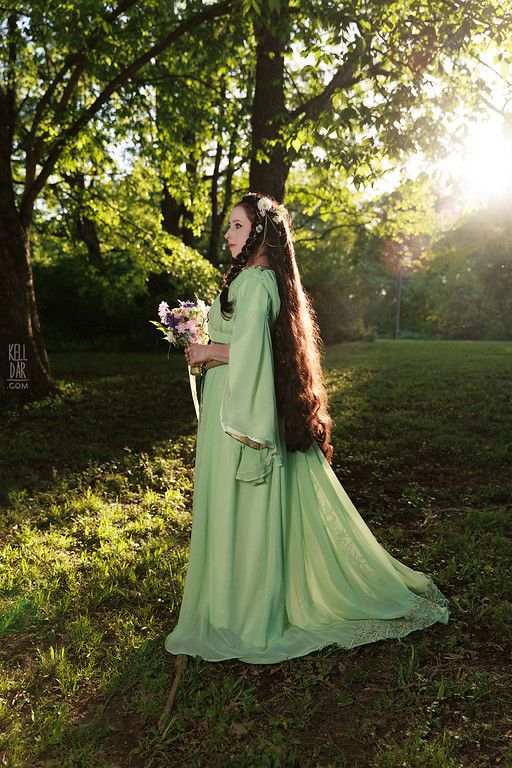
When it arrived I played around with some dye colours until I found something I liked. I liked the softer seafoam colour of the first reference best so that’s what I went for and it took a couple of rounds of dye to get there (tweaking the tone) but I’m really happy with the end result.
For the lining I was trying to cut expenses so I decided to use 3 more of the silk curtain panels I used from Eliza. It’s a little shinier and stiffer than I’d have ideally wanted, but since it’s not really seen, it’ll work ok. I dyed these panels a very pale green. I didn’t it to be too dark and cause the chiffon to look darker/a different tone than I was going for.
Dress:
And THIS is where the waffling truly begins. Because I kept re-thinking and re-doing things. Like I would probably do a week’s worth of work, then spend a day undoing that week of work, do another week of work, and undo it again. It was extremely frustrating.
Also if you are reading my blog posts on this project and they say something slightly different than what I’m saying here – go with the blog post. I’m writing this so far removed from the first month of construction that I’m probably an unreliable narrator at this point LOL
So anyway, I did start out by using a pattern for the lining layer. I cut the dress panels larger than the pattern called for because I wanted it to be somewhat loose fitting. Originally I had planned for this costume to be pulled on over my head with no closures, so I had wanted to keep it loose so it wouldn’t be too hard to get off and on.
So I got the lining layers assembled, took it up a little bit just so it didn’t look TOO big – and then it was time to drape the chiffon.
I cut the chiffon into basically 5 panels. 2 large rectangles for the front, 2 large rectangles for the back, and a 5th smaller panel that would be the outer corset layer and sleeves.
I got the chiffon panels sewn together vertically, then sewed front to backs at shoulder seams. I put that on my dressform and gathered the shoulder seams until they fit on the lining.
Once that fit, I sewed the chiffon layer to the lining layer at the neck I had to go back and lower the neck a few times as I tried it on. Ever since the debacle of my 70s Supergirl neckline, I start high and then go down in increments LOL. I probably still have it a bit too high but ah well.
Now that it was all one piece, I gathered the chiffon dress in a little bit at the underarm so it would fit the lining layer’s sleeve opening and then basted them together.
Then I started pinning pleats. And I tacked pleats. And I cut away pleats. And repeated the process. Over and over and over again.
At one point I decided to make it an elastic waist, so all of the pleats would automatically pull in at the waist and I could just tack the pleats on the upper chest. Well trying to sew elastic into this proved impossible. I tried so many different times in different ways. Finally I just put the elastic in the lining layer and then only sewed the chiffon outer layer down in segments. It wasn’t pretty, but this area wouldn’t be seen so I decided not to stress over it.
But, everytime I’d pull this off and on over my head to try it on, my hand-sewing to hold pleats down would pop in a spot or two. Everytime. It got worse once I put the sleeves on. I finally decided that pulling it off and on wasn’t going to be functional. So I split open the back seams and put in a zipper (dyed to match).
It made it feel like all that back and forth with the elastic was pointless, but at least the dress was now functional.
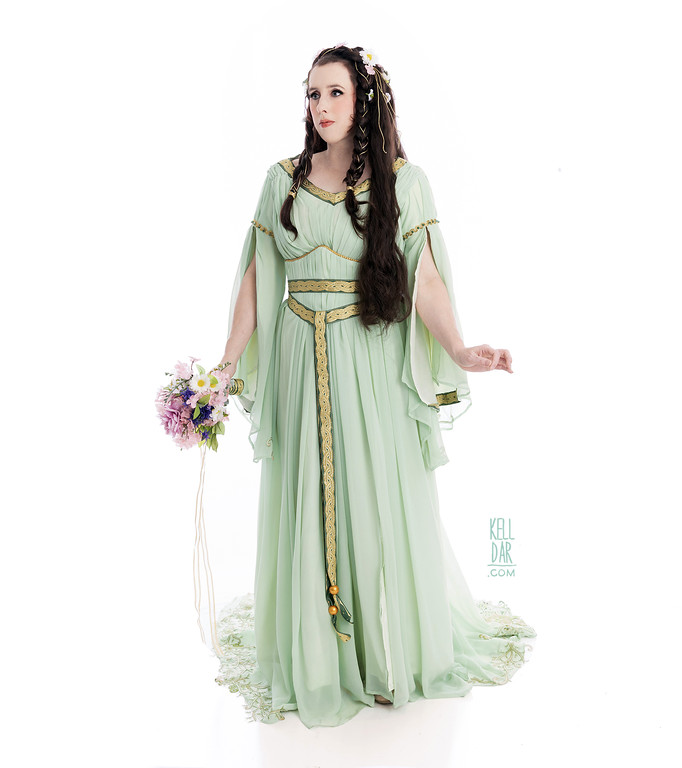
Then I waffled on the sleeves. I drafted a pattern myself, went through a couple of mock-ups. Cut the lining layer, it looked fine. Then I was going to drape the chiffon layer over it similar to the dress – but everything I did just looked CHUNKY. Like there’s already a lot of fabric through the torso, and then having the visually “heavy” gathered sleeves was just too much. So I messed around with them for a couple of weeks, slimmed them down, and only did a couple of small pleats on the outer arm.
Anyway at this point it was December and I was FINALLY done with the basic dress. I hemmed the sleeves and bottom hem by hand and it was finally time to do the fun stuff.
Corset:
Oh but before we get to the fun stuff we have to talk about the little corset piece.
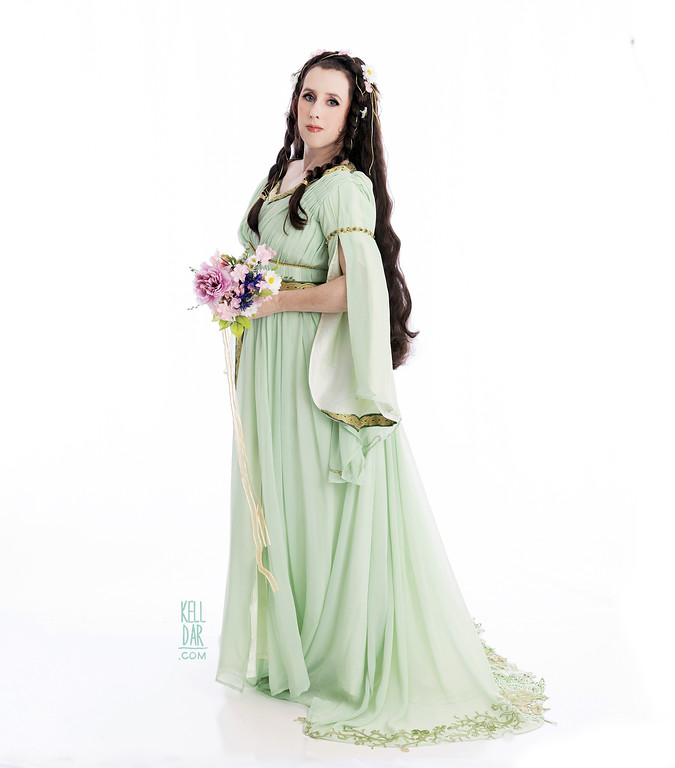
So I’ve done a very similar dress with my Megara costume a few years ago. Lots of silk chiffon pleated and gathered over a base. And try as I might I always felt like the amount of fabric pleated around my waist/torso just never looked a smooth/sleek as I wanted.
I didn’t want a repeat here. I knew trying to get that amount of gathering of the dress to look form-fitting was going to be a challenge, so I looked back at Megara’s issues… and I decided to go with the solution I see a lot of other Megara costumers do – doing the waist area as a separate, matching corset piece.
That wasn’t the plan originally. From that first reference I was going to make this as a wrap dress with minimal gathering. but the second reference was way more gathering – which I liked – but it also showed a very distinct underbust seam that I thought would work as the break where a corset would sit. So it worked out.
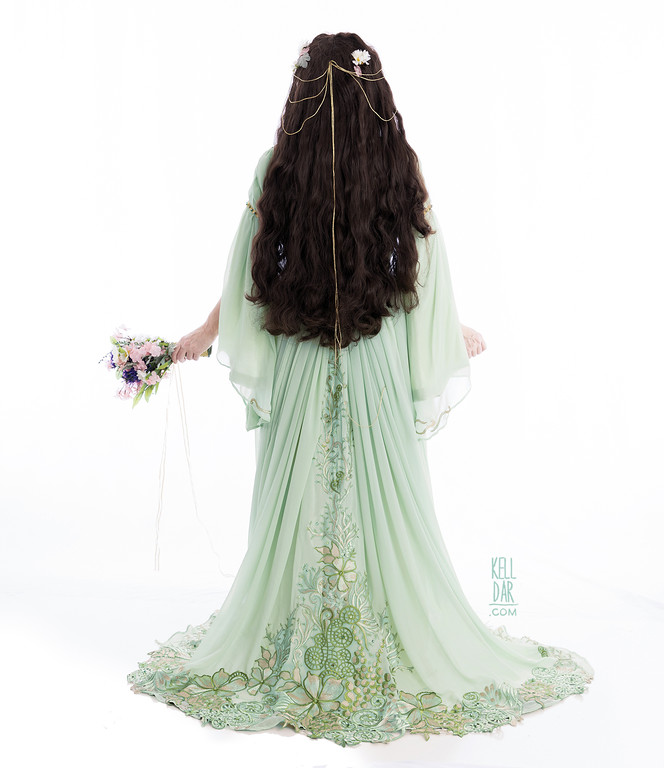
I made the little corset by starting with my fav bodice pattern, cutting it down in a very small “waspie” style underbust shape. I used some leftover white bottomweight fabric from another project and did 2 layers of that with boning. Once that was fitted, I cut the same pattern using the silk lining layer fabric as a base – then took the long rectangle I had left of chiffon and pleated it down to fit on the lining layer. Sewed those together, trimmed the excess, then sewed it onto the white base. It was not easy to flip this right side out – especially multiple times after having to fix a few spots and then trim edges – but the end result was good.
I added in 2 small flaps in the inside back for the eyelets, then had 2 larger flaps covering that to hide the lace-up back. It snaps closed over the lace-up back. Originally, I didn’t include the underbust trim, but after our photoshoot, I added that, you can see it in the Dragoncon 2023 photos.
Embellishments:
And NOW the fun part.
So I like I said earlier, I had to have a moment of “do I use this lace fabric I absolutely love, or do I do something more accurate to the second reference?” I decided to stick with the lace fabric.
I also waffled on how and where I wanted to use the lace fabric. Originally I had planned to leave it uncut, gather it at the top and sew it into the waistline between the lining layer and the chiffon layer. I thought it would be dark enough to be visible without being too “in your face” – because I liked how subtle the designs on the skirt looked in the first reference and wanted to capture that.
But after experimenting with it, it just didn’t work. It got completely lost under all that chiffon.
So back to the drawing board and I decided instead I would cut the lace up and create large appliques out of it that I would sew directly onto the outer layer.
I avoided doing this for weeks. I didn’t want to mess it up. Finally got it out and looked at it, decided where to cut, slept on it, looked at it the next day and was still happy with it, slept on it again, made my husband look at it, slept on it again… and THEN I finally cut it LOL.
For the first, largest piece I cut it out with my heated xacto knife like I did with my Padme floral lace. But quickly realized that wasn’t really necessary, scissors cut it just as neatly. I cauterized any edges where I had to go across the design, and trimmed the mesh around it down as much as possible. In some of the areas I did have to leave more mesh than I would have wanted – especially around the smaller vines, since the vines had tiny little branches on them I didn’t want to lose and I didn’t want to cut too much of the connecting mesh away and cause it to lose integrity.
So I got the largest main pieces hand-sewn on, then started adding in smaller pieces, and I went along I learned I didn’t need as much mesh left as I thought I did, and my cuts and clean up got much better. By the time I did the small vines on the back of the sleeves, I was a pro LOL.
Before Dragoncon 2023, I added a bunch of tiny green and clear crystals to the applique. They don’t show up in pics, but it looks like little sparkly dewdrops in person.
For the ribbon trim and belt, I got this green/gold trim from Calontir Trims. I wanted something that would work with the lace and the colour of the dress. Overall pretty happy with it. I sewed the ribbon on the neckline and then started on the sleeves – but after fully sewing the ribbon onto the inside edge of the sleeve lining, I didn’t like it. It made the sleeves way too stiff. So I took it off and only did it on the lower edge of the inside.
The ribbon belt is made of the same trim. It is sewn into place on the cincher at the center front, then snaps closed in the front. Added some gold beads at the bottom.
Before Dragoncon 2023, I decided I wanted to add the trim at the upper arm, which I had originally skipped. I couldn’t find anything I really liked, I bought something but the gold of it didn’t match my other golds. I dug through my stash and found my gold trim I used on the edge of the Post Senate Amidala cloak, and used that. I added dark green crystals in between each “loop” to give it a similar look to my ribbon trim.
Accessories:
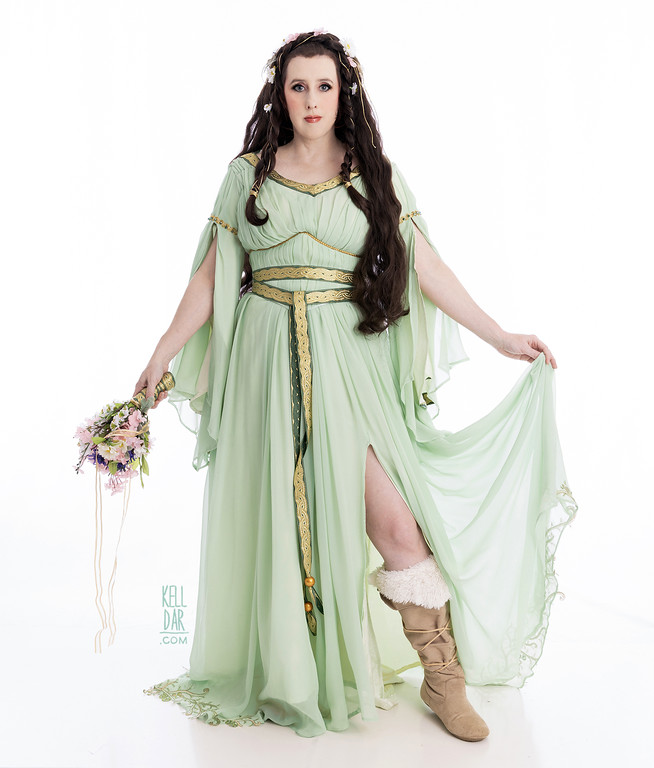
The boots I searched for high and low because I wanted something that looked like it belonged in ROTJ, suede boots similar to what I used for Huttslayer or Boushh, and I wanted the colour to be something that didn’t overshadow the dress and draw the eye to them. Finally found these light tan suede boots and when they arrived I loved how much they look like the boots they tested with Carrie’s actual ewok village costume! So much so I didn’t want to make too many adjustments to them so I could wear them with my ewok dress too!
So I made the fur toppers removable – they velcro onto the inside, and the lacing is just some leather cord I tie on around the boots once they’re on. I had wanted to make a sort of partial boot cover/wrap piece similar to my Hoth boots, but decided I didn’t like it after testing it and just let them be.
The wig is from Epic Cosplay Wigs — I curled it, trimmed it, and added the braid crown. Wove some gold cord into the braid, sewed some flowers in. Before Dragoncon 2023, I shortened it a bit so it was closer to the same length as my Ewok Village Leia wig.


 <
< 


Visit my FAQ | Contact Me
Please note that none of these costumes are for sale! This is my personal portfolio. Thanks!