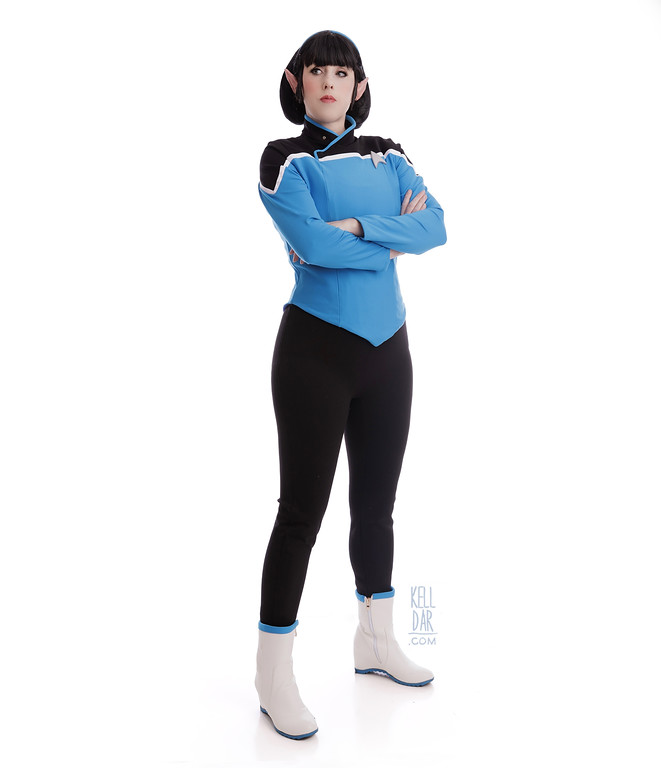
T’Lyn- Star Trek Lower Decks
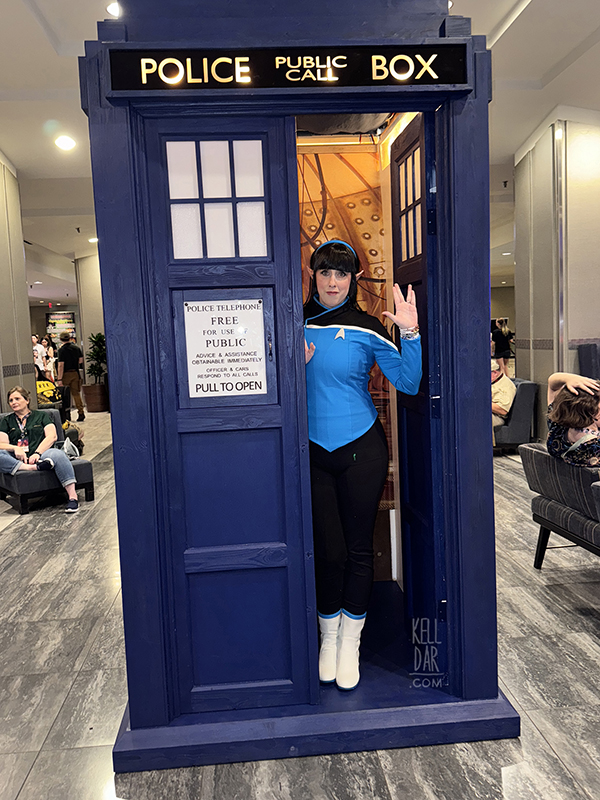
Made for: Dragoncon 2024
Related Costumes: Seven of Nine, ToS Uniform, Dr. Crusher
Journal Entries: Read more at my T’Lyn tag
![]()


![]()
Patterns Used: Sionnach Studios’ Space Trek jacket pattern (modified), and Kwiksew 2722 (pants)

The Fabric: I picked up my favourite refined ponte knit from Joann for the black sections, and originally I got a blue stretch knit at Gail K’s in Atlanta for the top, but eventually decided it was not quite the right colour, so I found another refined ponte knit in teal from Boho Fabrics and ordered that instead. The white parts were leftover jetset knit from a Leia project, doubled.
The Top:
So I used the Sionnach Studios’ Space Trek pattern for this as a starting point, which had the right yoke and all, but was cut straight across the bottom, meant to be a bit more boxy-fitting, and meant for non-stretch fabrics. I tested out the pattern pieces in some scrap spandex first to see what kind of modifications I needed to make to make it work for stretch, and thankfully it wasn’t a lot – I cut it out to the smallest size available on the pattern, and took it in a bit as a needed. In that mock-up spandex stage I also adjusted the shape of the bottom to come to a point.
That was easy enough – transferred my modified patterns to my real fabric. I used the original blue knit I bought at Gail K for a lining layer.
To add the white stripe to the yoke, I cut long stripes of some leftover white jetset knit from a Leia project, folded it over, and sewed it along the edge of the assembled yoke pieces. This was all easy enough, the only tricky part was the points on the sleeves.

This all went swimmingly until I got it right up to close to being done – the Sionnach Studios pattern calls it to have a front closure, obviously – right there on the side right seam. And I went along with that planning to do a snap tape closure.
But I got up to the point of beginning to plan that and realized… I can’t do that. My jacket is fitted and stretchy, and even though this knit fabric is pretty thick, I realized the snap tape is going to show REALLY badly, both from being pulled by the stretchy nature of the fit, and just being rather lumpy underneath the fabric. So back to the drawing board.
I decided to just do away with the front closure and do the same treatment I did for my Seven of Nine top the year before – where the only closures are at the neck to allow my head to fit through, but the body part of the jacket is sewn closed. To do that, I ended up taking out the lining, removing the underlap portion of the front on both the main layer and lining layer, and then putting it back together with the outer layer being fully sewn to the side right seam on both layers, up to the point of the yoke.
I got it all finished up, cleaned up and pressed again and ready to mark the snap closures, only to try it on and realize it wasn’t sitting right. Somehow in all of the man-handling, my lining layer ended up being shorter than my outer layer on one side, and it was causing the bottom to crumple up funny. I tried to just fix the area that was having the issue, or to just take it up at the yoke seam, but nothing was working, so I ended up having to take the lining out AGAIN to line it up with the outer layer and get everything matching again.
Finally re-assembled it all but it was a lot more unnecessary drama than I needed – and mostly avoidable if I’d just thought ahead and tried it on more often LOL

Accessories::
I made the pants using Kwiksew pattern linked above – my usual way of making fitted costume pants with no front crotch seam, by altering this unitard pattern. I added a waistband at the top and called it a day, these were pretty simple.
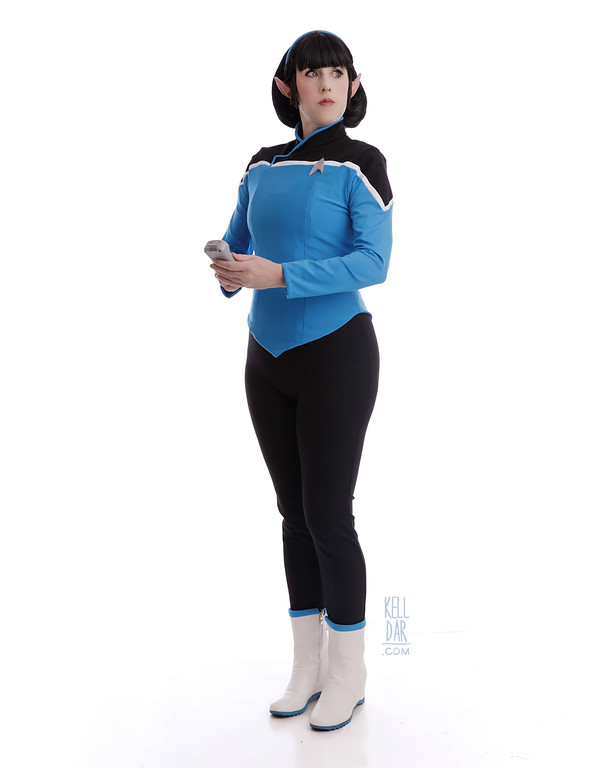
For the boots, I decided I wanted a wedge boot with a hidden heel instead of plain flat rainboots. So I hunted up and down for something that looked how I wanted. Finally settled on these from amazon and I’m really happy with them! They give me just a little extra height and are still pretty comfortable, and I love the shape. I had to remove some hardware and re-sew an edge where I removed a strap, add the blue stripe to the top and paint the soles.
Chase 3d-printed and painted my badge, and my pip is just a single magnet.
The wig I wore at Dragoncon is actually my 2nd wig. The first one I bought on amazon and it was SO cheap. The worst part of it though was it had a weird pointy shape to the top of it, like it was made for a conehead?? So after cutting and styling it I decided it looked too awful on me and bought another one from amazon. This one was better quality and didn’t have the weird point in the top. Trimmed the bangs, added the “sideburns” and steamed the whole thing to make it all lay as flat as possible.

After Dragoncon, for our white backdrop photoshoot in November 2024, I originally shot this as I wore it at Dragoncon, with the same wig and all. After I got pics back, I just wasn’t feeling it. The wig just didn’t look the way I wanted. So I bought a new much nicer wig (NOT from amazon LOL), styled it differently this time, and we reshot the costume in December 2024. I LOVE the new wig so much more! It looks the way I wanted! I do want to tweak it a little further before I wear it again, but it’s miles ahead of the first wig.
So quick run down of the new wig – it’s from Epic Cosplay Wigs. I trimmed out some of the wig cap/wefts around the ear to help make it fit better around my vulcan ears. I sewed a hairnet to my headband which I use to scoop all of the hair in the back into, creating the rounded shape. The two sideburns at the front are separate pieces I made out of wefted extensions and sewed in place. I do want to go back and tweak it a little more before I wear it out – I may take some more out of the wig cap because it’s still in the way of the ears and forcing them to poke outwards more than I want. And I want to “repoint” the sideburns again now that they are sewn in place. But miles better than the amazon wig.
I covered a headband in my matching fabric, and bought some ears on amazon. I’ll be replacing the ears in the future, they aren’t great looking, I need to invest in some decent ears again… all of my old elf ears are dried up!
Final Thoughts::
Overall I was really happy with how this turned out! It was very comfy to wear at Dragoncon, wore it as my late night costume twice. Only thing is I have no pockets or even a place to loop my badge, so I need to make some kind of bag to go with it.
Also somehow my neck snaps ended up misaligned – even though I corrected the positioning when I tried it all on right before we left for con! But when I put it on at con, it was somehow off again. I also feel like the collar is still slightly too big on me, so I’m going to see about taking it in where I can to get it fitted to my neck a little better, and get that snap in the right place.
I do also feel like the sleeves especially around the shoulders don’t fit exactly perfect, but that’s not really something I’m going to harp over for a fun costume.
![]()


![]()

Please note that none of these costumes are for sale! This is my personal portfolio.