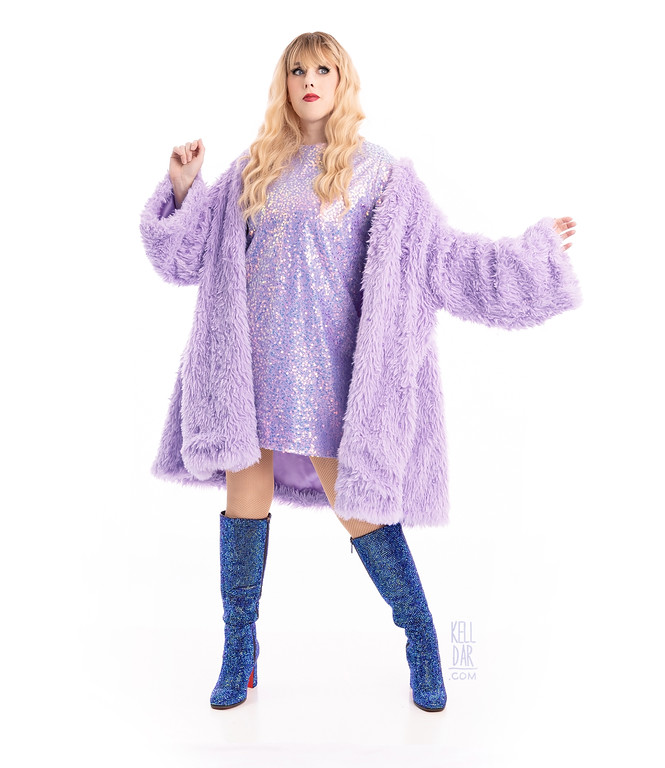
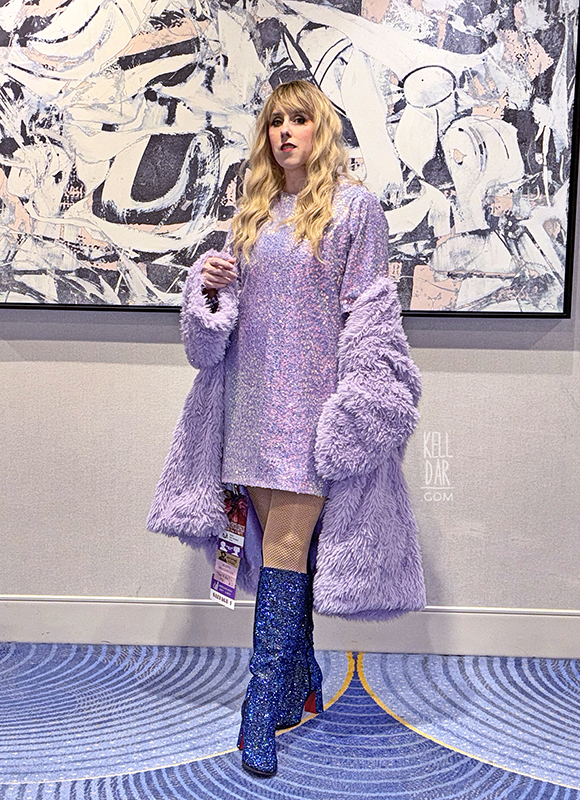
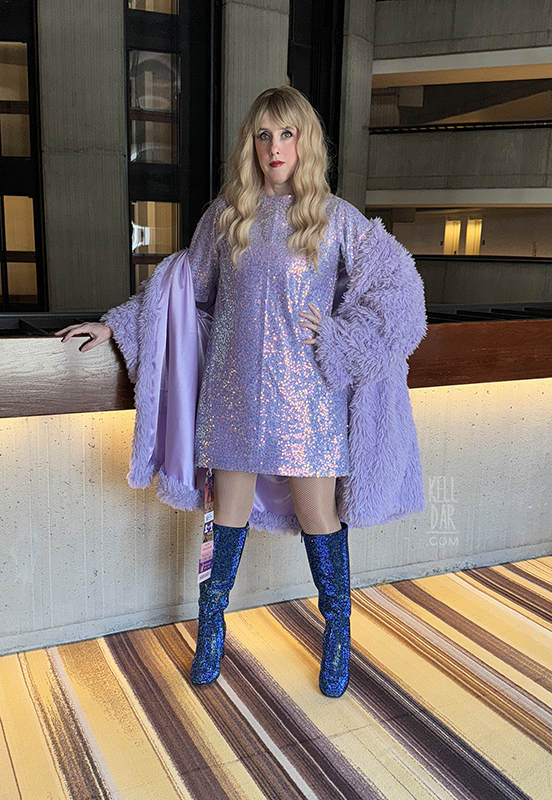
Taylor Swift – Eras Tour Lavender Haze outfit
Made for: Dragoncon 2024
Journal Entries: Read more at my Taylor Swift tag
Related Costumes: Stevie Nicks, Kate Pierson, Lady Gaga
![]()
![]()
Patterns Used: McCall’s 2339 (jacket, altered)

I would not have called myself a Taylor Swift fan until last year when Ash had me to go the Eras tour movie with her. Not that I disliked her, it was just never something I sought out. First off, I was surprised at how many songs I knew – I was thinking I knew like maybe 4 or 5 Taylor Swift songs as I was going in, but I knew a lot of them! And I enjoyed every minute of the show! But when she got to Midnights, I became a convert. I had never heard Lavender Haze before, and something changed in me as a person in those few minutes. I was obsessed with every song and went home and listened on repeat. That lavender jacket stayed with me too, so I wanted to do a little tribute to that moment.
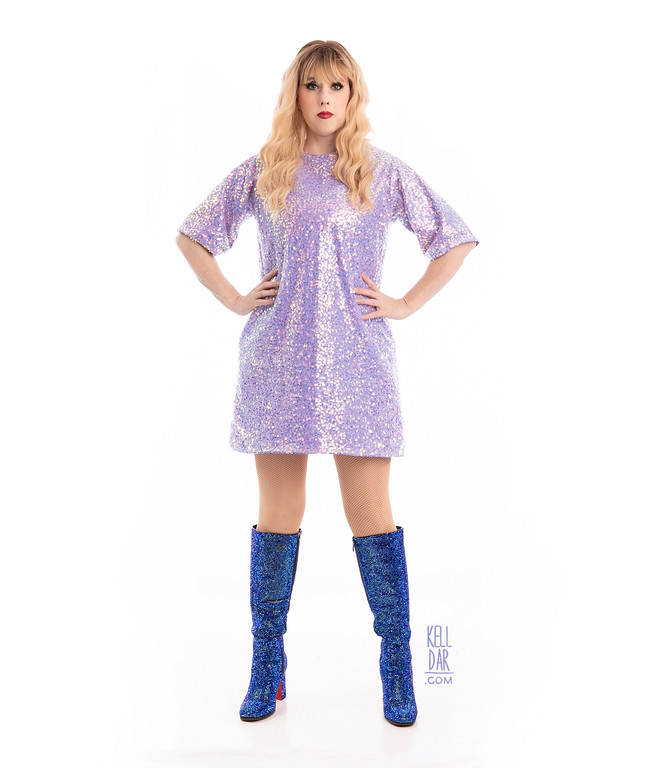
The Dress:
Earlier in 2024 I’d made a pair of Taylor Swift-inspired ears for a friend, and I’d bought some sequin fabric on amazon for that. I decided that’s what I wanted for my dress to do the “iridescent” looking t-shirt dress, so I went into my amazon history, found it and ordered a few more yards. I used some plain lavender kona cotton for the lining.
For a pattern, I have a huge oversized concert tshirt (Ringo!) that I wear to sleep in, and I thought it would be a good starting place. I laid that t-shirt out over some scrap fabric and used it as a guide to cut out a front and back. I pinned that front and back together and edited the shape a little bit, taking it in and shortening it as needed. Then I just made up a sleeve to go on it.
Using my scrap fabric mock-up, I got the panels cut out of both my lining cotton and the sequin fabric. I ended up having to cut 2 layer of the sequin fabric for each piece – 1 piece alone didn’t look “dense” enough, not enough sparkle! Since I now had 2 layers for each dress panel, I first basted them together on my machine to make it easier to deal with, then sewed the sequin front and back together, and the lining layer front and back together. I sewed these together at the bottom hem, flipped it right side out and then I was able to pull the neckline edges out to have them right-side-to-right-side, sewed them together, and then flipped them back out. It all pressed really nicely! Sewed the lining layer to the bottom of the sequin layer for the sleeves, then sewed them into the dress.
Finally I installed a zipper. Overall I’m pretty happy with it, my only beef is that the 2 layers of sequin fabric AND a cotton lining made it overall pretty stiff. I was only planning on 1 layer sequin so I thought the cotton would be fine – if I were going to do it again with 2 layers of sequin fabric, I’d have used a thinner lining fabric.

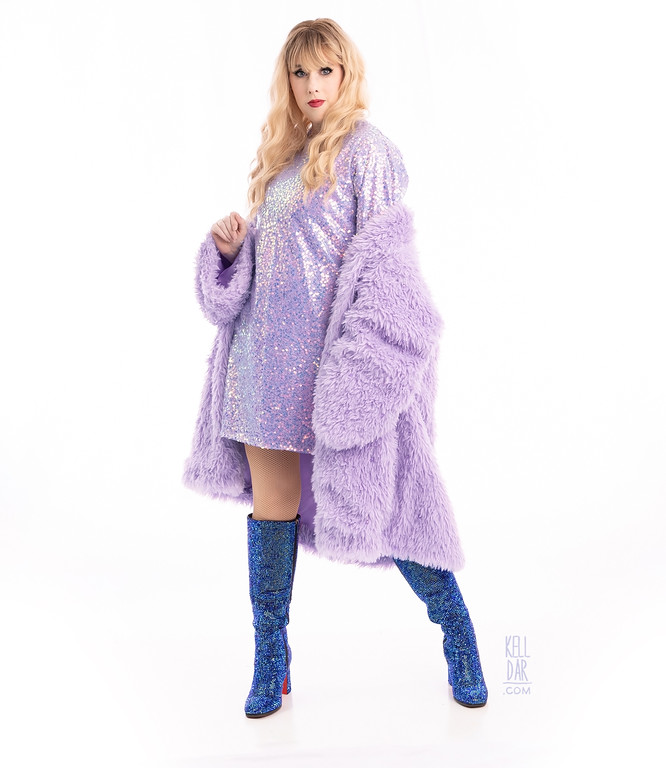
The Jacket:
For the jacket fabric, I had spotted a lavender fur at Joann a few months before. When I decided to do this I went back and thankfully they still had it. It’s maybe a little more desaturated than the real thing? But I love the colour.
For the jacket, I pulled out a basic biblical “robe” style pattern like you see linked above. I just wanted something simple and basic as a guideline to get an oversized shape.
I used these pattern pieces to cut out a mock-up from some scrap fabric first. The sleeves were too long, it did need to be taken in a bit, and the bottom edge needed to be shortened.
Once I had those tweaks done in the mock-up, I used them to cut my lavender fur fabric. I got the front and back pieces sewn together, and sleeves in. The sleeves ended up still being a little long, so I shortened them again.
I used the mock-up to also cut my lining – I bought a lavender lining fabric off amazon, and when it arrived it was SOOOO stiff! I washed it and it came out looking like the dye had run? It was all streaky and weird looking. So I threw that fabric into my “use for mockups” pile and bought something else. This time I just got a matte satin.
Once had the lining panels cut, I installed a pocket into one of the front panels. I basically just cut a big rectangle of the lavender satin, pressed the edges down, and then did welt zipper pocket in the upper part of it. Originally I was going to do a pocket on both sides, but the zipper was such a pain I said ok, only one pocket LOL. I did want to have a zipper on the pocket so my phone wouldn’t go flying if I took the jacket off!

Anyway once I had the pocket sewn onto the front lining panel, I assembled the rest of the lining pieces. I installed the lining into the fur jacket a little differently than I normally would have – instead of sewing it right-side-to-right-side on the machine. I hand-sewed it into the jacket wrong-side-to-wrong-side with raw edges matched, then folded the edge of the fur over the lining and hand-sewed that into place. I thought this would be the best way to do this to avoid the machine sewing possibly smashing the fur down and making it look weird.
Once the jacket was finished, I then laid it out on the floor and started adding beads. Each bead string is 3 crystal bugle beads and then a round lavender bead on the end – this way they can kinda swing and move and catch the light as I move.
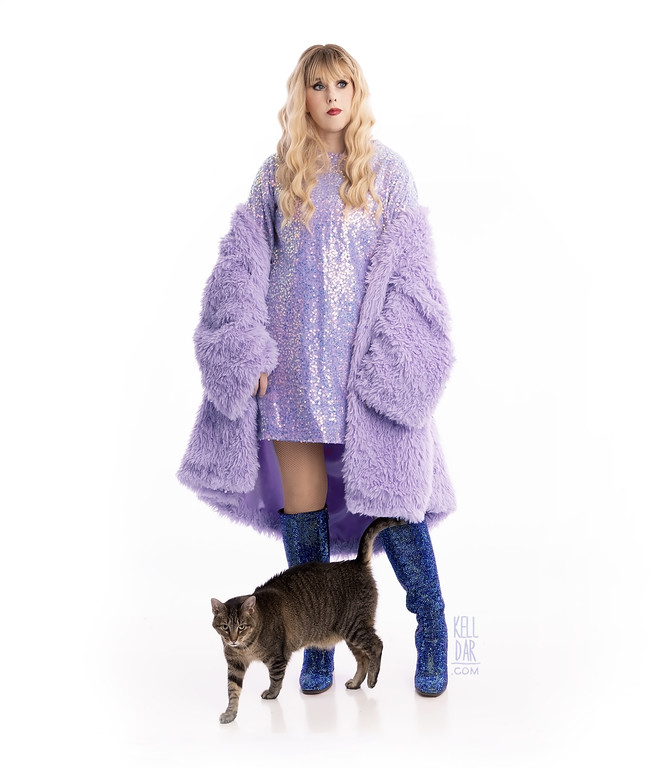
The Boots:
OMG the boots were so fun. One of my fav things I’ve made in a while.
So I hunted around for a while trying to find a basic pair of knee high boots with a heel I liked. I finally settled on these, they’re not perfect, the heel is a little off, and the calf section is a little big on me, but overall I’m satisfied with the look.
When they arrived I painted them blue and the soles red, and clear coated them – didn’t want the paint to crack and make me lose rhinestones!
Then it was time to start stoning. I had bought a little stoning kit the year before for my tricorder bag, and it had come with all kinds of accessories, the wax pencil, a tray, tweezers, etc. I also had a unopened bottle of Gemtac. So I bought 5 bags of 5,000 4mm sapphire stones and as soon as they arrived, I got to work. I started with the heels on the inside, and worked my way up and around.

I worked, on average, 5-6 hours a day stoning. I’d do a small section in the gemtac glue, and then place the stones. Move up and do another small section. The things that slowed me down were getting the stones to flip over onto the right side, I’d give the tray a little shake and it would flip a few of them over, then repeat over and over again, and sometimes I’d end up with 2 accidentally stuck to my wax pencil and wouldn’t notice til I had an extra one stuck in the glue. Bring in the tweezers and fish it out. Everyday i had a pile of “mis-glued” stones sitting in the corner of my desk. I also had a “boot stand” Chase made for me to keep the upper section standing up – it was 3 taped together coke cans LOL. As I moved up the ankle I had to pad it out a little more so I stuffed some old amazon shipping envelopes in there too. Eventually I couldn’t keep moving the stuffing from one boot to the next, so the other boot ended up stuffed with scrap fabric.
It took 8 days of the 5-6 hour grind, and then about another 3-4 hours on day 9 to finish up one last little section. I went through 4 of the rhinestone bags plus around half of the 5th, and I was on my 2nd bottle of gemtac.
After I let them dry for a few days I tried them on. As I was putting them on, I very roughly ran my fingernails all over every part of the boot, and any loose stones I felt, I scratched off. There weren’t many, and I think most of what came off in that session were just loose stones that had gotten stuck to some still-damp glue when i set the boots down on the desk. There was one small section right by the interior zipper ankle area on the left boot where I lost about 20 of them during this “scratching session” – I must have gotten the glue too thin right through there. I reglued those all back on and all seems good now.
Accessories::
I bought a wig on amazon, and made a ton of friendship bracelets!
That’s really kinda it. I did think about making the Midnights suit garter belt to go with it, but decided to save that for if I ever get around to making a Midnights bodysuit. I have too many ideas, I don’t know which one I’ll get to…
Final Thoughts:
I was so happy with how this came out! Thought looking at pics I realized I still have a very distinct fold line in the dress LOL I swear it wasn’t that noticeable in person! I am really glad I built the pocket into the jacket. I love how the boots turned out, though after wearing them at dcon, I’m not sure I’m going to be able to stand in them for a 3+ hour show… time to find some blue emergency flats to carry in my pockets 🙂
(Post-show update – I did buy emergency roll up flats to carry in my bag, and I switched to the flats once the show started! There is no way I could’ve stood on the concrete floor of the stadium for 3 hours in those heels, even with all the toe-kinis, shoe inserts and thick socks in the world! I put them back on during Mastermind!)
![]()


![]()


Please note that none of these costumes are for sale! This is my personal portfolio.