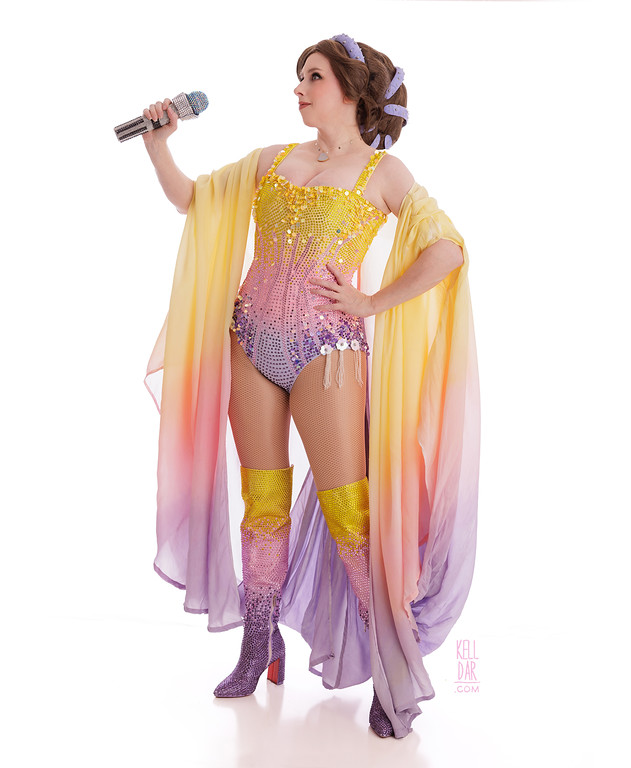
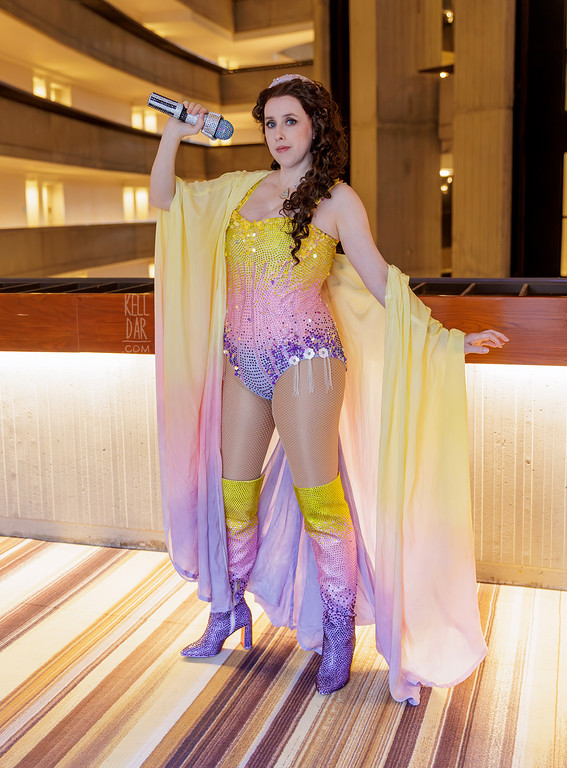
Padme – (Taylor’s Version)
Source: Star Wars / Taylor Swift’s Eras Tour
Made for: Dragoncon 2025
Background: I had this idea last year and had to get it out of my head for Dragoncon this year.
Journal Entries: Read more at my Lover Padme tag
Related Costumes: Taylor Swift (Lavender Haze), Lake Retreat Padme Disneybound, Padme’s Lake Gown Version 5
![]()


![]()
 Patterns Used: Kwiksew 2004 (modified)
Last year on the way to see the Eras Tour, Ash and I talked about some Padme/Taylor Eras tour outfit mashup ideas I’d had. Of course my favourite was the Lover/Lake dress mashup – I put those two together because the gradient of the Lover suits (especially the pink and blue) always made me think of the lake dress gradient.
I decided I had to do it for Dragoncon this year – we are thinking about taking 2026 off, and I don’t know of another convention where this would fit in as well as Dragoncon! So I shoehorned it in even though I really didn’t have time.
The Bodysuit:
So I imagined this costume not really taking that long. I thought the biggest time sink is going to be the rhinestones, but I can do that in off times. Well every step of this costume gave me problems, so let’s start at the first problem – the pattern.
Initially I was going to use the McCall’s Yaya Han bunny suit pattern. I’d heard of people having some fit issues with it but I figured I have enough experience, I can make it work. I decided to size up a bit and work down – I cut one layer out of some scrap fabric as a mockup, and it was ENORMOUS. So I cut it down 2 sizes, and now I couldn’t even get into it. So I started a new mockup in the in-between size. It fit OK through the upper portion but the butt area did not fit AT ALL. The crotch length was all off, and the back looked more like a thong, yet was still gaping at the sides?
 I said forget it and decided to just do a duct tape dummy and make my own pattern. Did that, cut it up, made a new pattern and a new mockup, and it STILL didn’t fit right. I made some adjustments. Still no. I compared my original duct tape dummy pattern to the McCall’s pattern. It still didn’t work.
I could have kept at this and eventually got it figured it out – if I had another 2 or 3 months. But I didn’t have 2 or 3 months, I gave myself about a month and a half on this and I knew I needed most of that for stoning.
So I decided to fall back on the way I did a similar build – my Black Canary suit from 2009. For that one, I built a basic bodice as the lining layer, and then the outer fashion layer was a stretchy leotard. I really hadn’t wanted to use stretch here, but this was the fastest, easiest option. Ordered some white spandex and while I waited on that to arrive, I used my duct tape dummy pattern to make just a bodice without the lower briefs section. I made this out of a layer of white taffeta, white canvas, and white cotton for the lining layer. It has spiral steel boning in the channels. That thankfully went together really quickly.
My spandex arrived, and I used the original duct tape dummy pattern (with the briefs section) to make the outer layer – just cut it smaller since it would now need to stretch. I also cut a second layer of the spandex as a partial lining – I wanted a lining layer at the leg openings for a clean finish.
Now onto dyeing! I laid out the main outer layer and the lining layer on some garbage bags, and just dabbed the dye on with paper towels. (I mixed up the dye in paper cups since I didn’t need much). It wasn’t perfect, but I didn’t think trying to dip-dye it in such a small scale would work very well (especially for the center pink section).
 I got the lining layer sewn to the outer layer at the legs, and then got the outer layer sewn to the top edge of the interior bodice, and basted them together at the back seam. Basted a zipper in so I could try it on. Annnd it fit weird. AGAIN.
The main issue now was that it was gaping at the front side and back side seams. I took in the front seams and that fixed that issue, but the back side seams would not sit cleanly against my butt no matter what I did. I took the lining out and took that seam up on both layers several times. And it still didn’t look right.
Finally it dawned on me that the reason it wasn’t sitting right wasn’t an issue with the side back seam, but rather with the center back seam being too big. I took up that center back seam and that fixed the issue — BUT, I’d taken up that side back seam so much, that the back butt area was WAAAYYYY too cheeky. There was no fixing this.
So, more spandex was ordered, I skipped using my duct tape dummy pattern this time and just modified Kwiksew 2004 because I knew that was a sure thing that FIT RIGHT. And this time I made the lining layer a FULL lining layer instead of partial, because having the loose lining layer in there was really irritating in the first go round. Got these new layers dyed, sewn onto the bodice again, tried on… and thank god after all that it finally fit and looked ok. Wish I’d built more shape into the bust section, but no time to go back to the drawing board on that.
I decided to finish the top edge with some bias tape dyed to match. I just wanted something sturdy there since both the outer layer and lining layer were stretchy and pulling on the top edge. Got that sewn on, and the lining layer sewn in place on the inside. Added the straps (made of canvas and dyed spandex) and got the zipper in (just a purple one I had here. Should’ve done pink!) and it was finally, finally ready for rhinestones. 
Decorations:
Last year when I stoned my Midnights boots, I used gemtac. I didn’t want to do that for the fabric suit, so I got a bedazzling gun and hotfix rhinestones. I wasn’t in love with the purple rhinestones – I feel like they read a little too dark – but it was all I could find on short notice that was in the right purple family and wasn’t like, magenta.
I tested out the bedazzling gun on a scrap of spandex first and was happy with how it worked. Only bummer was that the tip that came with the gun that was supposed to be able to pick up rhinestones of the size I was using, was never able to do that. I had to place them with a wax pencil, pick up the heat gun and apply, and sometimes in that extra movement the stone wouldn’t end up in exactly the right place. Oh well. I did a test row of yellow across the top of the suit, then it was time to dig in.
I wanted to draw out some guidelines on the suit for the pink “spines” on the front and back. I tried it with chalk, but my chalk wouldn’t leave a mark on the fabric. I don’t trust washable fabric pens on things I’ve dyed, so that wasn’t an option. Normally at this point, I’d baste guidelines on with thread – but I figured that would trap the thread under the glue and I’d have a mess on my hands. So I did my best to create guidelines with regular pins. It was really difficult to get the sides to mirror each other – even sitting there with a ruler and a million pins – but they are at least neighbors if not sisters if not twins LOL.
Now I just sat for hours and applied rhinestones. I did start with the front, because I was worried I was going to run out of stones too close to the con to get more, so I figured if I was going to be short, it would be on the back where it would be hidden by my hair. I DID end up having enough stones and unfortunately by the time I got to the back I was MUCCCH better at this than I was while I was doing the front! The front spacing of the stones is much more messy and got off grid and too close together more often. The back looks much tighter and neater (although by the time I got down to the lower purple sections I was sooooo ready to be done with this I probably spaced them out a little TOO much LOL)
I also learned as I went I could lay out about 10 rhinestones on the suit, set the bedazzling gun over one, and “scoot” it into place before the glue started to melt. That helped speed things up.
Also – I’m thankfully I have a lightweight dressform that I could take off the stand and have my suit on while I was doing this, so it was stretched out and I could see the shape of a body under it. I used batting stuffed between the form and the suit in the areas I was working on to sort of “flatten” that area out to make it easier to place the stones without them sliding off. The bust was absolutely the hardest area to work on.
I got the front and back finished up – also did the straps which was almost as annoying as the bust area to do. I did leave the lower edges unstoned, because I knew I wanted to leave room for snaps for my tassels. Once I was able to try this on, get the tassel placement worked out and snaps on, I went back and stoned around those areas, and also the crotch and leg openings.

At long last it was done – this and the boots probably took around 2.5 weeks to stone, of constant work. Now time for sequins!
Overall I was happy with the sequins I got – I got iridescent yellow, pink and an clear iridescent one that picked up on any colours it was around. The only ones I wasn’t happy with were the “lavender” ones – they were too magenta and looked too close to the pink. So I went back and found some purple ones, but they weren’t shiny iridescent like the other ones. So in that area I just mixed in more of the pink and clear iridescent to give it some shine. I hand-sewed these in place, which I was really worried about the threads making it hard for the spandex to stretch correctly for me to get into it, so I kept trying it on as I went – and it was ok!
(It IS hard to get into though. I wanted a zipper back and not a lace-up back, and it’s definitely a team effort to get that zipper closed LOL)
Boots:
I bought the boots online after window shopping for a while. They’re not exactly the right shape at the top, and I should’ve trimmed them and altered the shape a bit, but I didn’t. It’s close enough. Tried them on when they arrived and was horrified they were WAY too small, tight and stiff. I got online to see if I could return them and get a size up – and for some reason a size up was like way more expensive? What the heck. I thought, ok, I’ll try them on with just my tights and no socks, maybe that will help. So I did that and without my socks on, I could feel that there was something in there. That’s right, I forgot to take the cardboard shaper pieces out LMAO. With that gone they fit fine! Crisis averted!
 I mixed up some paint colours and painted them, then Chase sealed them for me. I decided to leave the zipper as-is, normally I’d have painted that too, but I did not feel like messing with it.
I took breaks from stoning the suit to work on the boots. I got one boot about maybe 40% done and decided to try it on. And a TON of the stones fell off from just me bending the boot to get my foot into it and walking around. Ugh. Most of the loose ones were in the lower vicinity of the boot – I think the issue was that for the ones closer to the top, I was able to put my hand underneath it to be a solid surface for the bedazzling gun to press the stone against. As it got lower and I couldn’t get my hand in there so well, it didn’t adhere as well. So I said fuck it, I’m not messing with the bedazzling gun anymore, bought 2 bottles of gemtac and just went after it the old fashioned way. It was so much faster – and easier to fix spacing issues. I’ve got one area where I had to patch in a bunch that fell off that doesn’t look as good as the rest, but I’m just glad it was fixable.
Normally I’d have painted the soles before the stoning, but I specifically ordered Angelus’ Walk on Red for the soles (nobody local had it) and had to wait on it to arrive, so I did after I was done stoning. Just taped it off and painted it on with a fine brush along the edges, larger brush for the center areas.
Accessories:
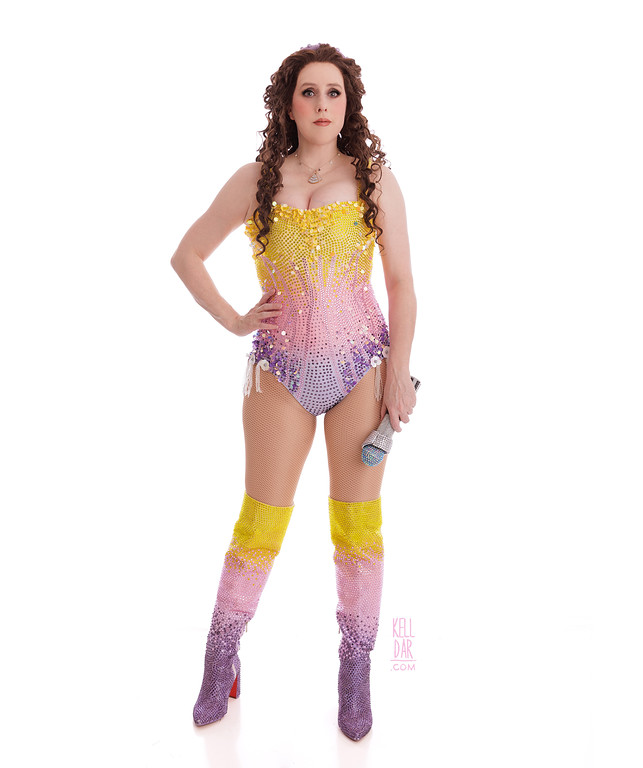
 I kinda agonized over what wig to wear with this. Did I wear my lake dress wig (which is a pain to transport and wear), or something else? I decided since this was a mashup, I would go with Padme’s hair colour and curls but worn down like Taylor — similar to Padme’s hairstyle in her dressing gown in Ep2, but with one of the lake dress headbands. I decided to use my disneybound headband for this since it’s a little bit lighter weight.
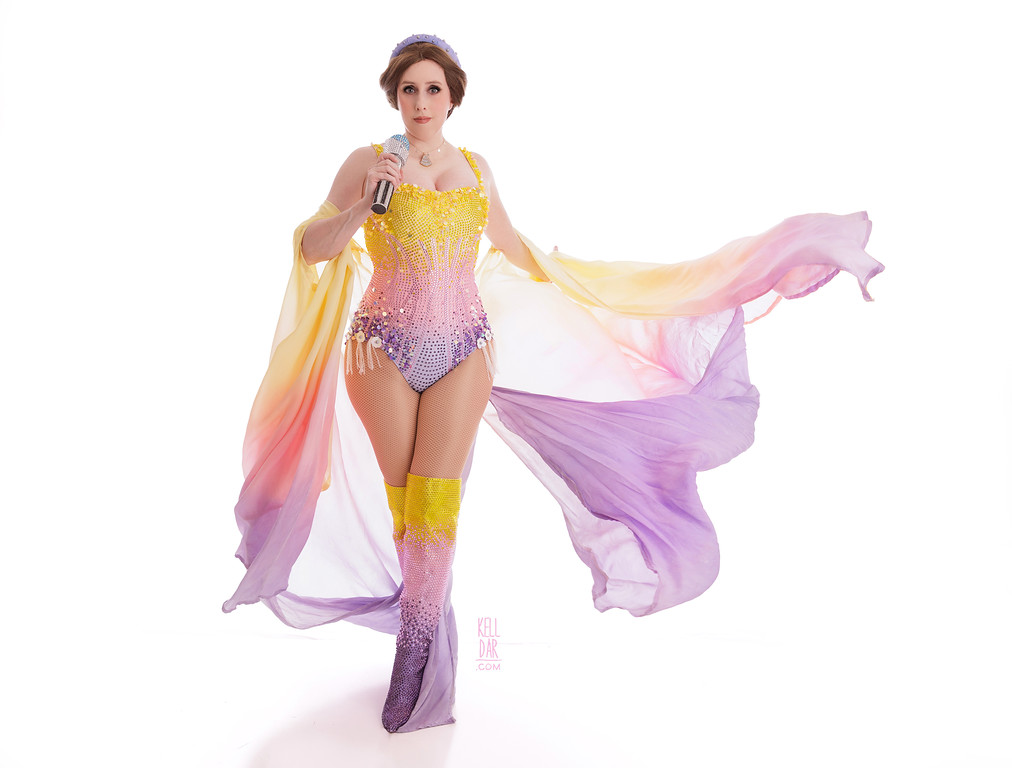
I also wore my Disneybound shawl with it. Doesn’t really go, but I felt more comfortable walking through crowds with the shawl on, and it gave it some more movement.
The necklace Chase made for me – there was a company that had a lake dress inspired necklace a while back that I thought would be PERFECT… but it was sold out by the time I thought of this (plus cost much more than I’m willing to spend on jewelry for a costume). So Chase 3d designed and printed a little tiny version of the lake dress necklace for me, and I put it on a simple little star necklace I got online. I painted the edges gold, and added some crystal rhinestones I already had on hand. They didn’t go on evenly – but close enough.
The tassels I made out of leftover sequins and cabochons from my 2019 lake dress. I made a little felt base and sewed the sequins around it, and glued the cabochon in the center. Then I threaded some crystal beads to the backside. There’s a snap sewn onto the back of each felt base, so these can snap off and onto the suit for transport.
I bought a kids’ rhinestone microphone prop online. I was just going to use it as-is. But we know how that goes. Decided it should look like a lightsaber hilt. First I added some black rhinestones to it to make the stripes on the lower part. Then I covered the top in blue rhinestones. Then Chase 3d printed the upper shroud part for me and I rhinestoned that. It traveled to atlanta still a little tacky but I was glad to have done it!
History:
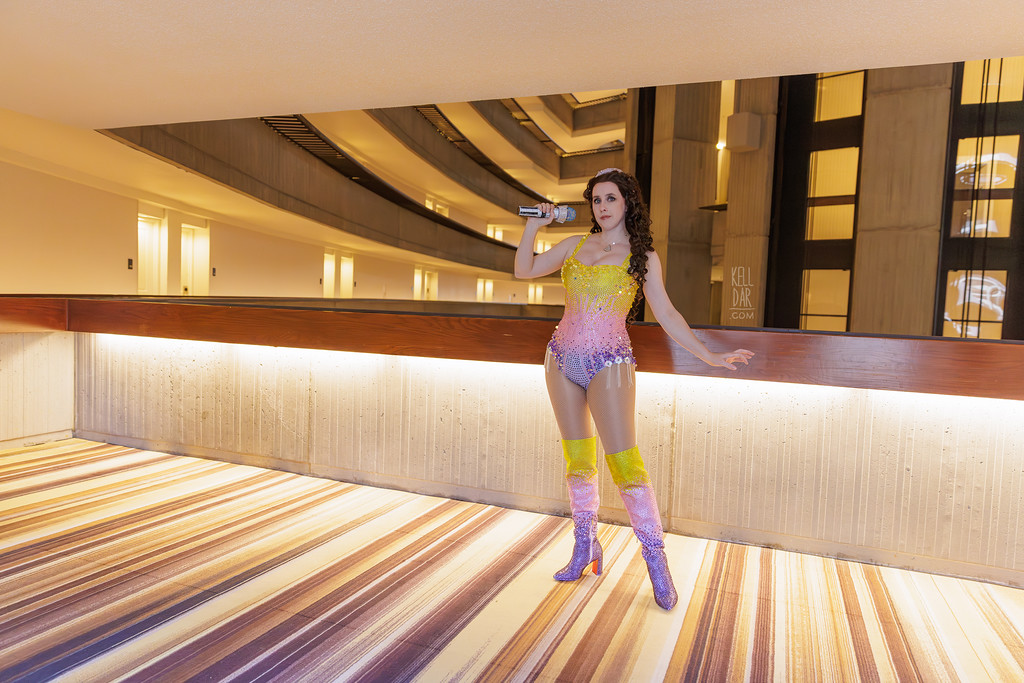
So looks-wise, I was really happy with this. I think it photographs well and I’m satisfied with that. Wearing-wise on the other hand – it is not comfortable. The fit it still weird, it digs in under my armpits, the straps are too long. The boots are incredibly uncomfortable. I kept tripping over the robe. The wig kept getting caught in sequins. After all this work, I ended up only wearing it for maybe 2 hours? I had hoped to wear it again at some point in the weekend, but didn’t.
Despite that, I AM happy with it. Like I said, it LOOKS good and photographs well even if it’s not comfortable to wear, and that’s all that matters, right? LOL. I think when we do the white backdrop shoot I may experiment with different undergarments with it. May also take a few photos with the lake dress wig. We’ll see – I can’t wait to shoot it, because I didn’t get a lot of photos of it at dcon since I was in it such a short time.
![]()


Please note that none of these costumes are for sale! This is my personal portfolio.