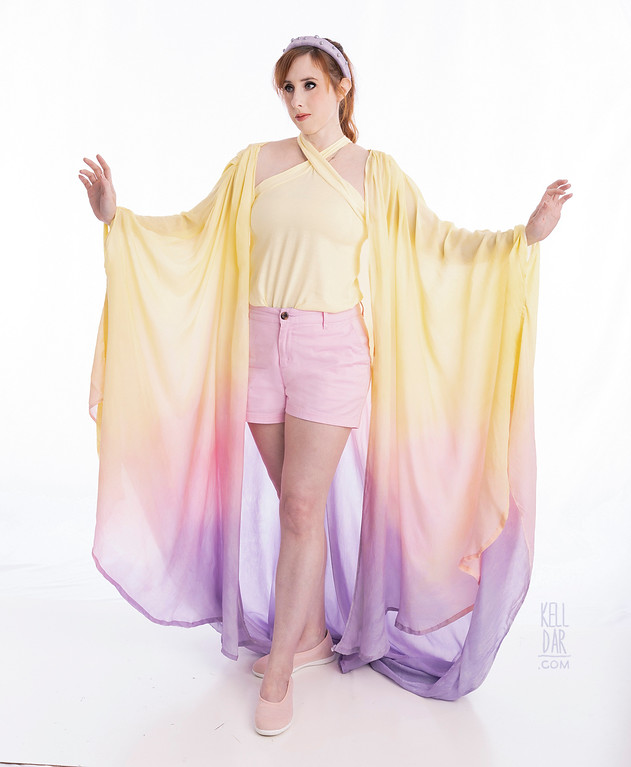
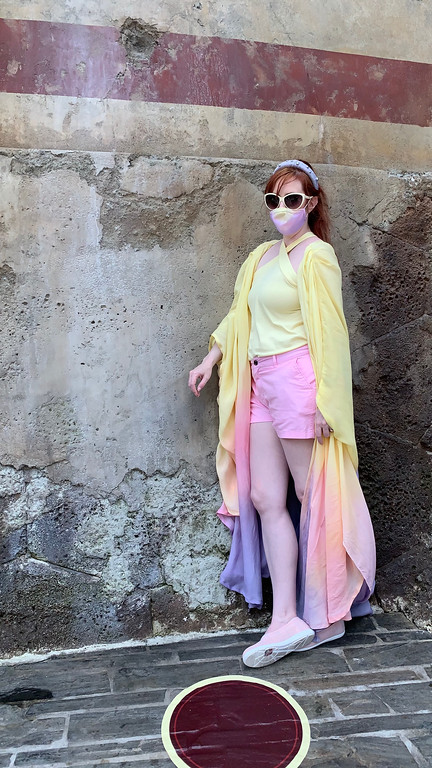
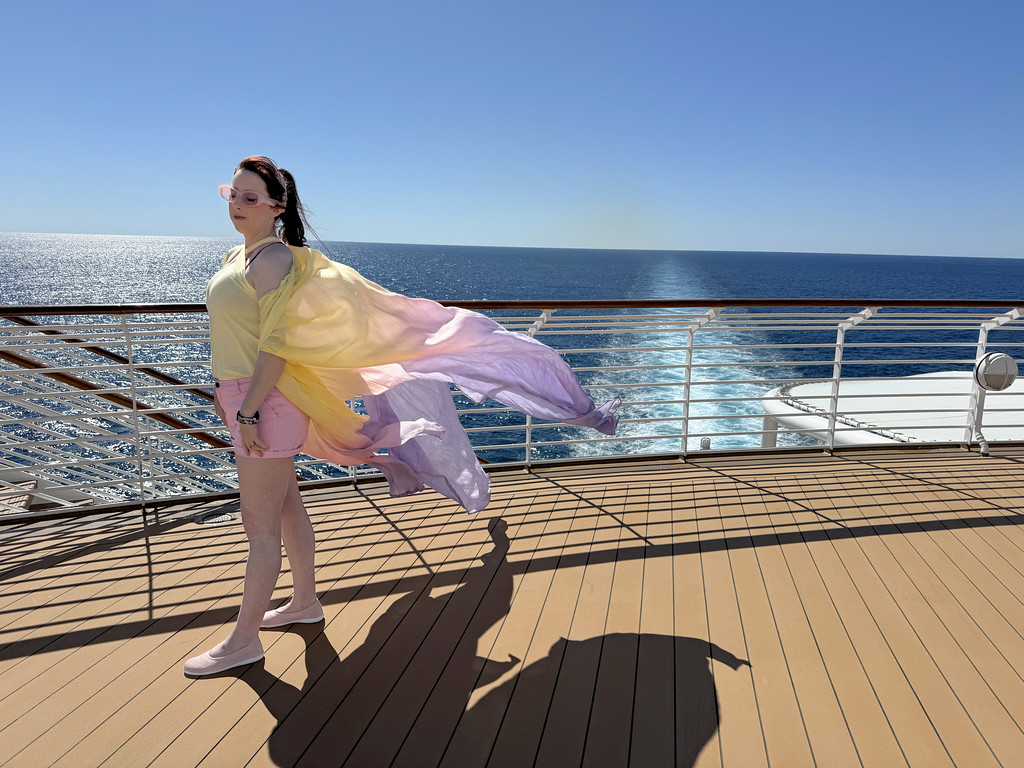
Padme – Lake Dress Disneybound Version
Made for: Disney Trip, April 2021
Journal Entries: Read more at my Padme Disneybound tag
Related Costumes: Padme Lake Dress 2019, Padme Lake Dress 2006
![]()
![]()
Patterns Used:
None

Background: The leftover panels from my old version 3 lake dress from 2006 were just begging for me to do something with them.
Shrug:
So when I was making my “final” lake dress in 2019, I remembered I still had the old outer panels from the 3rd version from 2006. I pulled them out and used them as a starting point for re-patterning the outer part of the dress. After that, they kind-of hung around my sewing room, and I kept thinking I ought to do something with them.
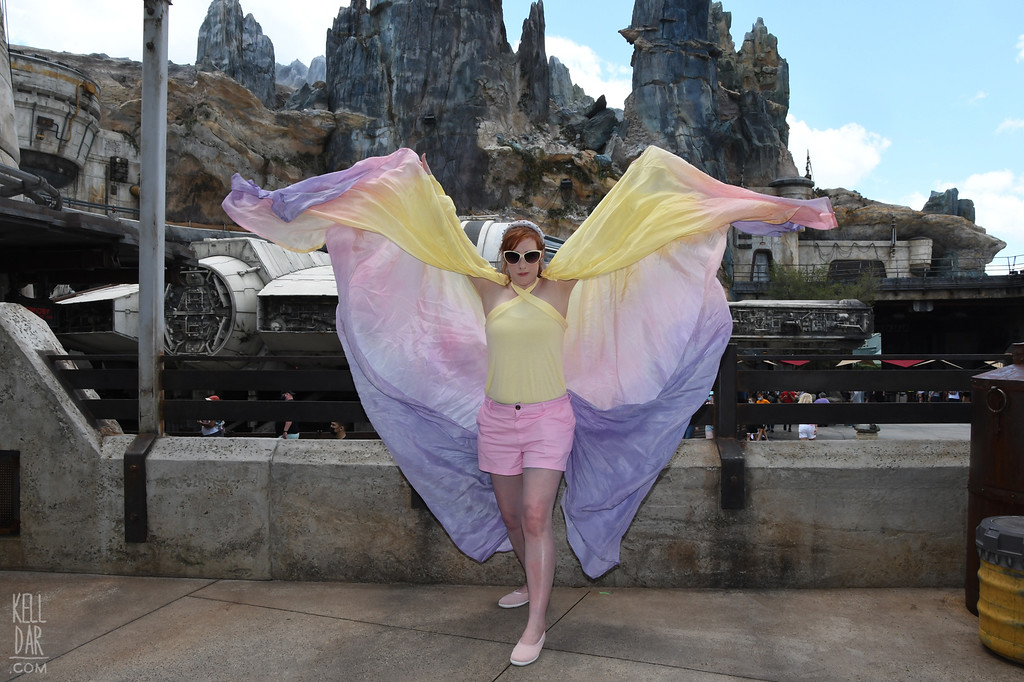
In 2019 I’d also made 2 shawl/shrug thingies – my dapper day Bespin Leia shrug, and an ankle-length one out of some neat fabric I found at Joann. The ankle length one was especially fun to wear, like wearing a cape – and was still nice and cool while blocking the sun at Disney World. So I thought why not repurpose these old panels into something like that and do a Padme disneybound for our 2020 trip? This is what a sketched up as an idea for the look.
I started out by re-dyeing the panels. The original dye job was definitely on the “delicate” side of saturation, and at 14 years old they’d seen some colour loss. I still had dye leftover from the 2019 lake dress, so I used that – just dip-dyed them.
Once they were dry and ironed, I pinned them on my dressform… and left them like that for a long time LOL. By that point I’d realized our 2020 trip wasn’t going to happen, so I set them aside and focused on other things.

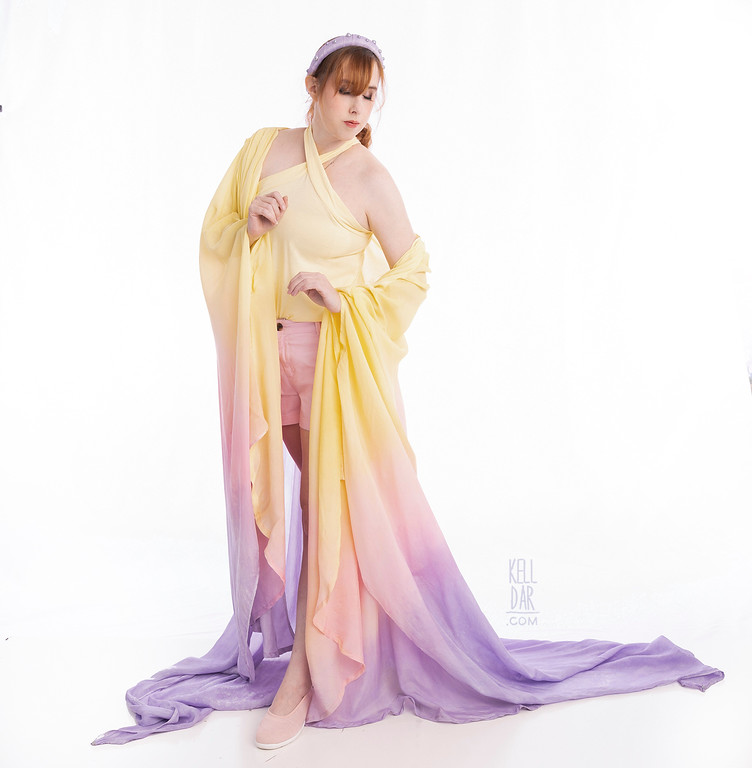
Finally in August 2020 I got them back out and started playing with them again. I ended up using the 2 original front panels as the front panels for the shawl as well – and 2 out of the 3 original back panels for the back. I experimented with a few things before settling on a small gather at the shoulder to deal with the excess width (and the gathering was a nice call back to the actual lake dress sleeves), and then after the curve of the shoulder, just a straight side seam with an opening for my hands – very similar to the 2019 shrug that was the inspiration. I shortened and rounded off the bottom of the front panels.
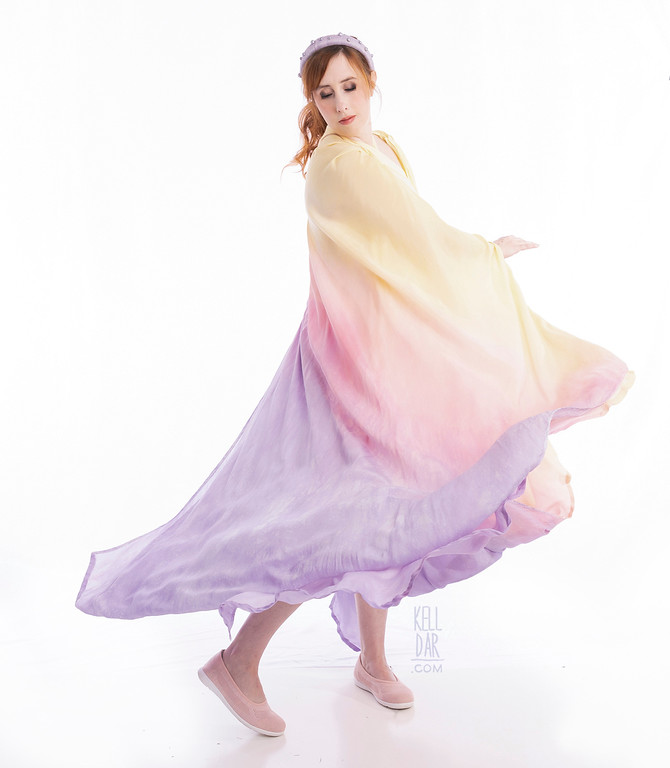
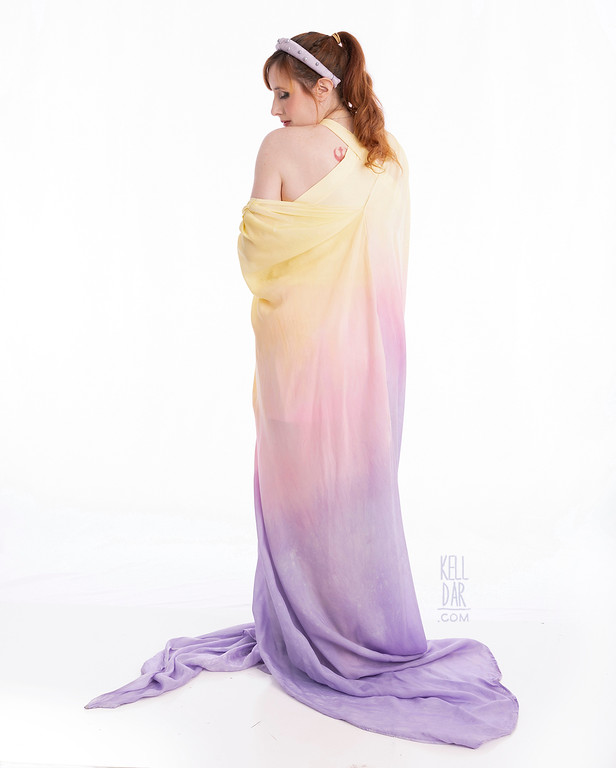
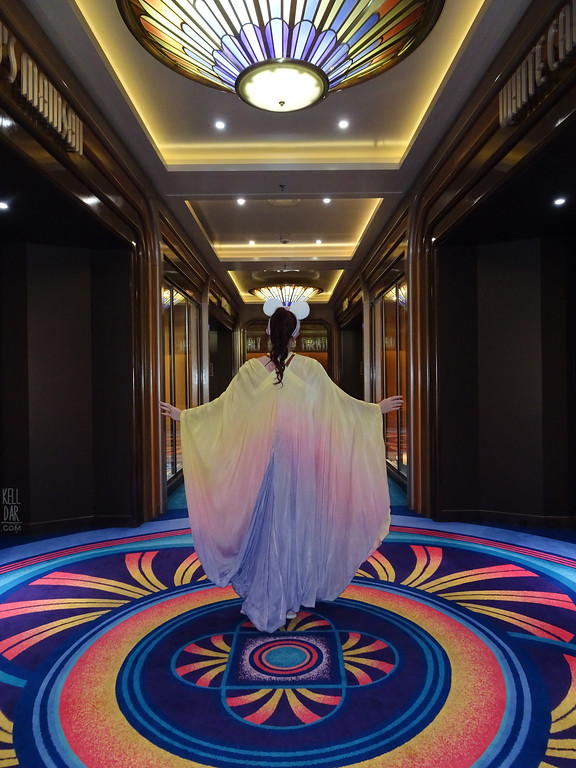
In the back, I started the back seam out about center back, to give a “backless” vibe. It again opens up from about thigh-height to the floor. One thing I had trouble with was the length in the back. The original panels were very long, even when raised up to shoulder height – and it was so pretty like that! I really didn’t want to cut the length off. I wore it around the house a few times and felt so dramatic in it LOL
But I knew I couldn’t leave it dragging on the ground for Disney. So I hemmed and hawed about cutting it off, until a friend said “why not just bustle it??” And I was like omg yes that’s a great idea. So the very far tips of the train snap onto the inside right around the waist, to shorten it to about ankle length when I’m wearing it. Worked great and the extra length tucked in the back looks super dramatic as well. I love it!
And that was pretty much it for the shrug.

Top:
Originally I planned this outfit that the only thing I’d be MAKING is the shrug. Everything else I wanted to buy, and have them be simple comfortable pieces I could work into my own wardrobe.
In early 2021 I started searching for these pieces – I wanted a pale yellow halter top, and apparently… that’s not currently a thing. I could not find exactly what I had in mind. In the end I found a white halter top on amazon that looked how I wanted – so I decided to just get that and try to dye it.
Well it arrived and it was… not great. It was too small, too short, and completely see-through, plus the fabric was really pretty cheap and gross. But since it was cheap, and the neckline was exactly what I wanted, I kept it and cut it up to use as a pattern for making the top myself.
I bought some soft yellow jersey knit online, and once it came, I used those neckline pieces from the amazon top as a pattern for cutting it out of my knit. For the lower part of the shirt, I used a shirt out of my closet as a guide to cut my fabric, since I liked how that shirt fit me. Then I sewed them together and it was done. It was a nice quick project – only took about 2 nights to finish.
And then I decided I wanted to change the straps so it looked backless. I took it apart, cut the straps up and tried to reposition them – which didn’t work. I ended up just having to remake new straps just like the originals and put them back on. What a waste of time LOL.

Accessories:
The headband I found at target – it was a nice white padded headband that I thought had a good shape for a Padme-reminiscent headband. I dyed it in some Rit Dyemore purple dye and then glued on some of my leftover pearls from my actual lake dress headbands. Was really happy with it.
The shorts were another saga. The first pair I ordered came and, while I loved the colour and length, I didn’t really like anything else about them. They didn’t look good on me. They had this ruffle at the top that I got rid of, and I tried to take in the center front seam, which helped a little – but overall there was just too much fabric through the hip section that ballooned out and was just unflattering. I probably could have kept messing with it and made it work, but I decided that shorts that were more structured would work better for me, so I bought a new pair. I don’t love the colour as much (it’s a brighter pink), but they look way better and have nice big pockets, so I’ll take it.
The shoes I also bought. I don’t love them and might replace them one day.
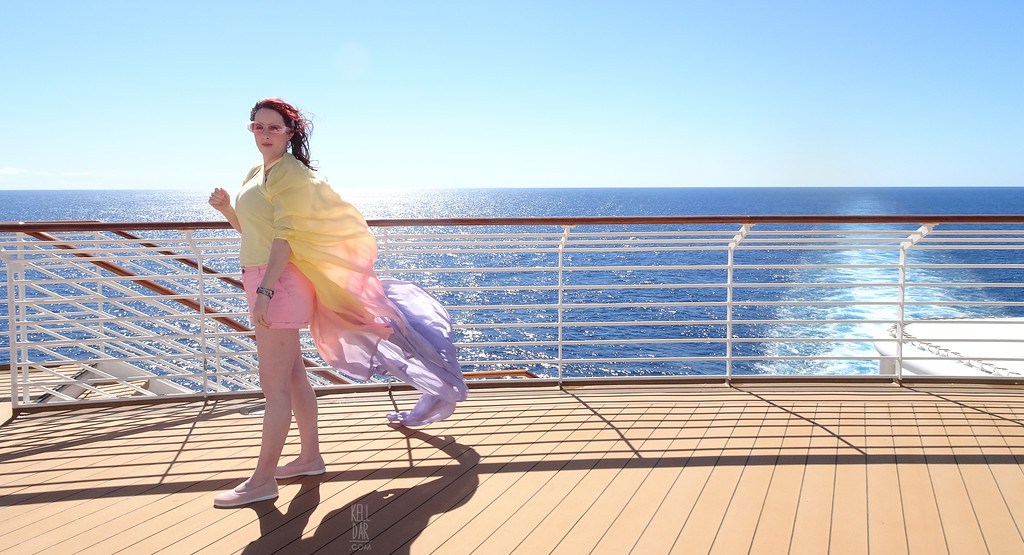
History:
This was a lot of fun to wear at Disney! It was easy enough to take off and drape over my arm when we were in tight spaces or queues, and light enough to not be hot while also protecting from the sun. Only beef I had was that the shoes gave me blisters, so maybe new shoes before next time.
![]()


![]()


Please note that none of these costumes are for sale! This is my personal portfolio.