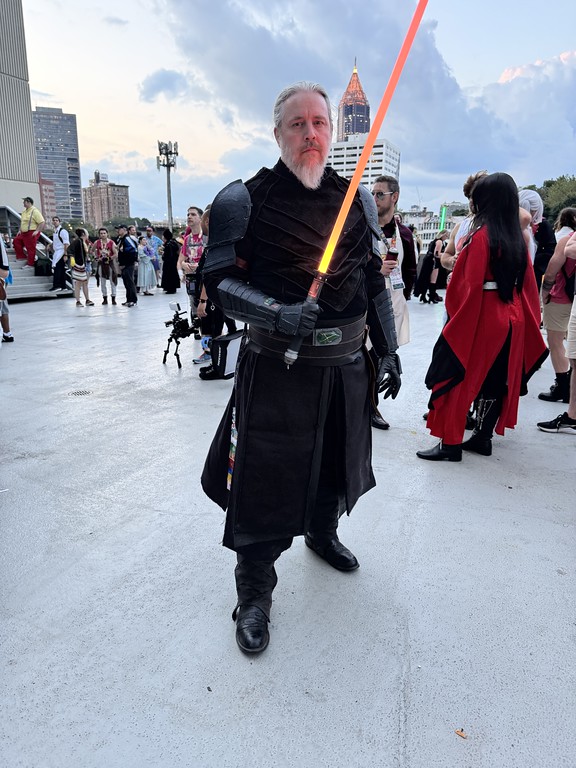
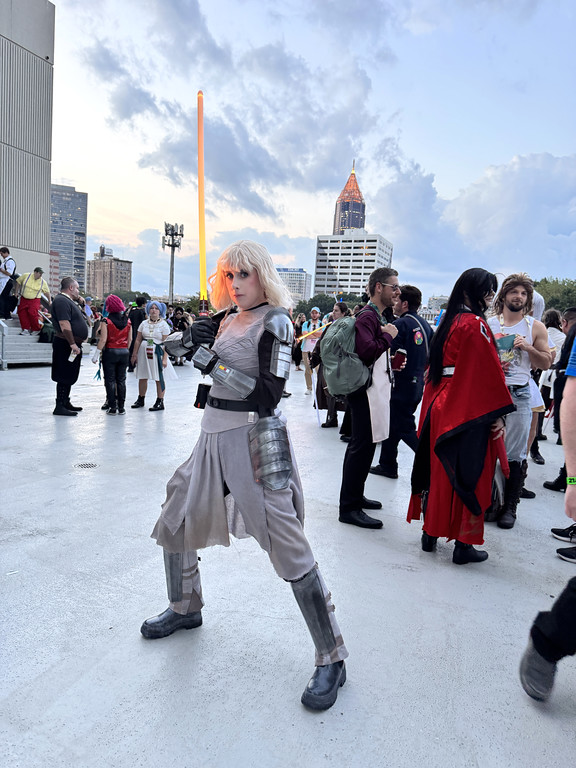
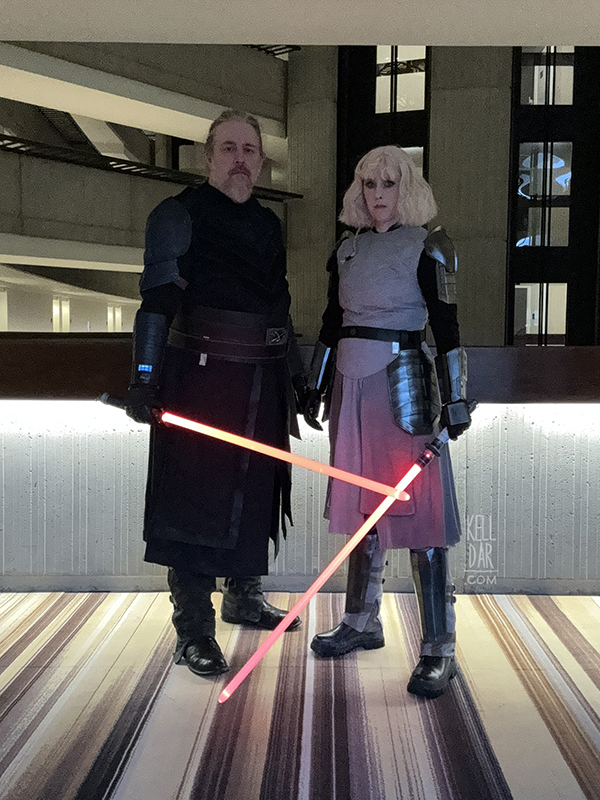
Shin Hati & Baylan Skoll – Ahsoka
Made for: Dragoncon 2024
Journal Entries: Read more at my Baylan tag and Shin Hati tag
![]()

![]()
Patterns Used: Sionnach Studios patterns used for Shin’s Vest, undershirt and gaiters, and Baylan vest, undershirt (modified from their Shin pattern), gaiters and kama.

I thought Chase would make a good Baylan, so we decided to do these for Dragoncon 2024!
The Fabric:
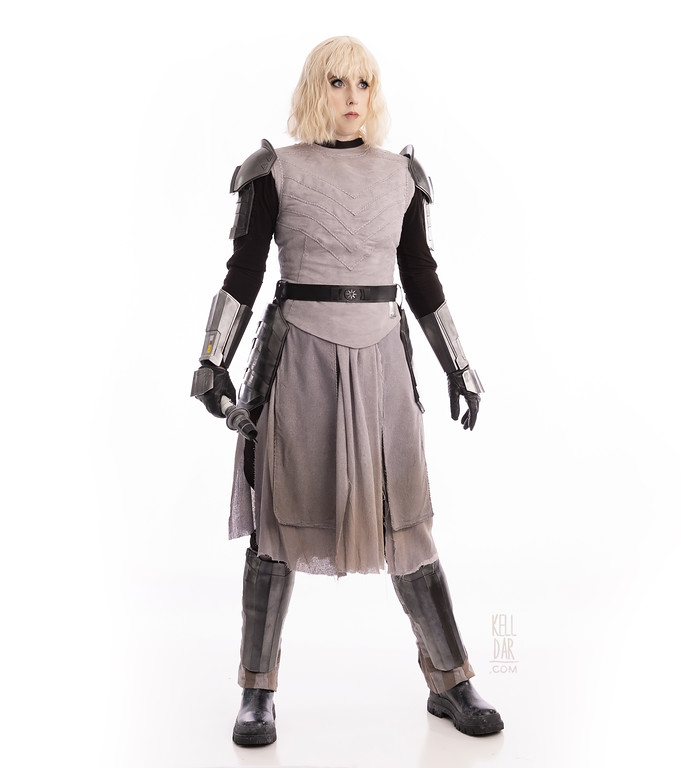
For Shin: For the vest and gaiters, I decided on a faux suede in a nice mid-tone grey. I had another faux grey suede on hand, but decided it was too “cool” – this one I ended up with was slightly warmer toned. For the undershirt and pants, I used a black cotton. The kama and tabards are made of raw silk I dyed and distressed, with the tabards backed in grey cotton. The gaiters also have some leftover dyed and distressed cotton as the inset and straps, leftover from Jedi Training Leia. My cape is a very thick brown wool.
For Baylan:: Chase picked out a number of very nice leathers and suedes – there was a crushed leather, a suede pig skin I think it was?, along with a couple of different black linens, a black burlap for the tabards, and black cottons for the shirt and linings.
Vests::
So as noted above, I used the Sionnach Studios’ patterns for both our vests. I did minimal alterations here, all I tweaked was for fit.
For Shin: I started with mine since I had my fabric first. It went together really nicely following the Sionnach instructions. Once I had the outer layer and lining layers assembled, I sewed them together and installed the zipper in the back. This was honestly the most difficult part, because I couldn’t get this faux suede through my machine without having my teflon foot on – but my zipper foot isn’t teflon. So I had to kinda just fake it and the zipper is not perfect, but it’s fine.

My one disappointment with it is that I wish I’d done the chevron treatments before putting the lining in. I used embroidery floss and roughly wrapped it around the bottom of each chevron. I liked the look of it, but it revealed my lining layers were a little bigger than the outer layers especially on the back, and the interior ended up looking pretty ugly because of the wrinkling. Oh well, lesson learned.
Once the vest was done, Chase painted the back closure pieces (3d prints bought online), attached them to leather plates, and we glued those leather plates down on either side of the zipper.
For Baylan: Chase had an assortment of leathers and a linen for his vest chevrons. It was tricky to get everything cut out and we did end up having to order one more leather hide to finish it out. I did deviate from the Sionnach instructions’ here – instead of placing the chevrons right-side-to-right-side and sewing them together and then top stitching, I ironed the edges over and sewed them together with the top stitch, which is the way the Shin vest went together. I thought this was much easier to do here rather than trying to line up points doing it right-side-to-right-side.
This was a much more difficult project than Shin’s, just because of all of the different leathers, leather thicknesses, etc. The zipper was again the trickiest part to get installed, and some of the line up points were SOOO thick with layers of leather. Thankfully my Bernette did a good job handling it all.
Worst part though was adding the trim – Chase picked up this twisted black trim at Joann for the edges of his chevrons. This was SUCH a pain to sew on, I had to sit with a pair of pliers forcing a needle in and out to sew it in place. And then ice my arm every few hours LOL

I wasn’t completely happy with how it turned out. The trim didn’t cauterize nicely, I did want I could to clean up the edges, but it’s not perfect. And it’s kinda wobbly in areas, but he’s happy with it, so I’ll leave it at that.
Same as with Shin, we glued the 3d printed closures on in the back.
Undershirt/Pants::
For Shin: I made my pants using a commercial pattern I already had on hand – I’ll have to figure out which pattern it was and link it above. They are just basic black cotton pants.
For my undershirt, I used the Sionnach Studios’ pattern, I just deviated it from it slightly and did the quilted patterns on the sleeves using black cotton with a layer of batting between. I did NOT want to try to do quilting on the thin black stretch knit I was using for the rest of the shirt! But yeah the under part of the sleeves, body and collar are the shirt are all stretchy black knit.
I weathered both pieces by spraying some bleach on, letting it sit and then overdyeing it. I think I should have done this a bit more, and probably will do a little more in the future, I’d really like to dial the black down a bit more to a dark grey-ish brown. I also added some paint spatter.
For Baylan: Since Sionnach didn’t have a Baylan undershirt pattern, and it’s essentially the same as Shin’s, I just upsized the Shin sleeve pattern, and edited it down to fit Chase right. I made it same as my Shin sleeves, and then sewed them onto an existing black t-shirt. I also added the black knit collar.
Chase bought his pants for Baylan since they aren’t really visible.

Kama/Tabards::
For Shin: For my kama and tabards, I got a raw silk fabric and dyed it grey. I didn’t use the Sionnach pattern for this – they hadn’t released it yet when I made mine, darn it! So mine is just a few panels I linked together on a bias tape waistband, just putting them together in a way I thought looked neat. It closes with a hook and eye and a snap. The tabards were dyed at the same time, but I let them stay in the dye a little longer to be darker. I backed them in some grey cotton, did the same embroidery floss treatment on the edge I did on the vest chevrons. I sewed these onto a bias tape waistband and it also closes with a hook and eye. I weathered these with some black and dark brown dye in a spray bottle, but again like with all of my weathering, I think I could have gone further.
For Baylan: By the time I got to Baylan’s kama and tabards, Sionnach had released their patterns for this, so that made my life easy. The kama is 3 cuts of a soft linen, and again I sewed this to a bias tape waistband. His tabards are a black burlap backed in a black cotton, with the same cording from the vest on the edges. These were layered over another tabard made of leather, and then I sewed those directly onto the waistband of his kama.
I should mention that for both, I did not hem the kamas. I roughed up the edges a bit and let them stay raw.

Gaiters/Boots::
For Shin: I used the Sionnach patterns for my gaiters, using my leftover grey faux suede, grey cotton for the lining, and some scrap brown cotton (dyed and distressed cotton leftover from Jedi Training Leia) for the straps and inset. I had a hard time following the instructions for this one, so at one point I just gave up and assembled them the way I thought it looked like they should go. I added the straps and d-rings last, because originally I thought those were part of the shinguards, not the gaiters… otherwise I would’ve added them while my gaiter was still “open”, would’ve been a lot easier! The entire front of each of my gaiters is covered in velcro – the shinguard velcros to this and once it’s on, it doesn’t move because I used A LOT of velcro LOL.
My boots were some I found at the secondhand store. They were originally white. I painted them grey first, then didn’t like how that looked with the rest of my costume, so I repainted them black and then added some weathering with paint. I had planned to make the upper section out of some grey fabric I had – I got it all patterned out and ready to go, and then ended up not doing it because it wasn’t going to be all that visible anyway. I would like to replace my boots eventually – they are a little too big – so maybe I can do that with version 3.
For Baylan:
Baylan’s gaiters were made of the last of his suede fabric, just using the “shinier” side. Originally I followed the Sionnach patterns, but then looking at other pics, we decided it should only have 5 chevrons and not 6. By that point I’d already assembled both front panels with 6 chevrons, but since we had enough fabric for me to recut, we started over. Fun LOL
Got them RE-assembled, and I backed these pieces in a heavy black denim to help keep them up. The straps are leather leftover from his Luke costume. They velcro closed up the side and then the straps close with a D-Ring. I do think we want to go back and add a snap to the upper top to attach to his pants to keep them from sliding down as he walks.

Armor/Accessories::
My wig is from Wig is Fashion and, for the price I paid, I don’t love it. You can see the tracks in the back. I trimmed it shorter and added the stones to the braid, but at Dragoncon I felt I looked more like Garth from Wayne’s World than Shin. It was just too damn fluffy. So afterwards for the white backdrop shoot, I hit it with the steamer and that made it look 10x better. I still don’t LOVE it but I’m fine with it and not going to replace it at this point.
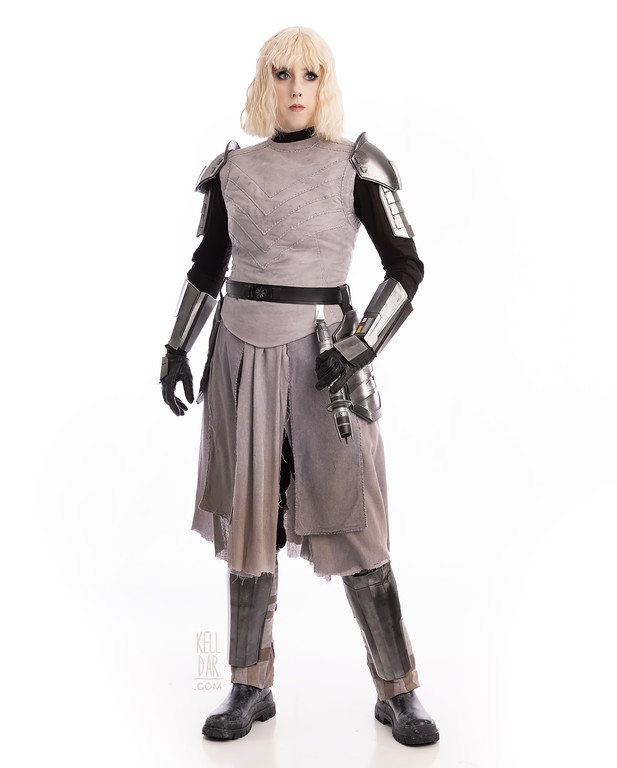
Chase made my belt out of 2 belts, and a 3d printed symbol in the center. It snaps in the back. His belts are also 2 belts joined together, with a buckle he made, and they’re worn over an obi he made of leather. It all snaps or velcros on.
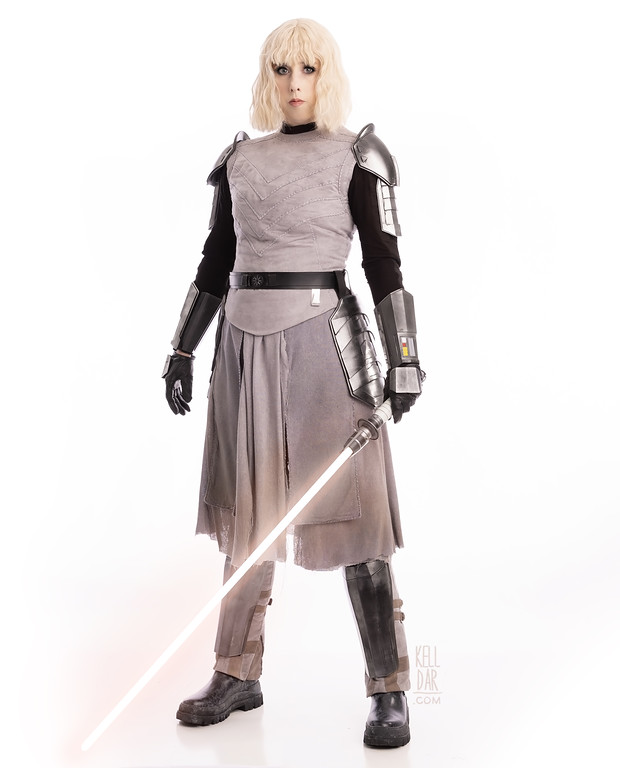
Chase 3d printed all of the armor – our shoulder pieces attach to the vest on velcro tabs, and my bicep armor attaches there too, along with another pieces of velcro on my upper arm. Myhip panels slide onto the belt, and my shinguards velcro onto my gaiters. Ourhand plates velcro onto the gloves (which we just bought online). The gauntlets Chase also 3d printed and finished, and they close with velcro tabs, but we plan on redoing those closures to make them easier to deal with in the future.
Chase also 3d printed and assembled our lightsabers!
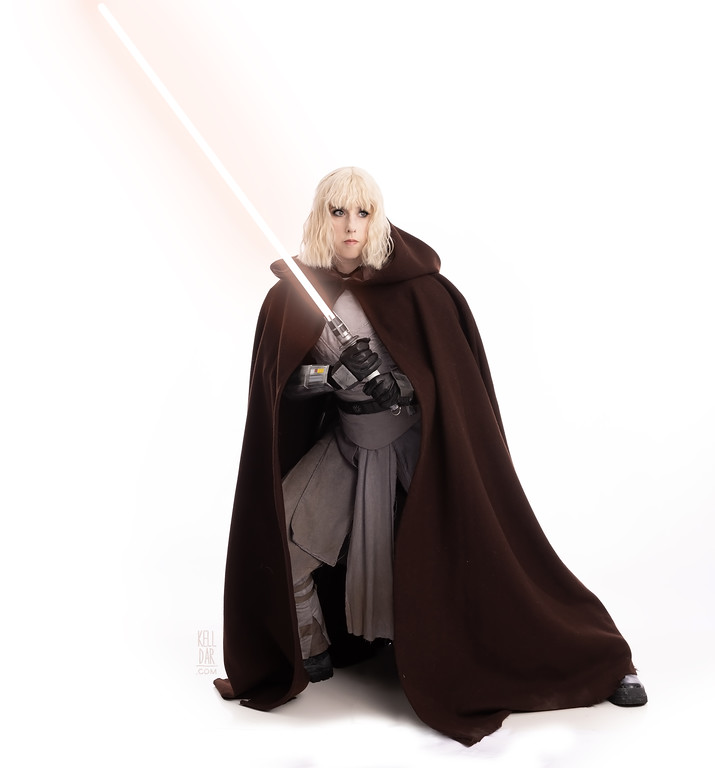
We did also intend to do the capes. I got mine partially assembled, and we have fabric for Chase’s – but we didn’t finish them for dragoncon. We knew we were already going to be super hot in these as it is, and it was one less thing to have to finish before con. We’ll finish them in the future.
(November 2024 update – I finished my cape for my white backdrop – I used a basic cape pattern as a start, edited out the yoke seams, changed the shape of the hood. Lined my hood in a brown satin. The cape itself is a very heavy wool I picked up in Atlanta – it’s probably too heavy! Finished side hems by hand and tore up the bottom edge. It closes with a hook and eye.)
I think that’s everything. There’s a lot of parts so I’m sure I forgot something… I’ll come back and add it when I think of it!
![]()


![]()


Please note that none of these costumes are for sale! This is my personal portfolio.