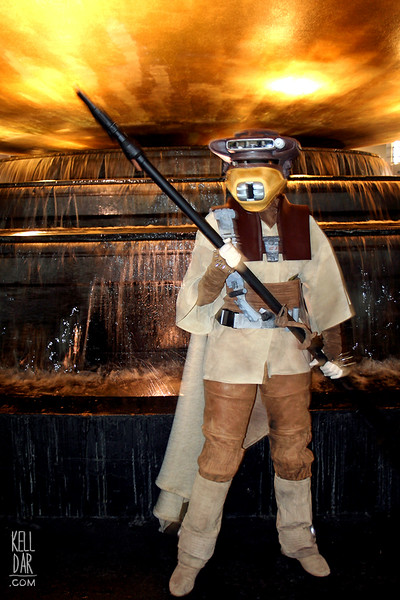
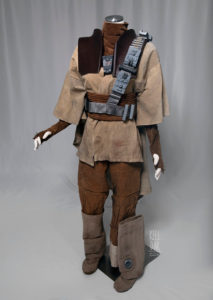
Princess Leia – Boushh Disguise
Made for: Dragoncon 2007
Journal Entries: Read more at my Boushh tag
Related Costumes: Huttslayer Leia, Rebel Uniform Leia, Endor Gear Leia, Ewok Village Leia
![]()
![]()
 Patterns Used:
Simplicity 7274 (basic pants shape)
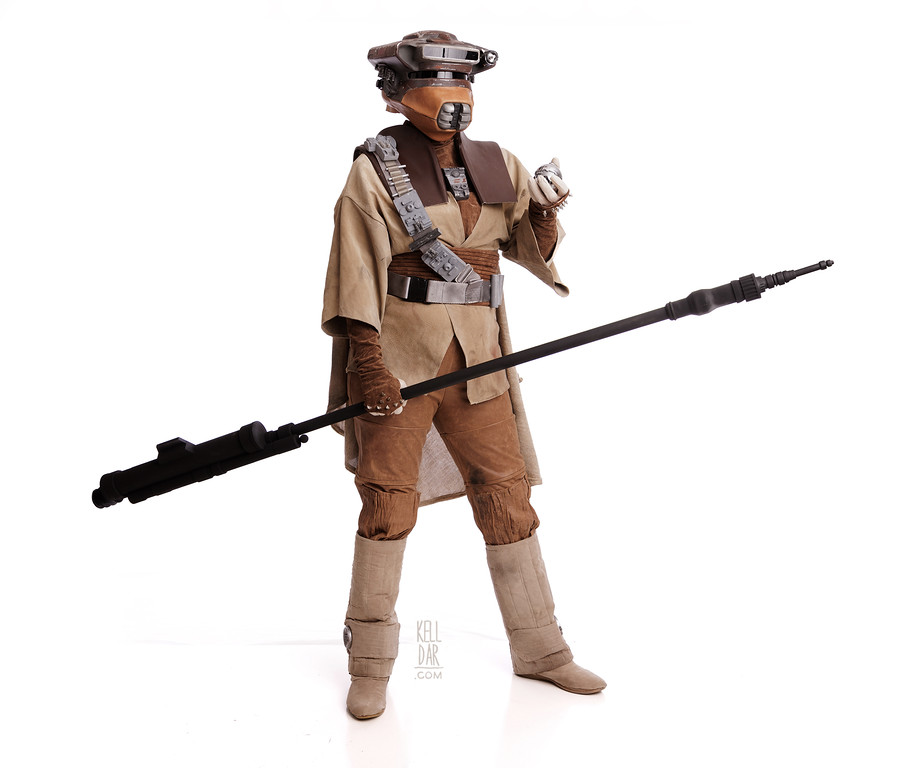
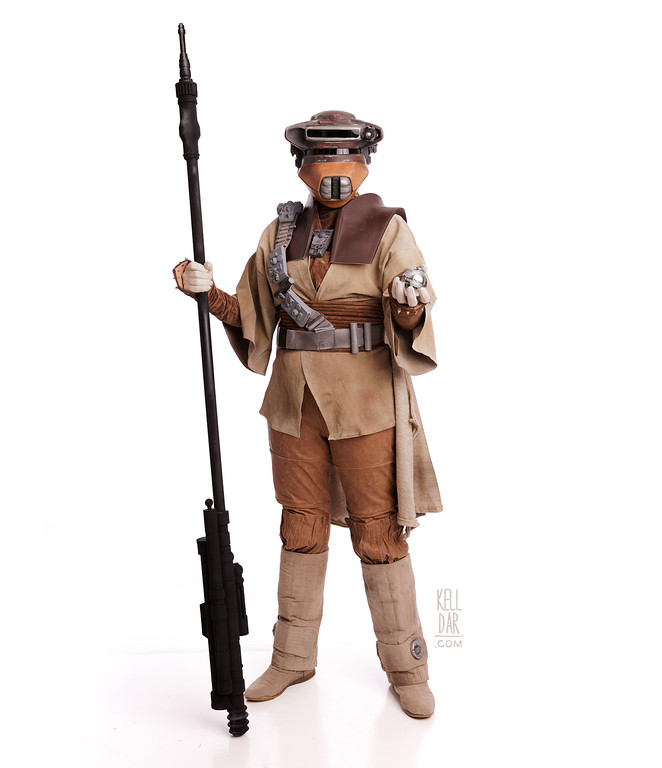
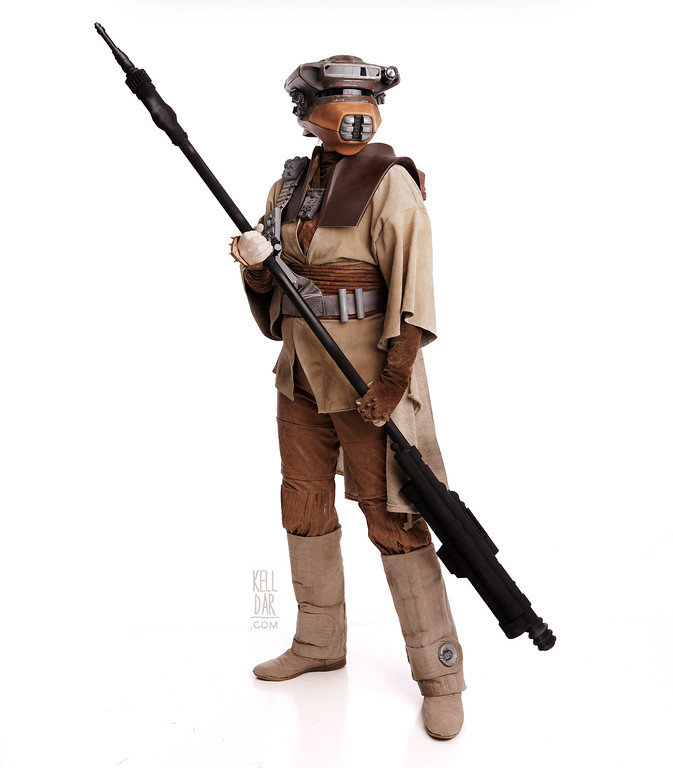
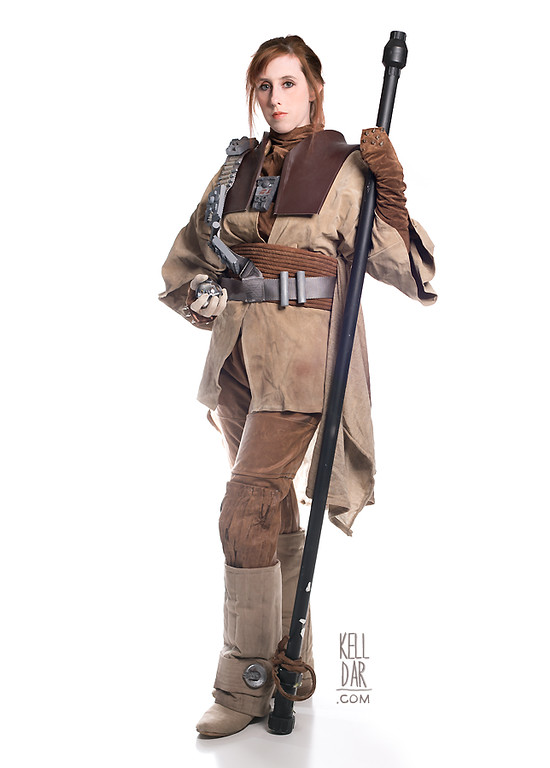
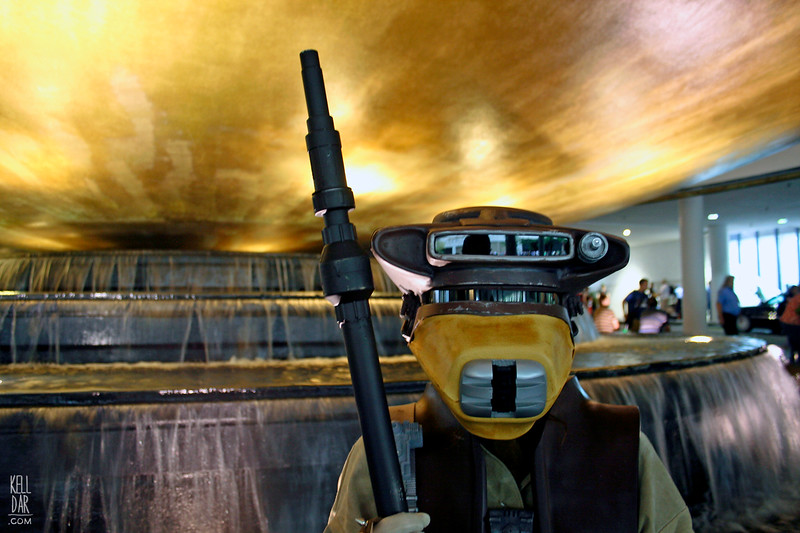
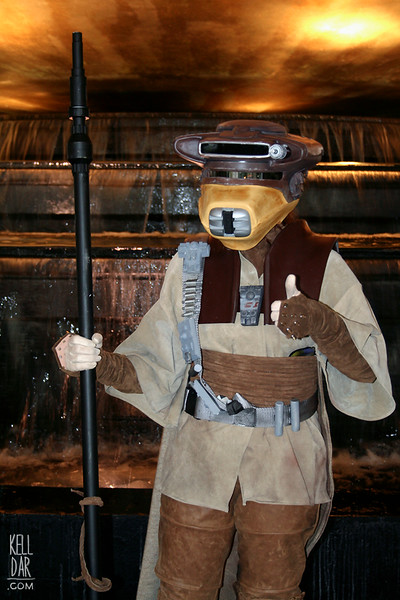
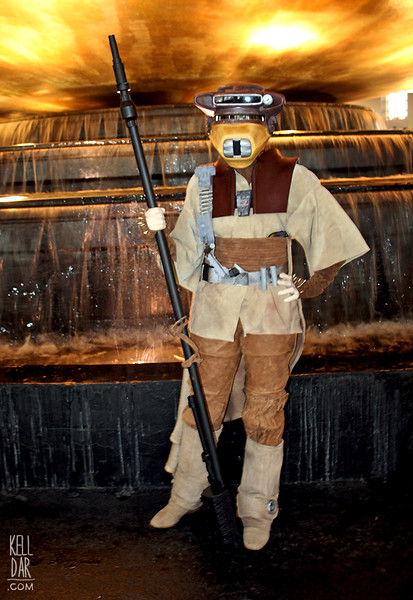
Helmet/Armor:
On one of his Star Wars forums, my husband found someone selling a un-assembled Boushh kit – someone had collected all these various pieces for the helmet, backpiece, etc but decided not to go forward. Basically everything not fabric. We bought it – it arrived with all the parts and a partially assembled helmet. My husband set about putting together the helmet, armor and bandolier for me — he spent a lot of time reworking parts, cutting them down, and even building new parts to try to make all of the pieces look the way he wanted.
In 2008, I sold my original helmet. (Actually, I traded it for a Master Replicas Thermal Detonator) We were ok with doing this because we planned to upgrade the helmet to one that fit me better – and just never did. Finally in 2017, TEN YEARS LATER, we bought a new helmet kit. And it sat unfinished in my costume closet for years LOL.
In 2024 we managed to snag one of RSPropMasters’ Boushh helmets. It’s BEAUTIFUL!! So of course it was time to finally reshoot this on the backdrop now that I had a proper helmet for the first time since 2008.
The backpiece/tanks is another piece we need to replace – the original 2007 version is cracked and VERY VERY heavy. That’s next on the upgrade list.

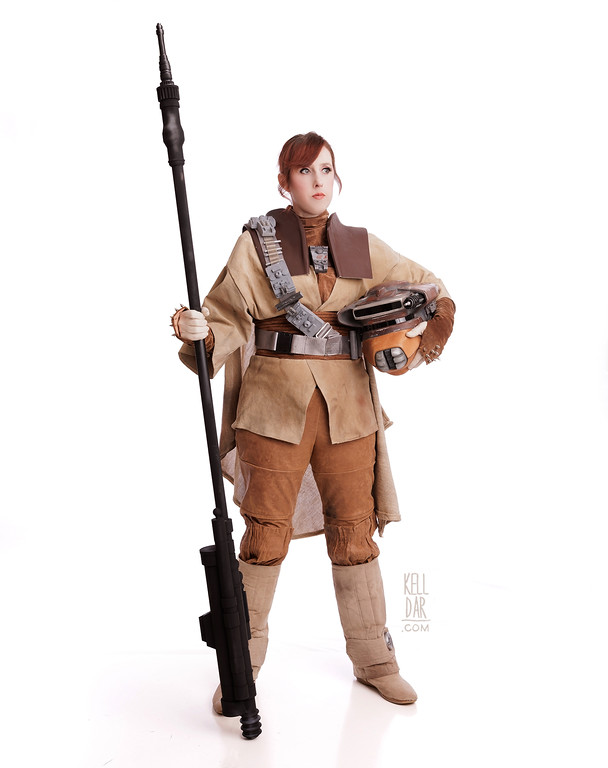
Tunic/Cape:
The cape was just some fabric I found on the dollar table, it’s just a big rectangle with the edges hemmed and some weathering. It attaches through slits in the tunic. The tunic was made of suede – I made a mockup out of scrap material, then used that as a pattern to cut the pieces. I don’t LOVE it and whenever I remake parts of this in the future I’m definitely remaking the tunic. The sleeves/turtleneck are all one part – I found an old turtleneck, cut the neck and sleeves off, and replaced them with the darker brown suede. The back of the neck velcroes closed.
Gloves:
The studs we bought online and my husband attached them to the darker brown gauntlet gloves I made. The base gloves I found on ebay, I dyed them a tad darker. (They fit so well, I love them.)
Pants:
The pants were the hardest part; the leather I bought was very thick, and I broke a lot of needles trying to sew it. (But I loved the look of that leather and insisted on using it!) I used a pattern for the mockup, then cut the mockup apart and used that as my pattern for my leather. The knee sections I made separately and attached.

In 2024 I did a quick revision on the pants – when I made them in 2007, the pants pattern I used was a low rise cut, which was in style at the time. Well I can barely bend over in these without them slide down my butt and I’ve always had to wear an extra belt with them just to keep them on. So when we shot this on the white backdrop in 2024, I made a very quick waistband out of some black fabric and attached it to the top of the pants – it now makes the waist of the pants reach my actual waist and no more Y2k butt crack pants LOL. When I do my total overhaul of this costume, I intend to make another new waistband that matches better in case it’s seen, something more permanent than the quick black fabric thing I did for the shoot.
Boots:
The boots I found in my attic, pretty sure they were my moms’ in the 80s. I had some leftover suede that I used to cover them and to make the upper boot covers. I quilted parts of it with batting and a cotton lining, and we glued the hard parts on.
Accessories:
The cummerbund we made using cut pieces of rope wrapped in my suede – it velcros in the back. (as of 2024, I had to make an extension for the back because it doesn’t fit anymore, and it now closes with large hook and eyes.) The blaster my husband originally made from various parts from Home Depot, but over the years and moves it fell apart. For the 2024 white backdrop shoot, he 3d printed new, accurate parts and assembled it for me.
History:
Originally in 2007, I said: “I still need to do more weathering, finish my other belt, and take up my bandolier (still too big!) and I’ll be happy!”
So updating this entry in 2025, I never did any of that LOL. Never did the other belt, the weathering, and never took up the bandolier (it’s still too big.)
![]()


![]()


Please note that none of these costumes are for sale! This is my personal portfolio.