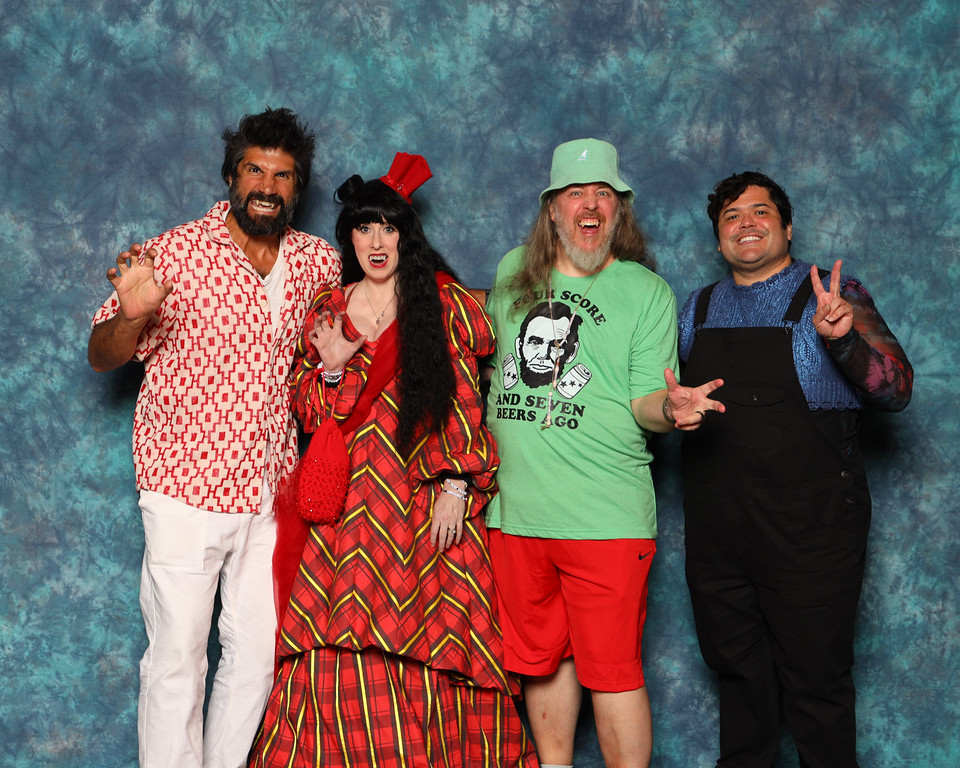
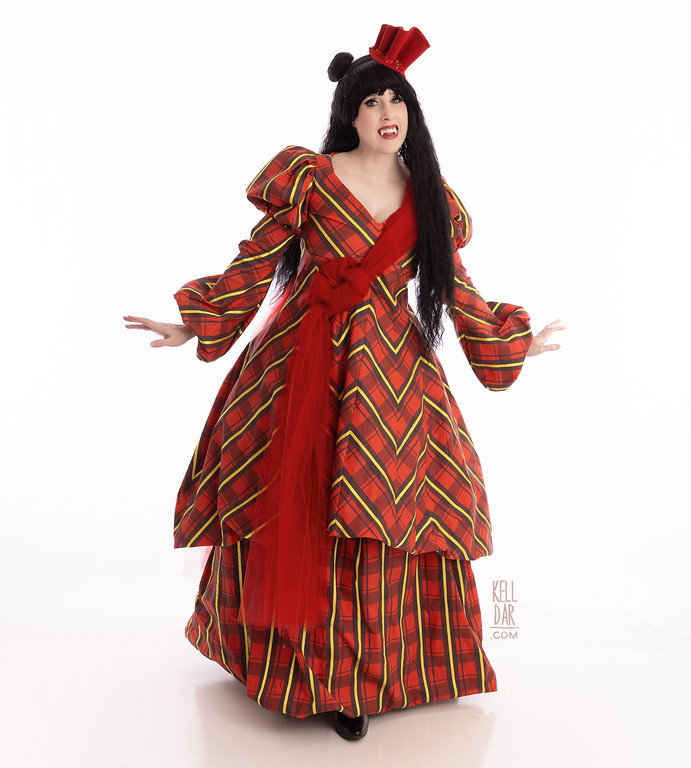
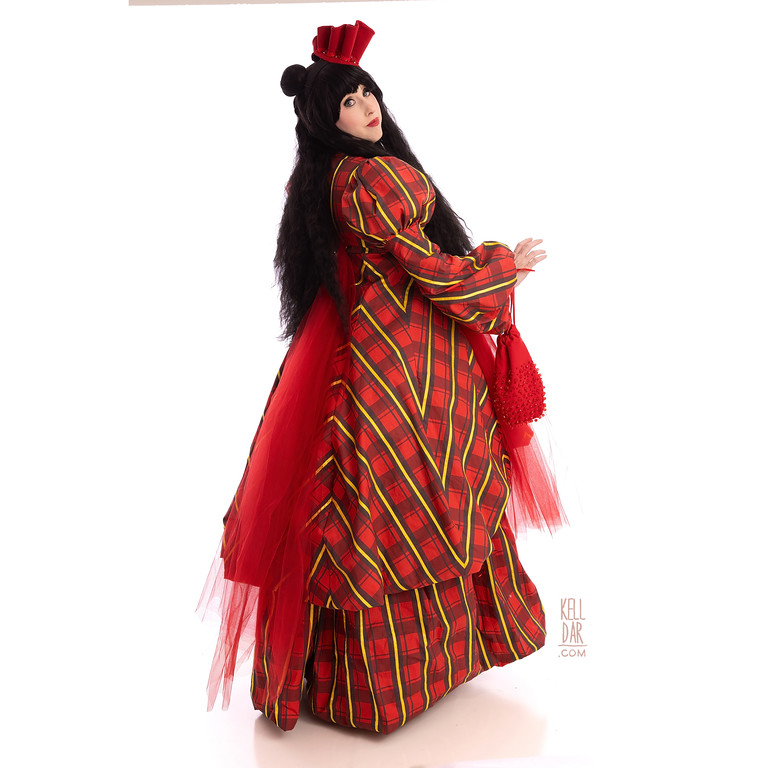
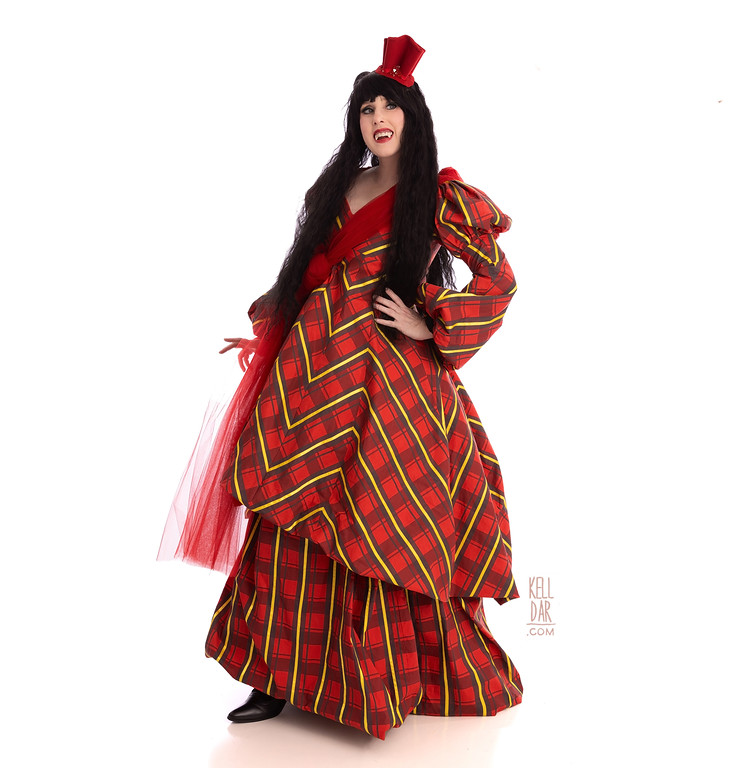
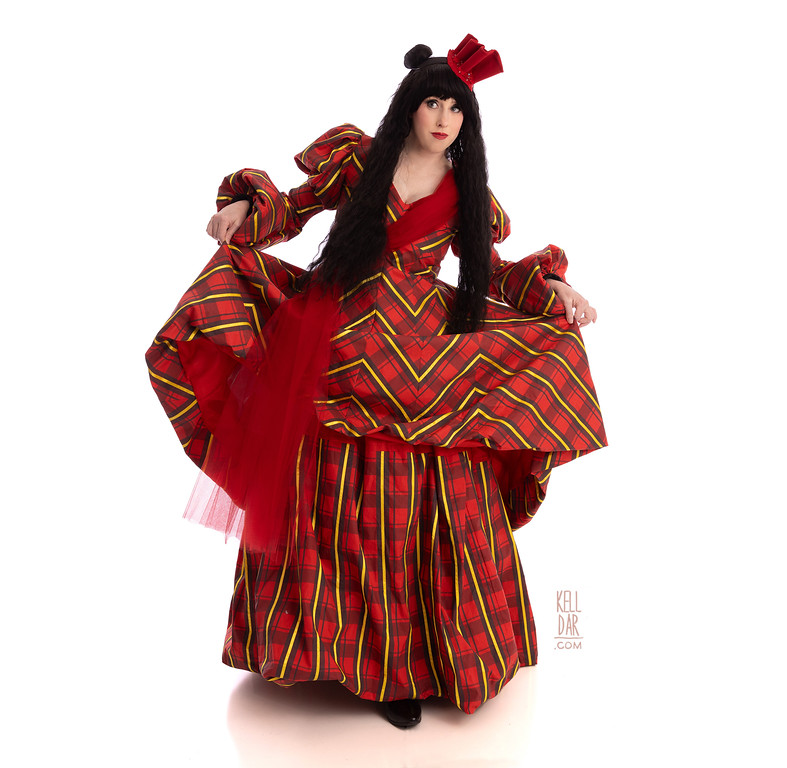
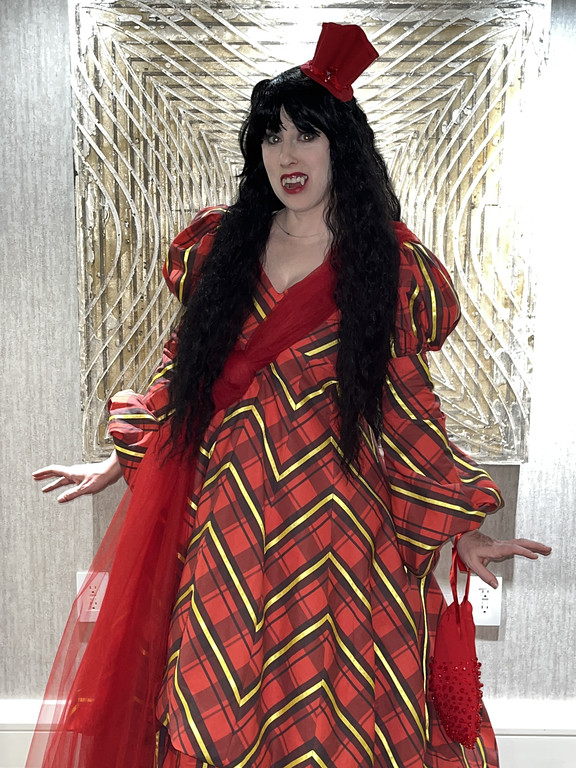
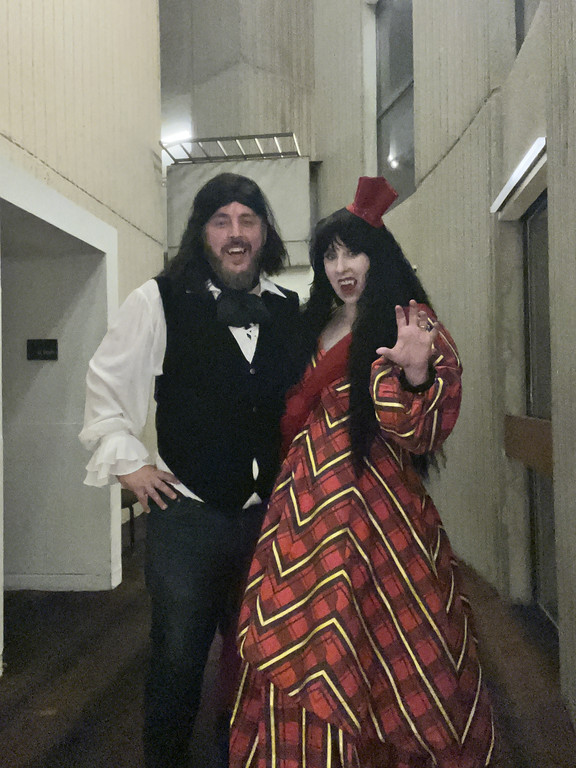
Nadja’s Plaid Dress
Source: What We Do In the Shadows
Made for: Dragoncon 2023
Journal Entries: Read more at my Nadja
![]()


![]()
Patterns Used: None

Background:
I have loved WWDITS since the movie, and I’d been fiending to do a Nadja costume – when I got to the episode with this dress, I knew it was the one I wanted to make.
The Fabric: So according to interviews with the costume designer, they bought a red and black plaid fabric and added the yellow stripes with ribbon. So I wanted to do that as well, I liked the idea of the yellow stripes being a different texture.
I looked at the photos I had of the costume on exhibit and from that, recreated the black and red plaid as close as I could manage. It took a 3 attempts of spoonflower swatches to get the sizing right.
Because of the pattern matching I ended up needing a lot more fabric than I planned for – all together I went through 15 yards, with nothing but weird triangular sections leftover.
I bought a ton of yellow satin ribbon online and once it arrived, I sewed it onto my pieces – but we’ll get to that in the next section.
The Dress:
Went through a few mock-ups for the dress. I got some striped fabric on clearance at Joann to play with the pattern matching, and I also drew guidelines onto my pattern pieces as I made them to make sure I cut everything correctly.

Bodice section was the easiest to pattern – the sleeves took 2 attempts, had to change up the shape of the lower section. The skirt was the hardest part – my first attempt was not full enough. Tried again with another fabric (I was out of striped fabric!) and that was better so that’s what I used to make my pattern pieces.
Once my spoonflower fabric was in, I started getting these panels cut, starting with the easiest parts – the bodice. Once I had each panel cut, I sewed the yellow stripes on before assembly. To make sure they lined up correctly at the seams, I’d pin them together right side to right side, and then baste the edges of the ribbons together in place before sewing the seams. That kept it in place better than pinning.
I got the bodice assembled then took a stab and the sleeves, and I wasn’t completely happy with the first one. So I took a break and moved onto the skirt before cutting the other sleeve. Eventually I decided the first sleeve was ok so I got the other one assembled the same way. The sleeves have an interior fitted sleeve of black spandex to keep them in place, and some tulle for shaping in both the shoulder puff and lower arm. I finished the sleeve cuff with bias tape.
The skirt was fun. I use that term loosely. I did actually enjoy putting it together because it was satisfying to see it come together but it was also a pain in the butt.
The first 2 panels were easy enough to do the pattern matching. I’d sew the ribbons on one of the panels, then line up the next one, get the ribbons for that one placed, and again, I basted them together in place in the seam allowance to make sure they lined up right. It REALLY helped that I could see the striped pattern of the fabric on the wrong side to match things up.

As I moved around the skirt and it was no longer straight lines, the pattern matching became more hit or miss. I had to curve some of the seams a bit more to get them to meet, and this fabric being a cotton with a tiny bit of natural stretch helped. There’s a few places it doesn’t quite meet perfectly, but overall, it’s pretty close. Close enough, anyway.
Once the skirt was assembled, I got the lining layer cut – it’s shorter than the outer skirt, which pulls it up and creates the “bubble” effect. I sewed the skirt to the bodice – both outer layer and inner lining layer (bodice is also lined in the same fabric as skirt), and got a zipper installed, and the main section was done!
For the underskirt, I started by making a basic, gathered, elastic waist skirt out of the lining fabric. I really didn’t want to waste the expensive plaid fabric where it wouldn’t be seen, so everything from about the knee up is lining, and from the knee down is the plaid fabric.
Thankfully all of the stripes on this part are just vertical so the pattern matching was minimal. I just took what I had left of my fabric, cut it into large rectangles and sewed it together – I did take care at the seams to match it up as close as I could, and one of the rectangles I had to piece together so it would be the same height as the others (I was down to the dregs of fabric by this point), so I did get that matched up as well as I could. Got all of the stripes sewn onto these, and then got this attached to the upper portion. Added a partial lining – it’s sewn to the bottom edge to pull up the hem, then sewn back up at the seam where the upper and lower sections meet on the inside.

The tulle sash I dyed a little darker – it was originally a much brighter red and didn’t look right. I just knotted it in the front, hand-sewed it in place there and at the shoulder, and it closes across the zipper in the back with a snap.
I was really pretty happy with how this costume went together. It was a lot of of fun to make and was smooth sailing for the most part.
The Accessories:
Wig is from arda, buns are from amazon, boots are from amazon.
I made the little bag out of scrap fabric and beads leftover from Alyss. It’s not exact, but it’s close enough and fits my phone, that’s all I need.
The hat/fascinator was interesting because the exhibit photos of it weren’t great (plus I think it was displayed backwards) and the screenshots were all so dark. So I did the best I could. I started by making a paper mock-up pinned onto a wighead to get the shape and sizing figured out, then I cut those shapes out of buckram (or kobracast, my notes say both, I think maybe the head part was kobracast and the upper part was buckram?).
I covered both the base and the upper section in some scrap red fabric, then pinned it all back together on my wighead and set the shape with some steam. Let it sit overnight and took it apart the next morning – it held the shape really well! I decided to sew some red bias tape on the bottom edge of the serpentine piece (I should’ve done that before heat-setting it into the curvy shape, but ah well) just to clean it up. Then I hand-sewed that piece onto the base. Once it was all together, I sewed some more leftover beads onto it, and then sewed it onto a headband and it was done!
![]()


![]()


Please note that none of these costumes are for sale! This is my personal portfolio.