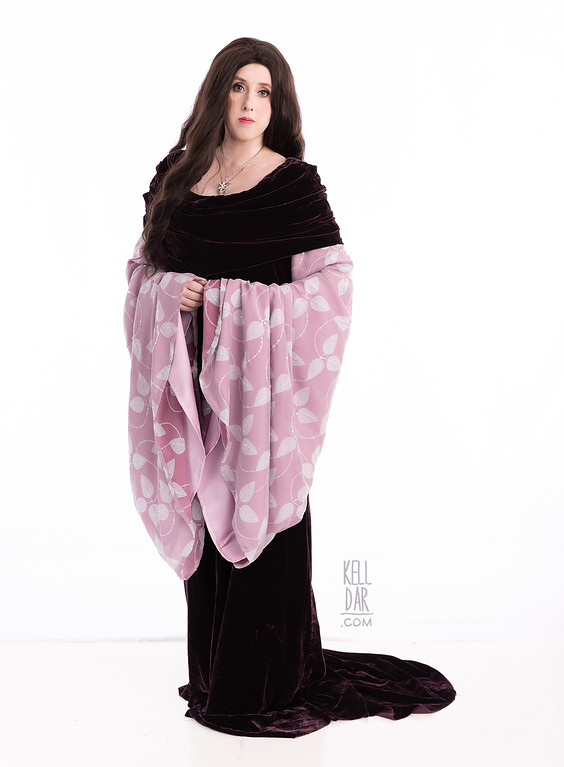
Arwen – “Hope” Dress
Source: Lord of the Rings
Made for: Nothing 2020
Journal Entries: Read more at my Arwen hope tag
Related Costumes: Arwen Blood Red Dress, Arwen Chase Dress, Arwen Original Design
![]()
![]()

Patterns Used: Simplicity 9022 (cowl/dress mock-up), Simplicity 9891 (Underdress base)
Research/Fabric:
As mentioned above, I’d had a photo of this costume sitting in my “want to do” folder since 2003. That year for Christmas, my parents had given me some beautiful purple velvet fabric that I thought could work for this — but I ended up making a cape out of it instead. I honestly never thought I’d actually get to do this costume, but one day in 2019 Chase and I were discussing Lord of the Rings and the costumes and I went down a rabbit hole and fell in love with her costumes all over again, and remembered this one I had wanted to do so long ago. So I decided… let’s do it.
One of the things that stopped me from doing this costume in 2003 was the sleeve fabric. I could not find anything like that in 2003, and embroidering the entire design on was far outside of my skill set at that time. But looking at it 2019 and having spoonflower as a resource… it was do-able!
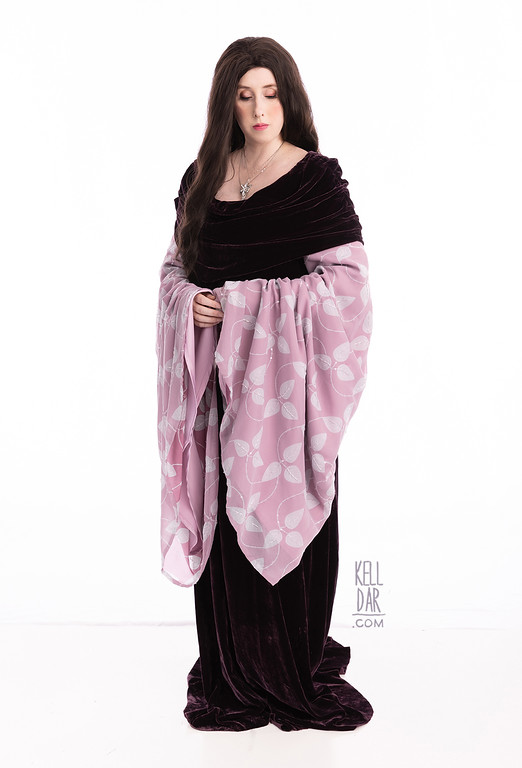
References of this costume are scarce – it’s on screen for only a few seconds in the movie. The best references were photos taken of the costume on display in the early 2000s and notes that those folks took of the details, so I relied heavily on that information from the Alleycatscratch LOTR site. I took one of the sketches someone did of the sleeve design and drew up a repeating pattern in photoshop, then uploaded that to spoonflower. Ordered a swatch and it looked good – though the “wrong” side of the fabric colour looked better than the “right” but that was ok, I can just use the “wrong” side LOL.

Then I shopped around for a velvet that would look right for the outer dress and ended up with this beautiful silk velvet from Silk Baron in colour “currant”.
Outer Dress: Because the silk velvet I wanted to use was a bit pricey, I decided to use Simplicity 9022 (already had in my stash) as a basis to do a full mock-up. I was hoping I could get away with 3 yards instead of 4. I had some scrap blue lining fabric so I used that – modified the pattern to widen and lengthen the bottom of the dress and tweaked the neck drape shape. After doing that… I determined I did actually need 4 yards but I’m glad I tested instead of gambling on 3.
Once my velvet came in, I used those mockup panels to cut my actual velvet. I had some scrap purple lining on hand, so I used that as a partial lining – the dress is lined to the waist. I did have to hand baste everything with this velvet first before machine sewing it, which took longer but it kept anything from slipping while sewing.
I got the outer dress mostly finished in November of 2019… and then did nothing until summer 2020. Yikes!

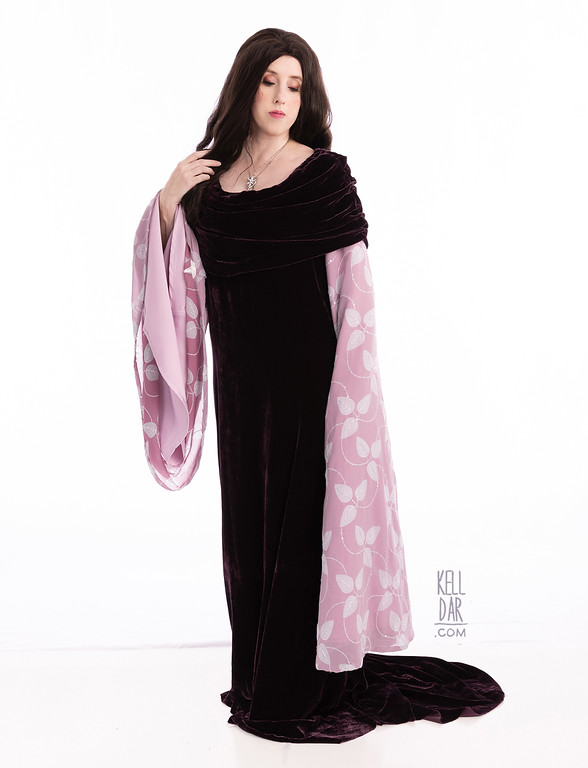
Inner Dress/Sleeves:
The main reason for taking a hiatus on it was that I did not feel like dropping $100+ on the spoonflower chiffon yardage after dropping $100+ on the silk velvet LOL. And once 2020 got underway I realized I wasn’t going anywhere anyway, so there was no rush. In summer of 2020 I finally got back to work on it.
I started by getting some lilac satin from the fabric store to use as the sleeve lining – it would also be the sleeve mock-up. Like with the outer dress fabric, I wanted to double check the actual yardage I’d need for the sleeves before paying out the nose for too much fabric. I pulled out my Arwen Blood Red Dress from 2005 and used it’s sleeves as a basis to cut the lining for these sleeves – but only as a basis, because I cut these shorter and not near as full as Blood Red. But it gave me a starting point. Once I had that I knew how many yards I need of the spoonflower fabric, so I bit the bullet and got it ordered.
While waiting on it to print and show up, I made an underdress to support the sleeves. Just used Simplicity 9891 and the rest of that purple lining fabric I’d used on the outer dress. I made it knee length, otherwise no changes to that pattern.

When my spoonflower fabric showed up, I used the lining pieces to cut the chiffon… and then did nothing for a few more months LOL.
In November 2020 I finally tackled beading the sleeves. There are no photos of the beading, only notes and sketches made by folks who saw it on display. Initially I got off to a bad start by using some round beads I had on hand and beading them down the center of every leaf on one sleeve… before looking back at the notes and realizing that was wrong (that’s what happens when you let a year go by in between starting and finishing…). So I removed all that and started over. Ordered some bugle beads and flat sequins. The notes said each leaf had bugle beads on all the leaf veins and around the edge, and sequins on the vines. I tested 2 leaves out with the bugle beads everywhere the notes said.. and hated it. It looked clunky. So I decided… I’ve already simplified this once (no embroidery, all printed), so let’s just do the beading how I like it and get this thing done, instead of driving myself crazy trying to figure out something I don’t like.
So, I only did the bugle beads down the center of each leaf, and the sequins on the vines. It ended up looking nice, especially once I got done with each sleeve and steamed it. They sparkle very nicely in real life, but it’s hard to capture on camera. All in all it took about 3 weeks to do both sleeves.
Once the beading was done I got back to work on my sleeves. While doing the beading, I was thinking I was going to fully attach the lining to the chiffon layer – ie, sewn together at the bottom edge for a neat finish. But once I started assembling I realized that hadn’t been my original plan (again… problems with starting and stopping a project LOL). I’d meant for them to be basically separate layers. That meant finishing them took longer than I planned – since the inside would be visible, I french-seamed both layers, machine-hemmed the lining layer, and finished the chiffon hem by hand. It turned out ok. I think I would’ve preferred they be one piece instead 2 but oh well.

Once that was done I got them sewn into the underdress and that part was done!
Neckline Drape:
I was terrified of this neckline drape. After cutting the dress, I only had one large square of the silk velvet left, so if I messed it up, I was SOL. (And it was out of stock on silk baron’s site by summer 2020, so no ordering any backup). I did two mock-ups, one in 2019 and another summer 2020. The 2020 one is what I used to finally cut the pieces. I cut 2 – one for the front and one for the back. I do wish I’d cut them smaller at the top and wider at the bottom, but I’m like 95% happy with how it turned out.
Once I had the pieces cut and sewn together at the side seams, I sewed it to the neckline of the velvet dress (only along the shoulder area, left it hanging free at the center of the front and back). Then I ran a gathering stitch up each side seam until it was gathered how I wanted. And finally I turned the edge of the bottom and hemmed it by hand.
Accessories:
I reused my current Arwen wig and wore some black flats with it.
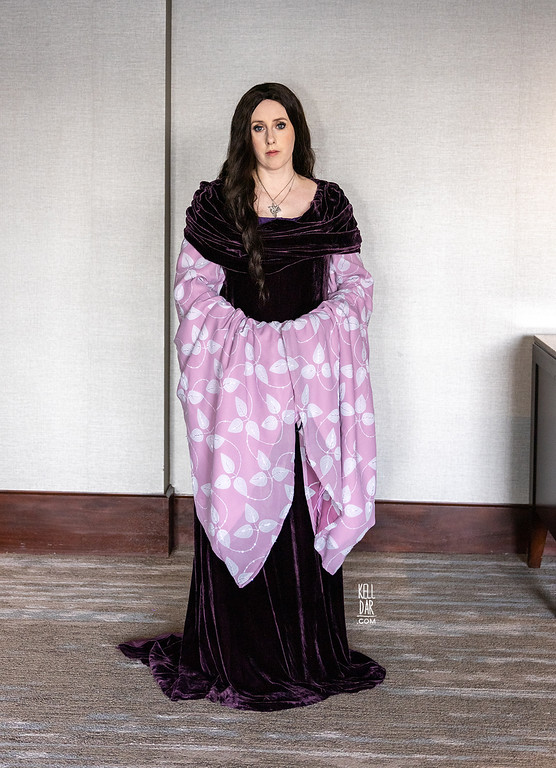
History:
I did finally get this out of the house, to Dragoncon 2021. I’ve tried taking it back again in 2022 and 2023 to take it to the Tolkien shoot, but every year I have conflicts with the Tolkien shoot. Maybe 2025??
![]()


![]()


Please note that none of these costumes are for sale! This is my personal portfolio.